
Is your kitchen island currently a “catch-all” for junk mail, half-eaten snacks, and mystery keys? I feel your pain. For the longest time, mine was basically a giant obstacle in the middle of the room. But here’s the truth: that hunk of wood and stone is prime real estate.
If you’re tired of playing Tetris with your Tupperware, check out these 21 clever ways to turn your island into an organizational powerhouse.
In This Article
The Essentials: Everyday Storage Wins
1. Show Off Your Dry Goods

Ditch the messy pantry and move your staples to the island. Use glass jars with airtight lids to store pasta, rice, and coffee beans on an open side shelf. It looks high-end, and you’ll actually know when you’re low on fusilli. 🙂
2. Pull-Down Cabinets

This is a game-changer for shorter folks or anyone tired of digging in deep cupboards. Pull-down cabinets with glass fronts let you see everything at eye level. Use them for spices, snacks, or even small appliances.
3. The Rolling Cart Hack

Tiny kitchen? No problem. A rolling wooden cart acts as a “mini island.” You get extra prep space when you need it, and you can shove it into a corner when you don’t. It’s basically the Swiss Army knife of furniture.
4. Hang Your Pots and Pans

Don’t let your heavy pans dent your cabinets. Install a sturdy curtain rail on the side of the island and use S-hooks to hang them. It gives off major “professional chef” vibes without the professional price tag.
Entertaining & Lifestyle Upgrades
5. Add a Beverage Fridge

If you love hosting (or just really enjoy a cold soda), build a small fridge into the island. It keeps the “party crowd” out of your main cooking zone and makes your kitchen feel like a boutique hotel.
6. The Magic Hinged Overhang

I’m obsessed with this for small homes. A hinged counter flips up when you need breakfast seating and folds down when you need more walking room. It’s genius, honestly.
7. Basket Storage for the Win

If your island has open lower shelves, don’t just pile stuff there. Grab some woven baskets. They hide the clutter while adding a cozy, rustic texture to the room.
8. Secret “Stash” Cabinets

Hide a “secret” door in the paneling. It’s the perfect spot for things you use but don’t want to see—like dog bowls, baby bottles, or (IMO) your emergency chocolate stash.
Custom Layouts for Pro Organizers
9. Built-in Bookshelves

Stop stuffing your cookbooks into a random drawer. A customized end-shelf turns your island into a library. Throw in a few potted herbs, and you’ve got a Pinterest-worthy focal point.
10. Island on Wheels
Similar to the rolling cart but bigger. A full-sized island on heavy-duty casters lets you rearrange your entire kitchen layout on a whim. Perfect for people who get bored with their decor every six months (guilty!).
11. Airy Open Concepts

If your kitchen feels cramped, go for an island with glass shelves and doors. It feels lighter than a solid block of wood and lets you show off your fancy wine glasses or vintage vases.
12. The End-Cap Wine Rack

Why waste a whole wall on a wine cellar? Build a 24-bottle rack into the end of your island. It utilizes space that usually goes to waste and keeps the Pinot within arm’s reach.
Specialist Storage Solutions
13. The Slotted Multi-Shelf

Use an island with slatted shelves. The slats are perfect for holding wine bottles steady on top, while the solid bottom shelf handles your heavy Dutch ovens.
14. Reclaimed Wood Style

Eco-friendly and gorgeous. Using a reclaimed workbench as an island adds instant history. Plus, if you scratch it, it just adds “character.”
15. Your Personal Coffee Station
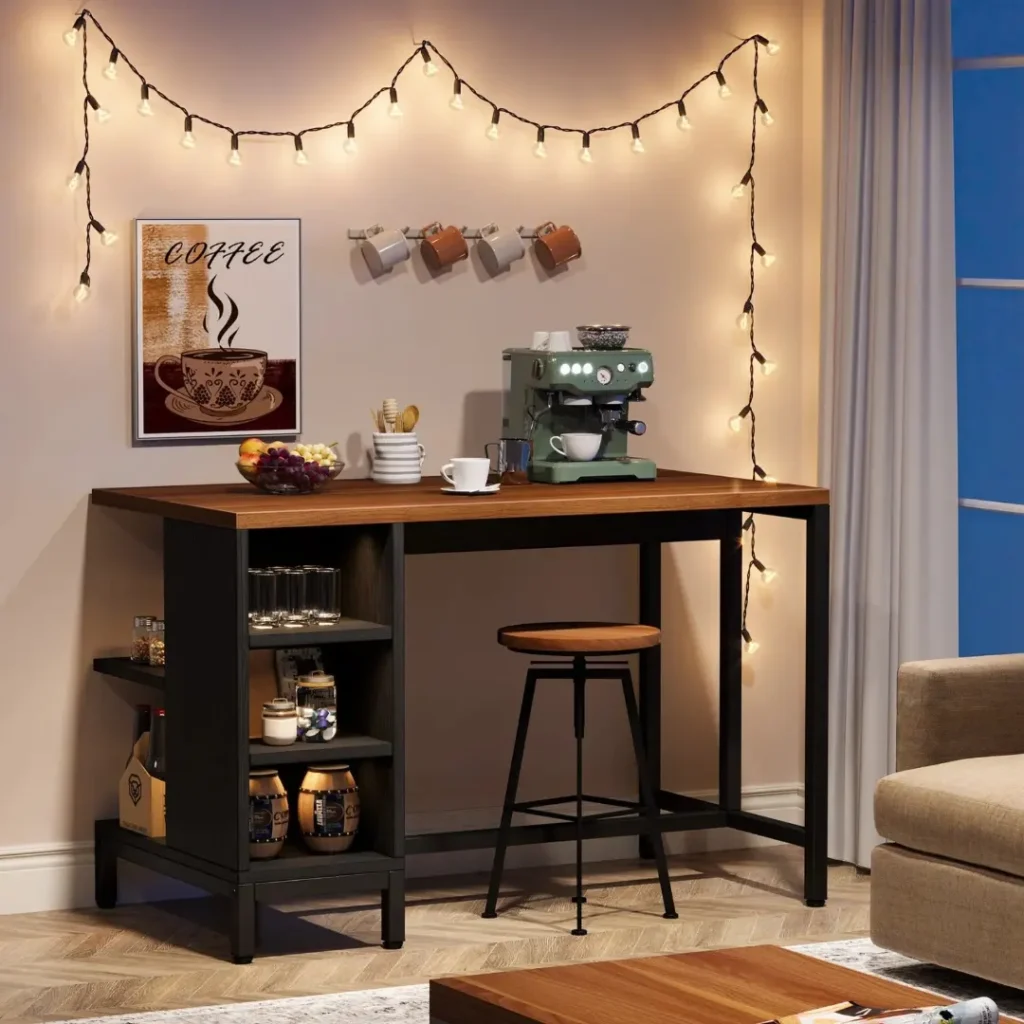
Stop running across the kitchen for a spoon. Dedicate your island to the caffeine gods. Set up your espresso machine, mugs, and syrups all in one spot. Don’t forget a cute coffee poster to seal the deal!
16. Pull-Out Baking Tray Organizer

Baking sheets are the worst to stack. A vertical pull-out organizer keeps your muffin tins and cookie sheets standing upright. No more “clanging” every time you want to bake brownies.
17. The Quick-Grab Pot Shelf

If you cook every single day, don’t hide your most-used pots. An open shelf on the end of the island makes grabbing the pasta pot a five-second task.
High-End Finishes
18. Mini Wine Cellar (The Fancy Version)
This is for the true connoisseurs. Instead of just a rack, convert a cabinet into a temperature-controlled mini cellar. It’s sophisticated, sleek, and very “adult.”
19. Slim Bookshelf Side

Even a tiny island has room for this. A slim, 6-inch deep shelf on the side is all you need to house your most-used recipe books.
20. Soft-Close Rollout Trays
If you have the budget, get rollout storage. These shelves glide out so you don’t have to crawl on the floor to find a lid. The soft-close feature is very “ooh-la-la” and saves your sanity. 🙂
21. Double-Sided Storage

If your island is deep enough, put doors on both sides. Use one side for daily plates and the other for “once-a-year” holiday platters. It effectively doubles your kitchen’s capacity.
The Final Takeaway
Your kitchen island shouldn’t just be a place to dump your mail. Whether you add a simple rail for pans or go all-out with a wine fridge, these tweaks make your life easier and your kitchen way more functional.
So yeah, if you’ve been sleeping on your island’s potential, now’s the time to wake up and give it a shot. Trust me—your counters will thank you later. 😉