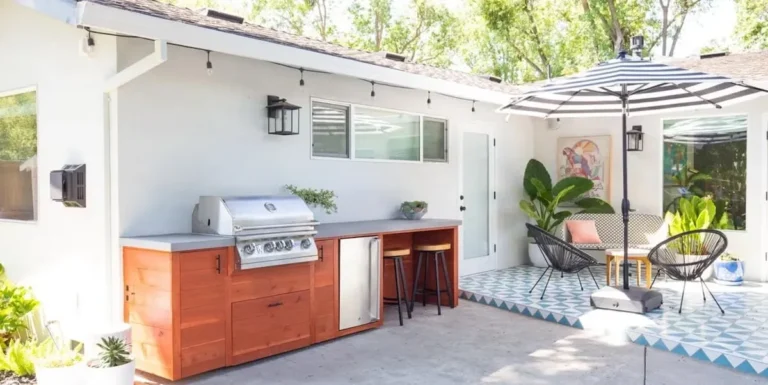
Creating a stylish and functional outdoor kitchen doesn’t have to drain your bank account. With some creativity and smart planning, you can transform your backyard into a culinary paradise that’s perfect for entertaining friends and family.
Here are 15 budget-friendly outdoor kitchen ideas that combine practicality with style.
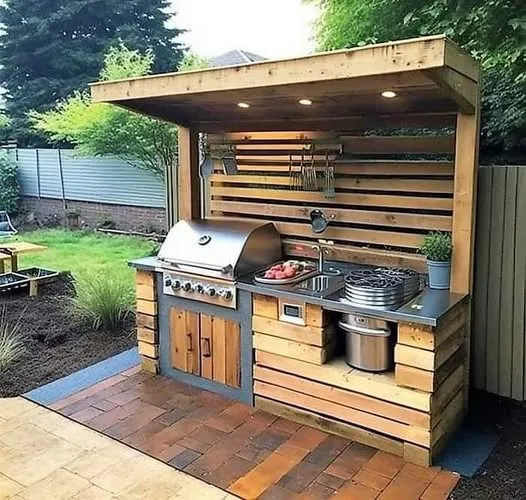
Transform free or low-cost wooden pallets into functional outdoor kitchen elements. Sand them down, apply weather-resistant paint or stain, and arrange them to create countertops, shelving, or storage units. This eco-friendly approach adds rustic charm while keeping costs minimal.
DIY Tips: Visit local stores, warehouses, or construction sites to ask for free pallets. Select pallets that are in good condition without excessive damage.
Use a hand sander or sandpaper to smooth all surfaces, removing splinters and rough patches. Apply a coat of outdoor primer followed by weather-resistant paint or stain (look for sales at hardware stores).
For countertops, secure multiple pallets together with screws, then add a smooth plywood top sealed with polyurethane. For storage units, position pallets vertically and add shelving between slats.
The entire project can be completed for under $50 if you source free pallets.
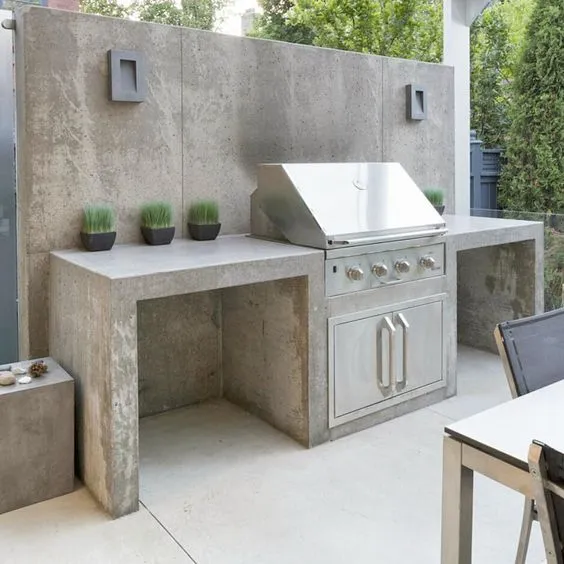
Create stylish, durable countertops at a fraction of the cost of granite or marble. With just concrete mix, a sturdy mold, and basic tools like a trowel and sandpaper, you can craft custom countertops that perfectly fit your space. After curing, sand and seal them to prevent stains and weather damage.
DIY Tips: Build a mold using melamine boards (approximately $20 at hardware stores) cut to your desired countertop dimensions. Seal the edges with silicone caulk to prevent leaking.
Mix concrete according to package directions (a 60-pound bag costs about $5-10) and pour into the mold. To eliminate air bubbles, tap the sides of the mold with a rubber mallet. Let cure for 48-72 hours, then remove from the mold.
Sand with progressively finer sandpaper (80-grit up to 220-grit). Apply concrete sealer ($15-20) with a paint roller for protection.
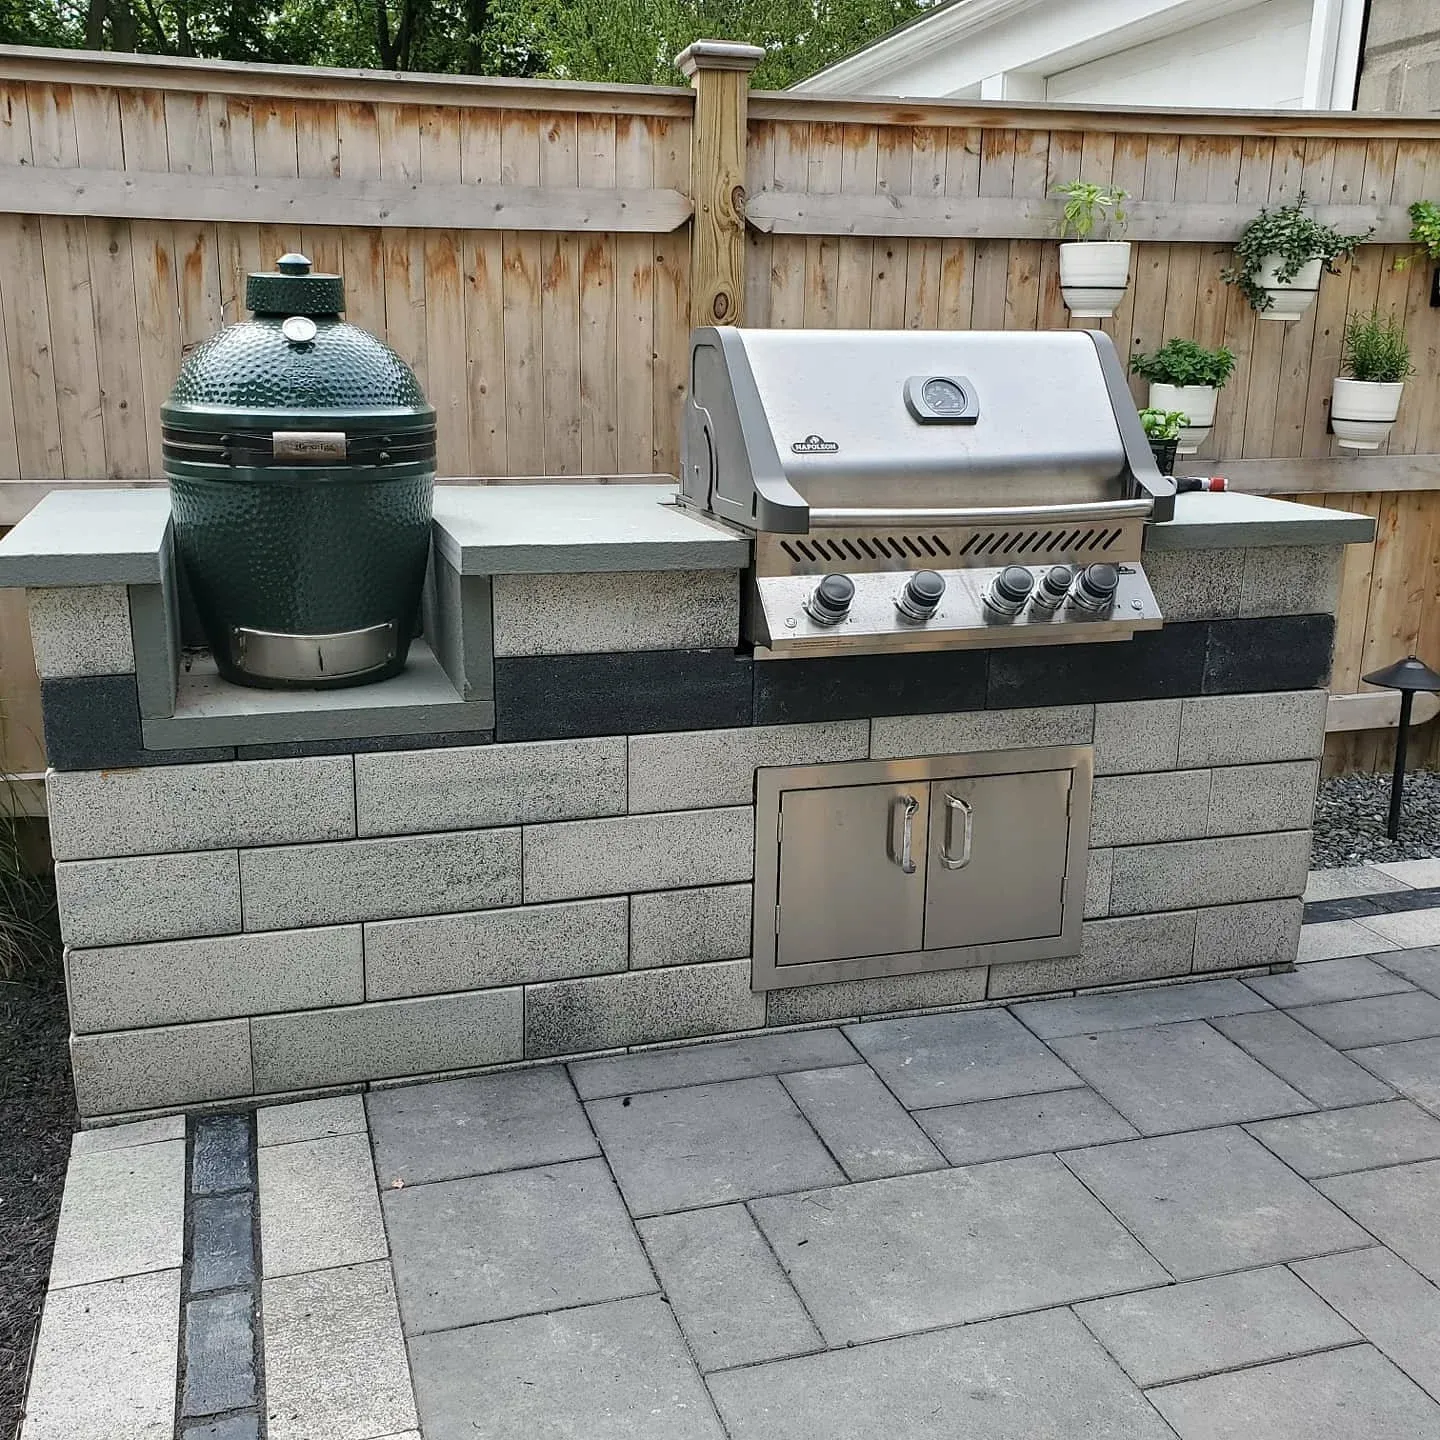
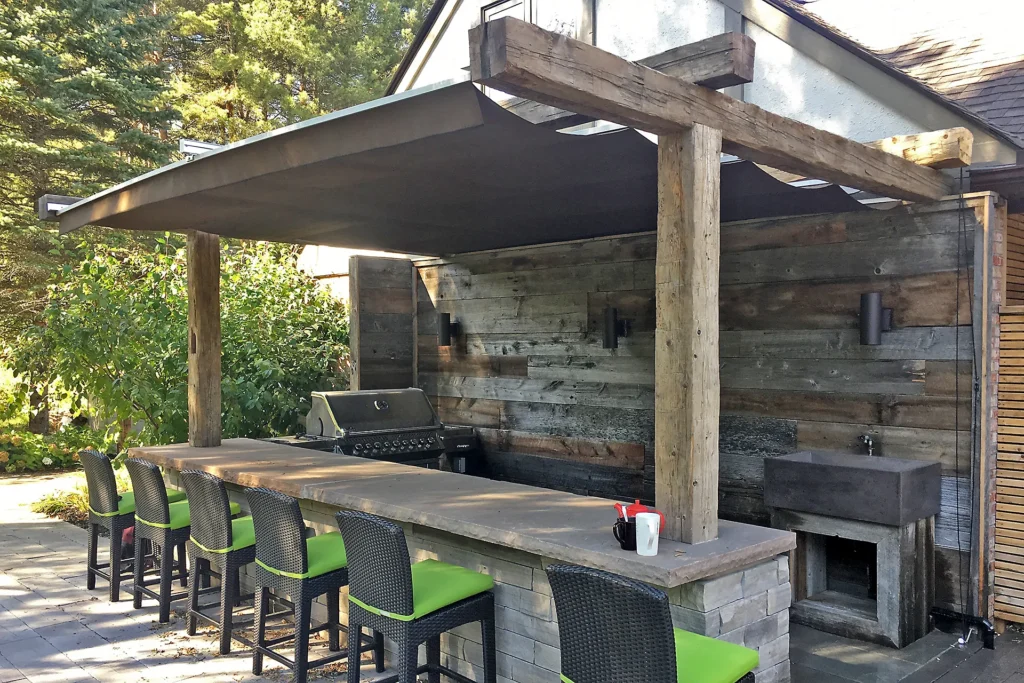
Leverage the affordability and durability of cinder blocks to build a solid foundation for your outdoor kitchen. Arrange them to form your desired cooking area, then top with a slab of reclaimed wood or concrete for a heat-resistant surface that can withstand various weather conditions.
DIY Tips: Purchase cinder blocks from a home improvement store (typically $1-2 each). Lay out your design on level ground, stacking blocks in a pattern that creates your desired cooking station height and configuration.
No mortar is necessary for a simple setup, making this truly DIY-friendly. For countertops, either pour a concrete slab directly on top (see concrete countertop instructions) or place a piece of 3/4-inch plywood cut to size and sealed with outdoor polyurethane.
Add a decorative tile surface using outdoor-rated tile adhesive if desired.
A basic L-shaped setup can be created for $75-150 depending on size.
Breathe new life into old furniture pieces by transforming them into outdoor kitchen elements. An old dresser can become a serving station or storage unit with just a thorough cleaning and a coat of weather-resistant paint. Add hooks or shelves to increase functionality and create a unique focal point.
DIY Tips: Source old furniture from thrift stores, yard sales, or online marketplaces (often $20-50 for solid pieces). Clean thoroughly with a mixture of vinegar and water. Sand lightly to create a surface the paint can adhere to.
Apply outdoor primer ($15) followed by exterior paint ($20-30). Protect with 2-3 coats of polyurethane sealer ($15). For added functionality, install hooks on the sides for utensils (pack of hooks $5-10) or add a towel bar to the front.
Replace drawer pulls with weather-resistant options if needed. Consider adding casters ($15-20) to make the piece mobile.
Total investment: $75-150 depending on the original furniture cost.
Create a versatile cooking station that can be moved anywhere in your yard. Build a simple frame with shelves for utensils and cooking essentials, add wheels for mobility, and you’ll have a functional grill cart that adapts to any gathering. Choose metal for durability or wood for rustic appeal.
DIY Tips: Start with a basic wooden frame using 2x4s ($15-20). Create a rectangular frame approximately 30″ high, 36″ wide, and 24″ deep. Add cross supports and a plywood shelf at the bottom ($15).
Install heavy-duty casters on the bottom ($20 for a set of four). For the top, use concrete board ($15) covered with ceramic tiles ($20) or heat-resistant stone ($30-40).
Add hooks along the sides for hanging tools and a towel bar on one end. Finish wood with outdoor stain and sealer ($20).
Total cost: approximately $100-150, saving hundreds compared to commercial options.
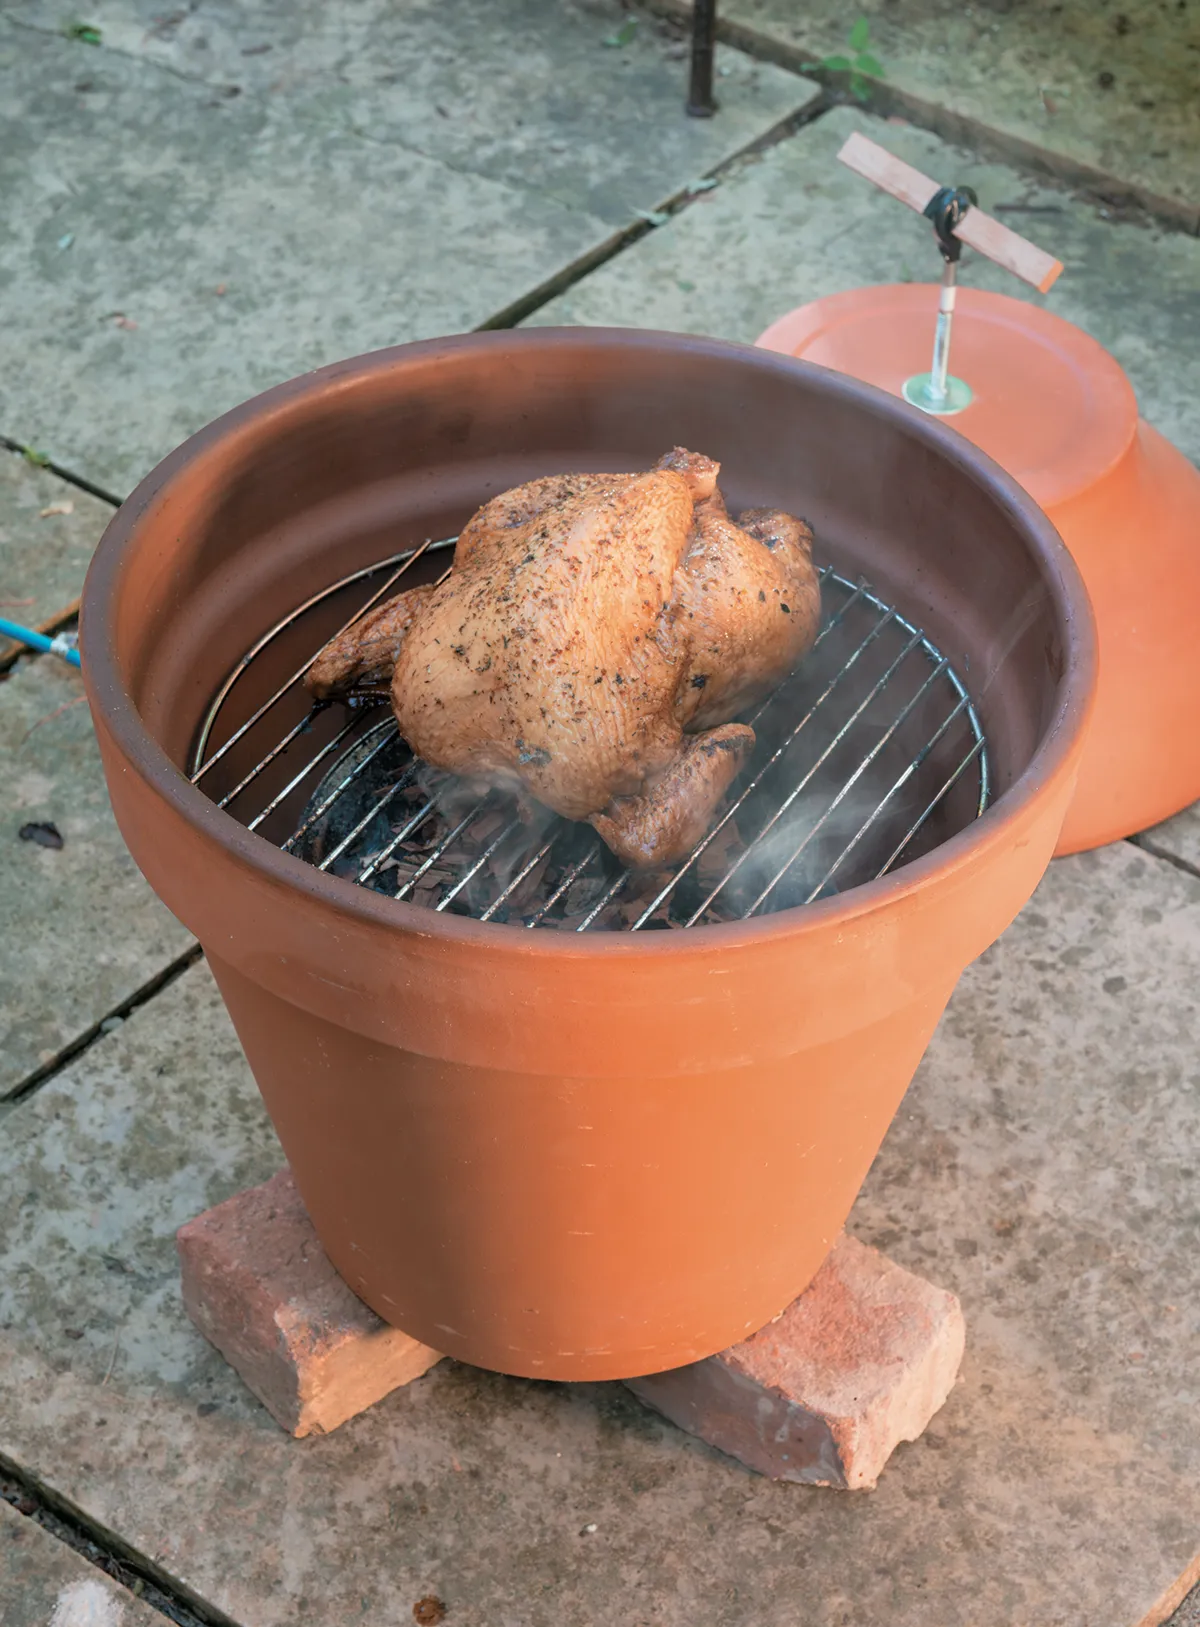
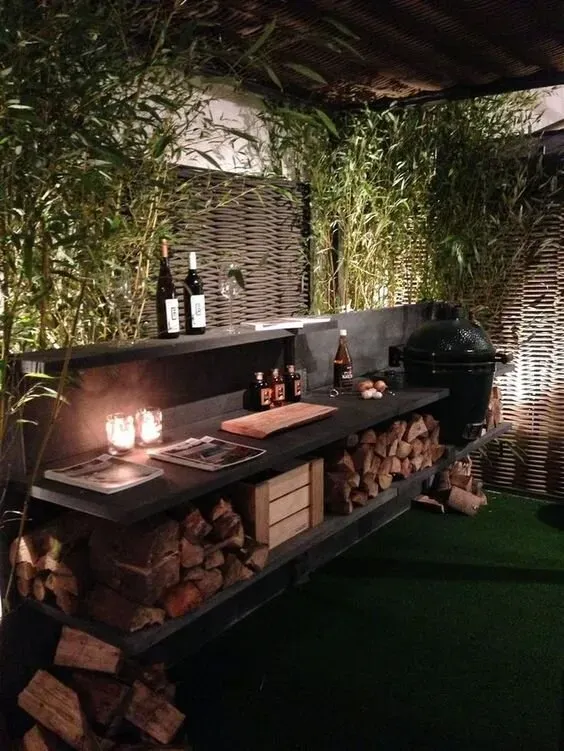
Enhance your outdoor cooking capabilities by building your own smoker using materials like clay pots, metal bins, or cinder blocks. This project allows you to customize to your preferences while adding a distinctive flavor dimension to your outdoor cooking repertoire.
DIY Tips: For a simple terra cotta pot smoker, purchase two large clay pots (14-16″ diameter, approximately $20-30 each), a hot plate ($20), metal grill grate that fits inside the pot ($10), and a metal pie pan ($3).
Drill ventilation holes in the bottom pot. Place the hot plate in the bottom pot, put the pie pan filled with wood chips on the hot plate, position the grate above it, and use the second pot as a lid (drill a hole in the top for ventilation).
For a more substantial smoker, stack cinder blocks in a U-shape, place a grate on top, and cover with a piece of plywood when smoking.
Total cost: $60-100 depending on materials chosen.
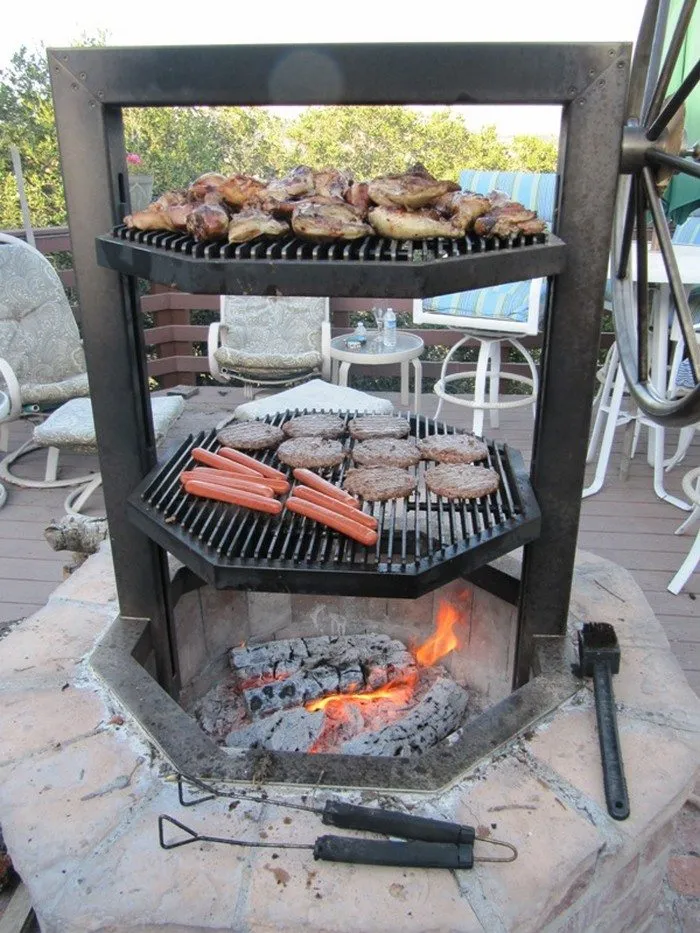
Maximize your outdoor space by transforming a basic fire pit into a dual-purpose cooking area. Simply place a sturdy grate over your existing fire pit to create a versatile station that serves as both a cooking surface and a cozy gathering spot as the evening progresses.
DIY Tips: If you already have a fire pit, purchase a heavy-duty cooking grate sized to fit across the opening ($30-50). For added functionality, look for grates with adjustable heights.
If building a new fire pit, dig a circular hole 2-3 feet in diameter and 1 foot deep. Line with fire bricks ($40 for basic setup) or create a ring with landscape stones ($50-75). Add a layer of gravel at the bottom for drainage ($5).
Position your cooking grate across the top when ready to cook. When not cooking, remove the grate and enjoy as a traditional fire pit.
Total cost: $35-125 depending on whether you’re adapting an existing fire pit or building new.
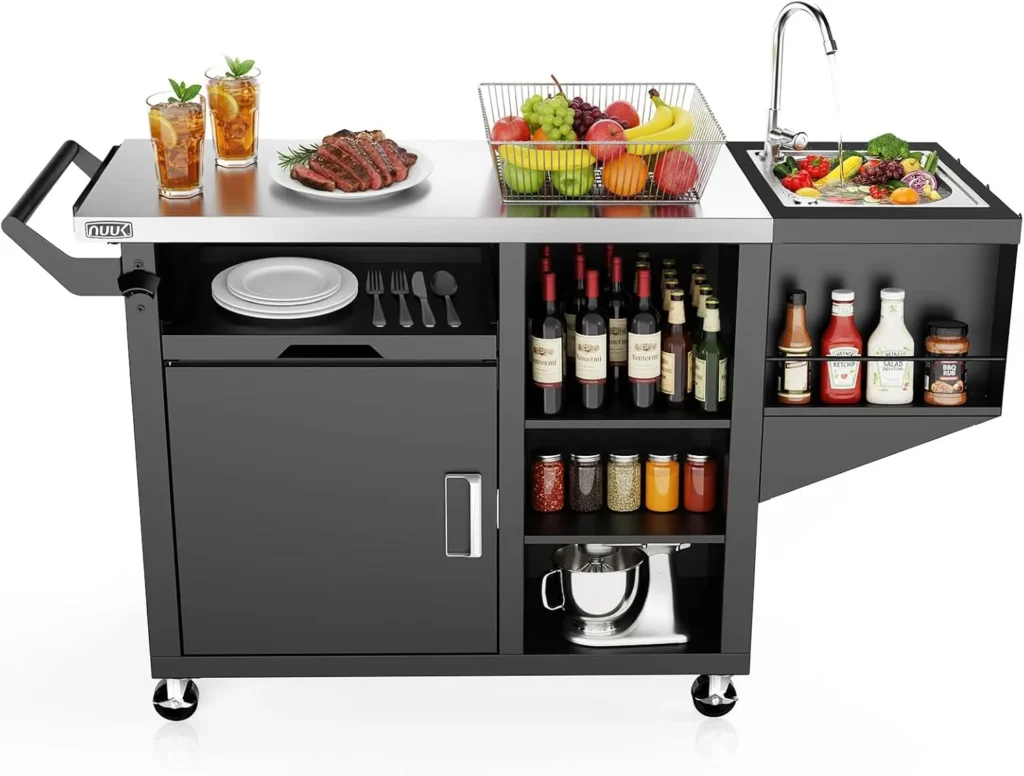
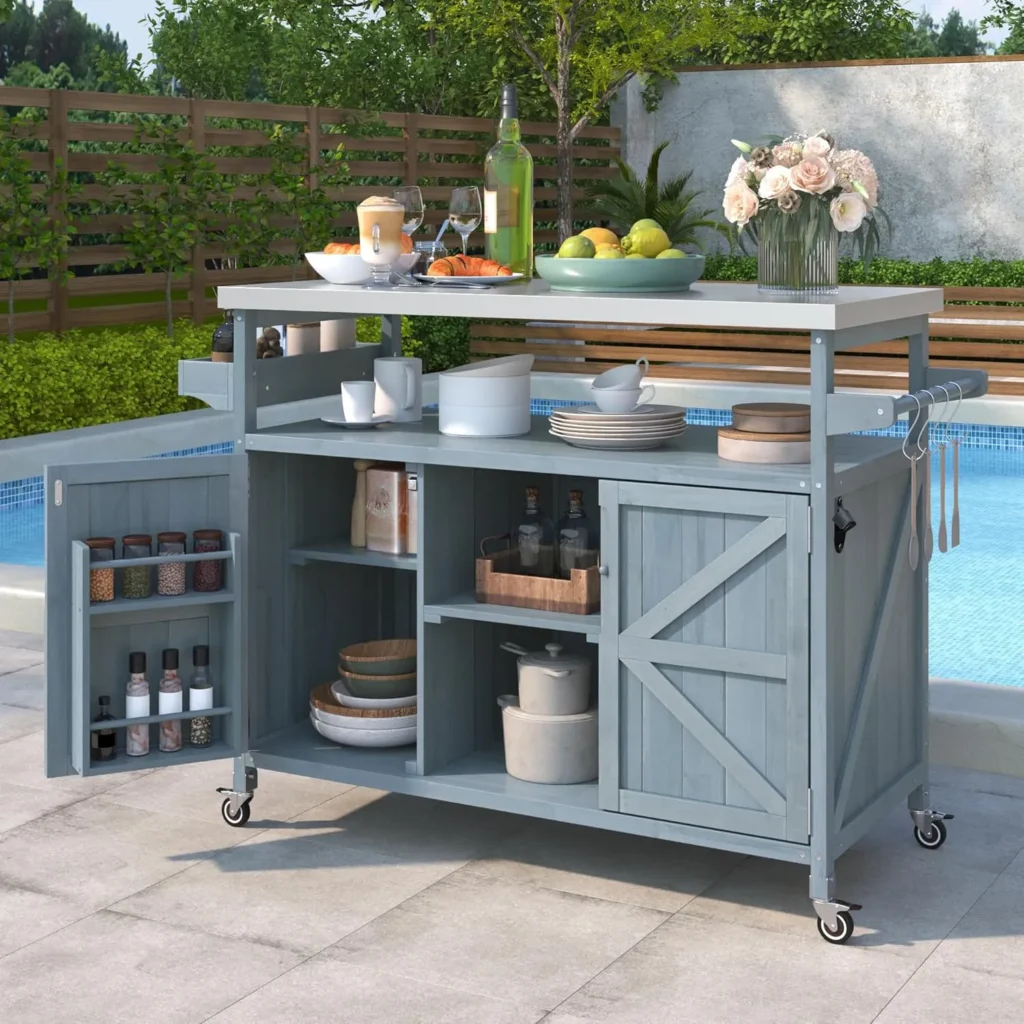
Add flexibility to your outdoor kitchen with a movable island that provides extra counter space for food preparation. Look for models with wheels for easy mobility and features like built-in storage or towel racks. Check flea markets or online sales for budget-friendly options.
DIY Tips: Repurpose an old kitchen cart or microwave stand (thrift stores, $20-40) by sanding and painting with exterior paint ($20). Add a weather-resistant top by covering with outdoor fabric ($15) sealed with clear vinyl ($10), or install tile ($25) for a more durable surface.
Replace existing casters if needed ($15-20). For a built-from-scratch option, construct a simple frame from 2x4s ($20), add plywood shelves ($15-20), and install a countertop of sealed wood, tile, or concrete board.
Add hooks, a paper towel holder, and a trash bag holder for convenience ($15 total).
Total cost: $80-150 depending on materials and whether you’re repurposing or building new.
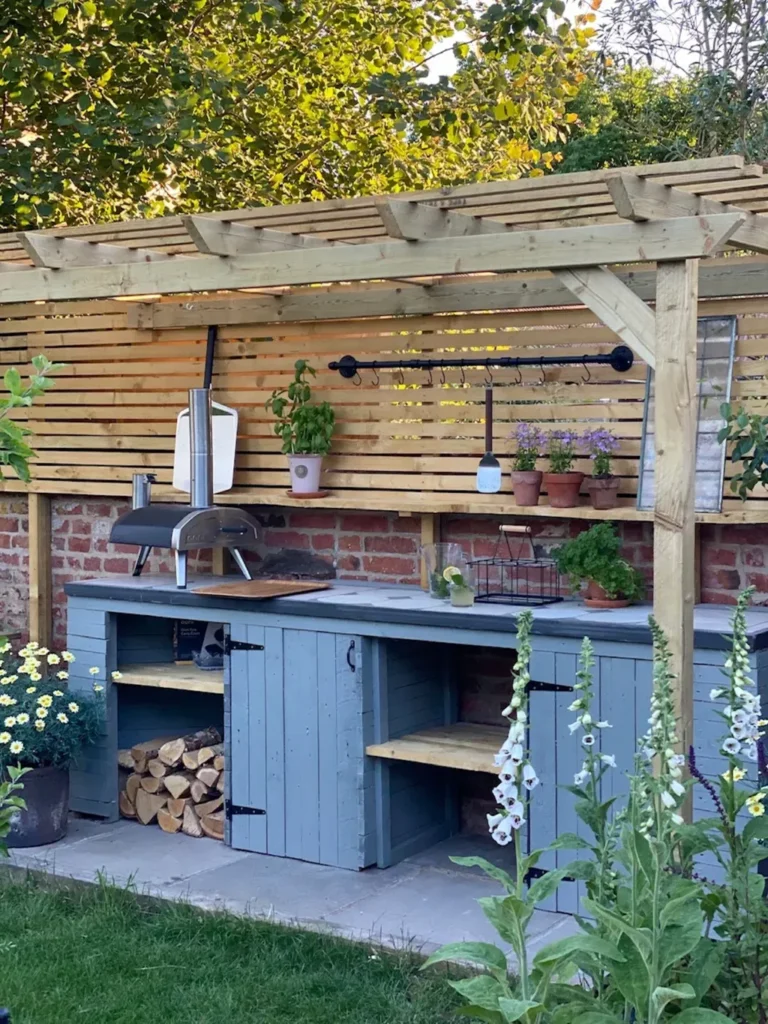
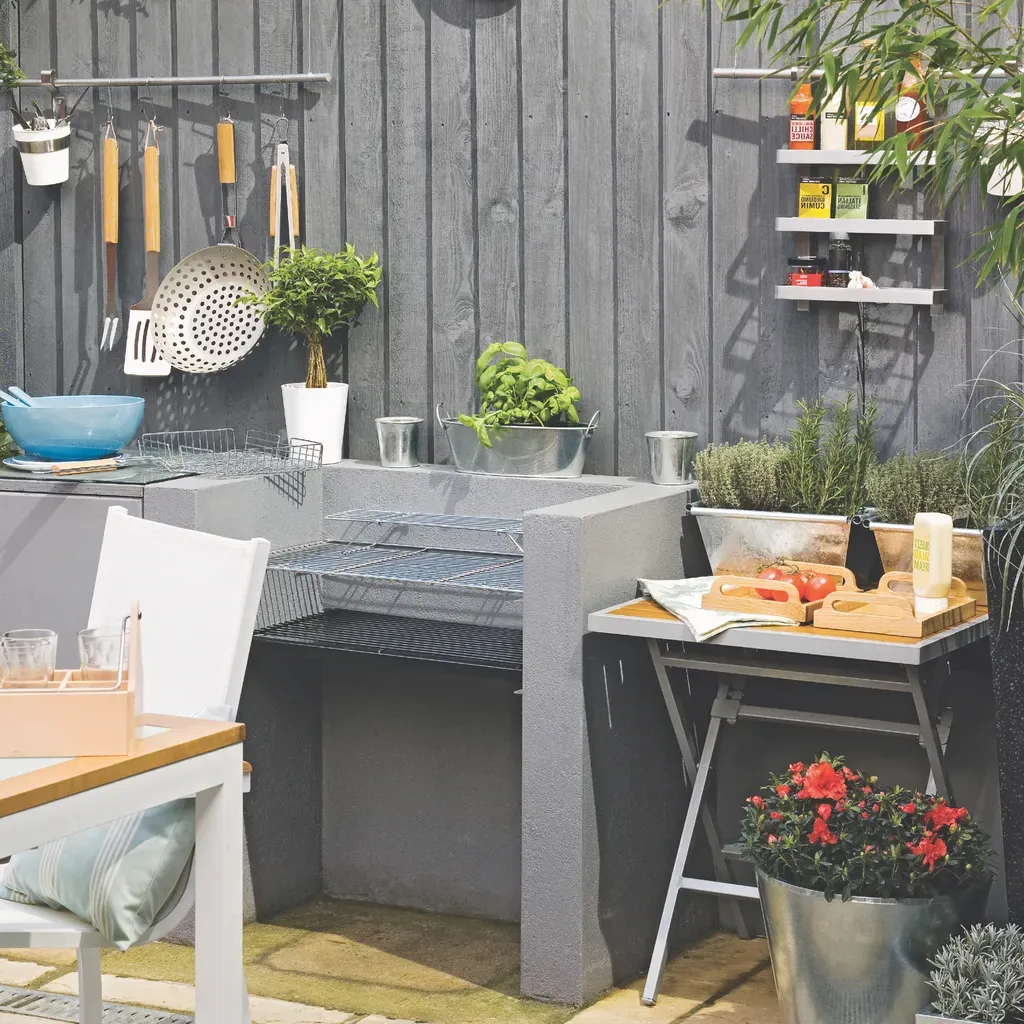
Maximize your outdoor kitchen space by utilizing vertical storage options. Install a pegboard or sturdy hooks on a nearby wall to hang utensils, pots, and pans, keeping everything organized and within reach while freeing up valuable counter space.
DIY Tips: Purchase a 2’x4′ sheet of pegboard ($15-20) and weather-treat it with exterior primer and paint ($15). Mount to an exterior wall using 1×2 furring strips ($5) to create space behind the board for hooks.
Alternatively, install a pressure-treated 1×6 board ($10) horizontally and add heavy-duty hooks ($10-15 for a pack). For a more rustic look, mount a reclaimed wooden pallet vertically, sand smooth, seal with outdoor polyurethane, and add hooks.
Label areas for different tools using waterproof markers or small signs.
Total cost: $40-60 for a complete system that keeps everything organized and accessible.
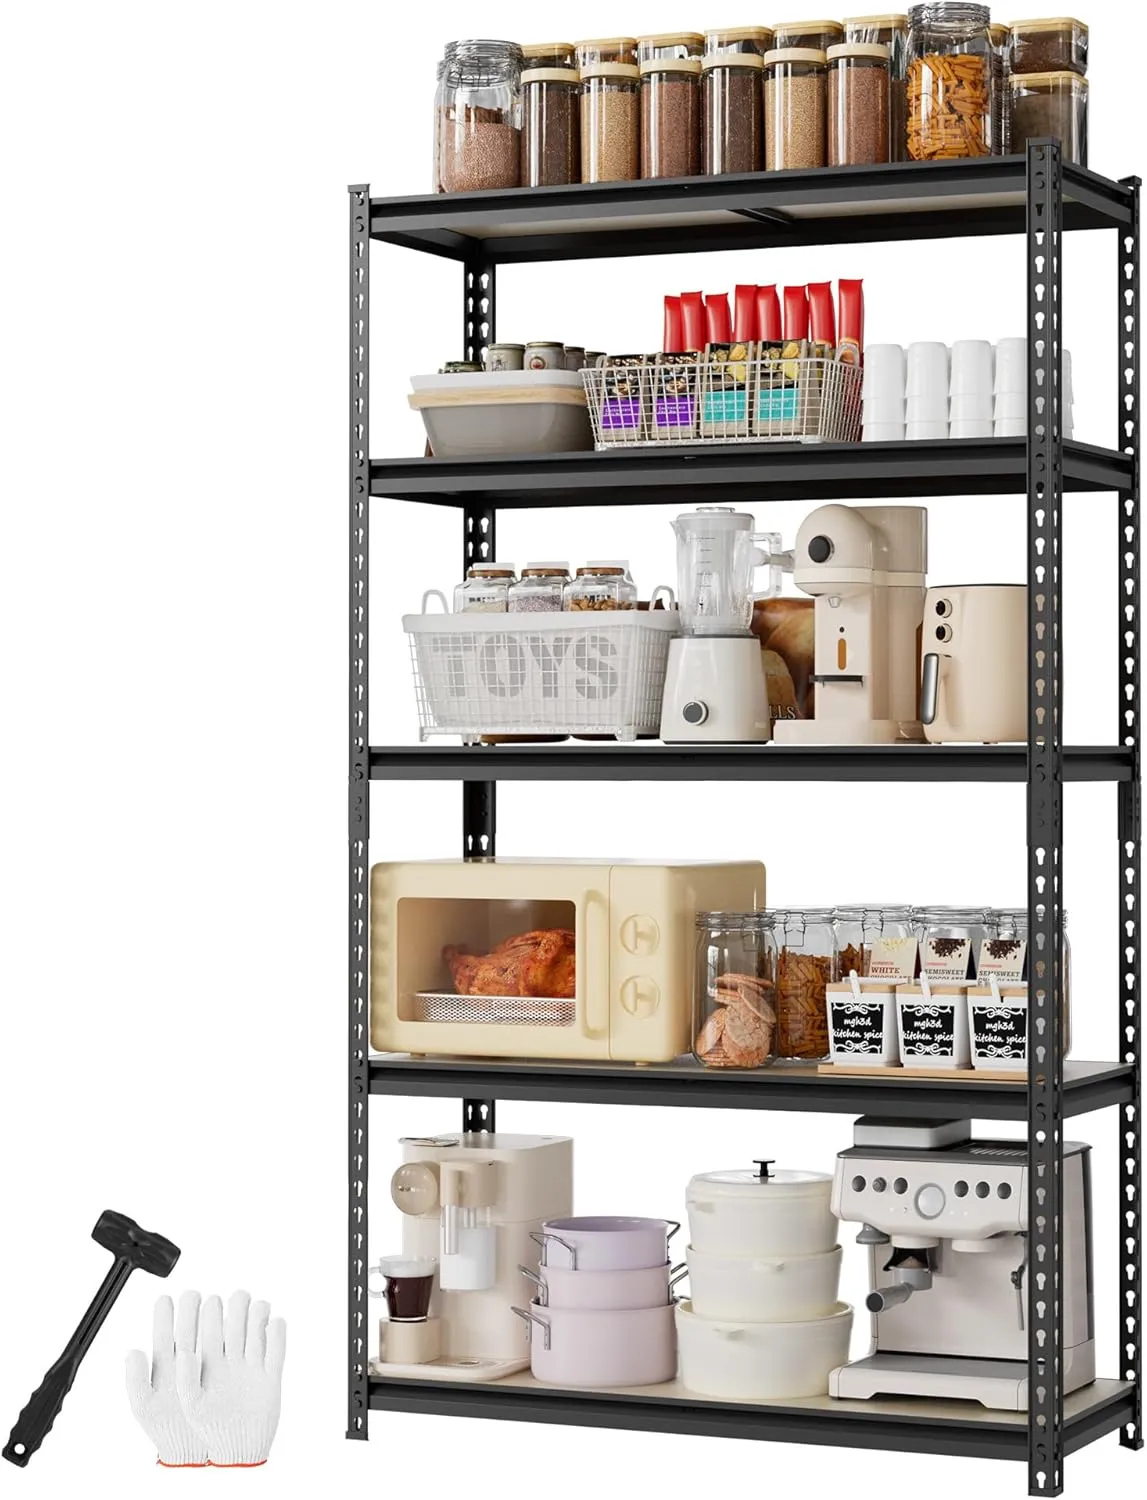
Install metal utility shelves to keep your outdoor cooking area neat and functional. These durable, easy-to-clean shelving units provide accessible storage for cooking ingredients, utensils, and other essentials, making your cooking experience more efficient and enjoyable.
DIY Tips: Purchase basic metal utility shelving units from a home improvement store ($30-60 depending on size). Look for sales or secondhand options to save more.
Choose galvanized or powder-coated options for weather resistance. Assemble according to package directions, typically requiring just a screwdriver or wrench. Secure to a wall if possible for stability, using appropriate anchors for your wall type ($5-10).
Add small bins or baskets ($15-20) to organize smaller items. Label shelves with waterproof labels for easy identification. Consider adding a clear shower curtain ($10) that can be pulled across during inclement weather for additional protection.
Total cost: $60-100 for a complete storage solution.
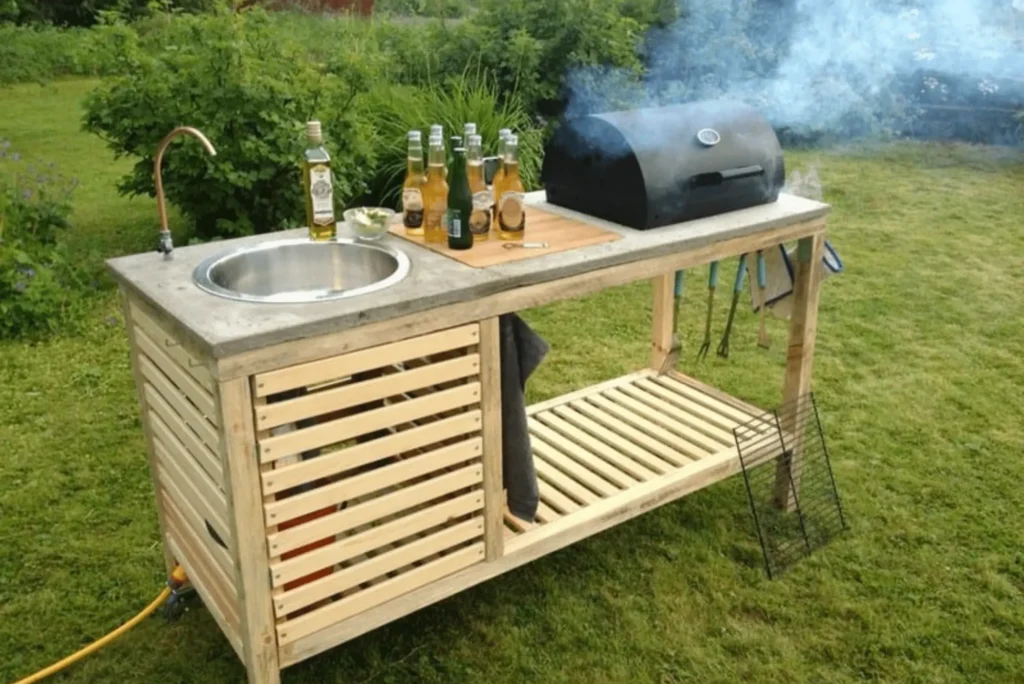
Add functionality to your outdoor kitchen by incorporating a salvaged sink from a thrift store or salvage yard. This sustainable choice adds character while providing a practical washing station. Clean thoroughly, cut an appropriate hole in your countertop, secure with brackets, and connect plumbing if needed.
DIY Tips: Source a used sink from a salvage yard, thrift store, or online marketplace ($20-50). Clean thoroughly with a mixture of vinegar and baking soda to remove stains and residue.
Measure and mark the location on your countertop, then cut the opening using a jigsaw (for wood) or appropriate masonry tools (for concrete). Apply waterproof silicone caulk ($5) around the edge before dropping in the sink.
Secure underneath with mounting clips if available or construct simple brackets from metal strapping ($10). For basic water access, connect to a garden hose using a sink-to-hose adapter ($15-20).
For drainage, position over a bucket or install simple PVC piping ($10-15) leading to a garden area or drainage point.
Total cost: $50-100 depending on sink cost and plumbing complexity.
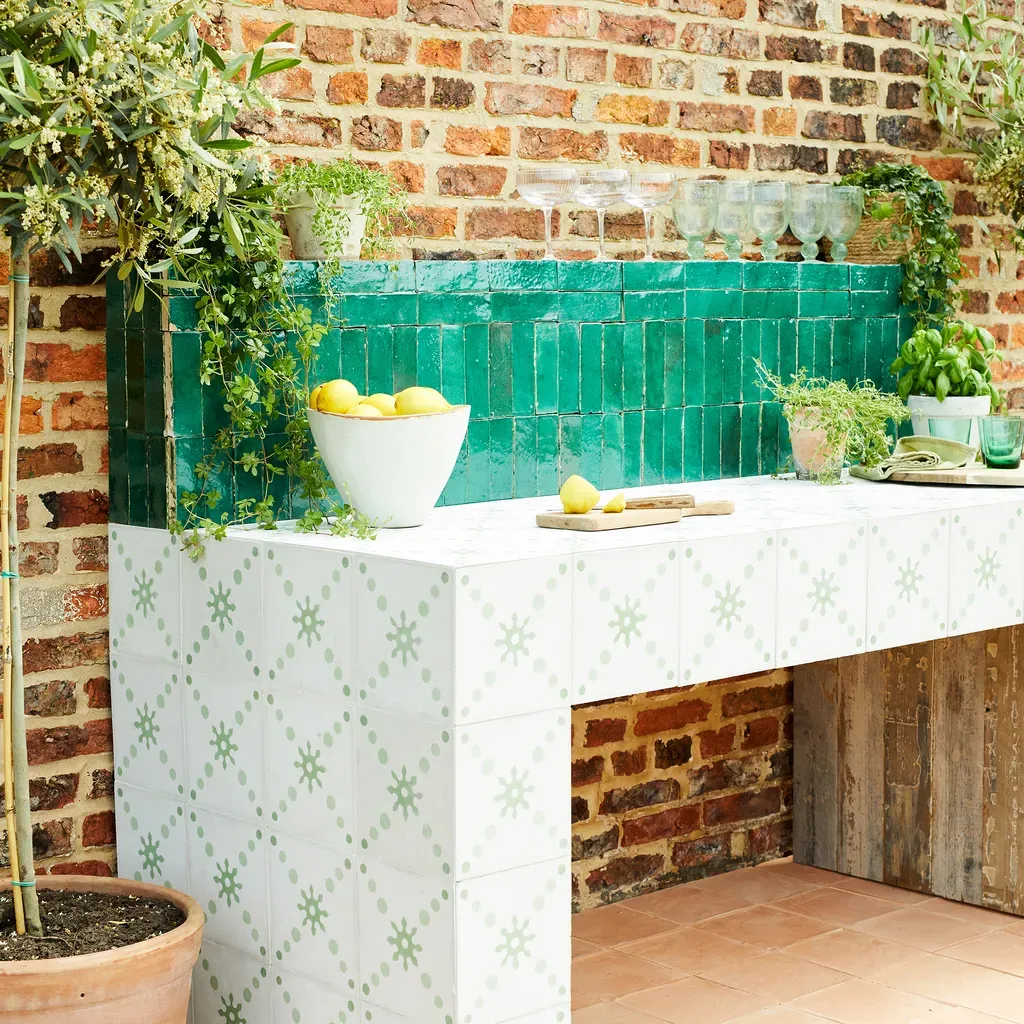
Create a vibrant, personalized backsplash using leftover or secondhand tiles. This eco-friendly option adds color and protection to your outdoor kitchen while being easy to clean and maintain. Arrange tiles in a pattern that complements your style, secure with adhesive, and finish with grout.
DIY Tips:Collect leftover tiles from your own projects or ask friends who have recently renovated. Check construction resale stores or online marketplaces for inexpensive tile lots ($10-30).
Clean the wall surface thoroughly and ensure it’s flat. Apply outdoor-rated tile adhesive ($15) with a notched trowel. Press tiles into the adhesive in your desired pattern, using tile spacers ($3) to maintain even gaps.
Allow to dry completely (24 hours), then apply weather-resistant grout ($10). Wipe away excess grout with a damp sponge before it dries completely. Seal the grout with a waterproof sealer ($10) after it cures for 72 hours.
Total cost: $40-70 for a unique, personalized backsplash that protects your wall and adds visual interest.
Protect your outdoor kitchen from the elements with an easy-to-assemble wood frame covered by a waterproof tarp. This affordable solution shields your cooking area from rain, sun, and wind, ensuring your culinary adventures aren’t interrupted by weather changes.
DIY Tips:Construct a simple frame using pressure-treated 2x4s ($30-40). Create a rectangular structure with four corner posts and cross beams at the top. Secure joints with galvanized deck screws ($5).
For a 10’x10′ covering, purchase a heavy-duty waterproof tarp ($20-30) slightly larger than your frame dimensions. Secure the tarp to the frame using bungee cords ($10) or heavy-duty zip ties ($5), pulling it taut across the top and sides.
For added stability, consider anchoring the frame posts in concrete footings or using deck post anchors ($20).
Leave one or two sides open for access and air circulation.
Total cost: $65-100 for a functional shelter that can be easily modified or removed as needed.
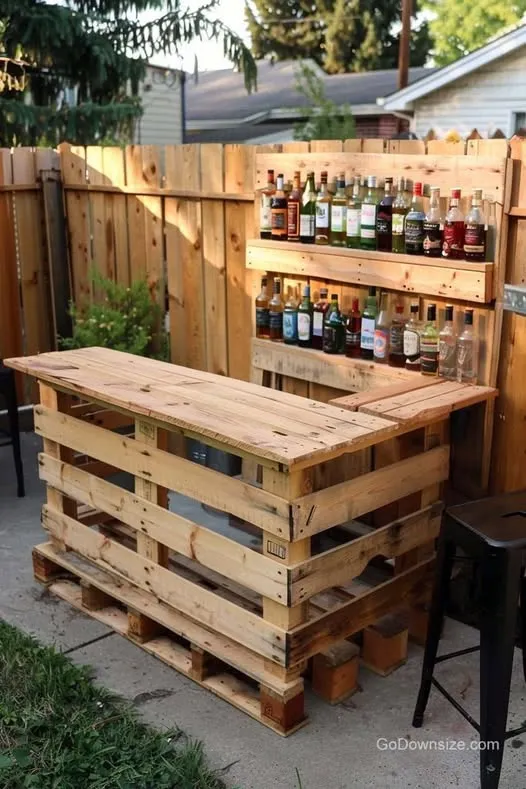
Transform your backyard into an entertainment hub by building a bar from pallets. Assemble them in a U-shape or L-shape, secure with screws, and add a smooth countertop. Install shelves or hooks for glasses and bar tools, then personalize with paint or stain to match your outdoor décor.
DIY Tips: Collect 4-6 wooden pallets (free from local businesses). Clean thoroughly and sand smooth. Arrange in your desired bar shape—typically an L-shape works well for corner spaces or a straight bar for along a wall.
Secure pallets together using 3-inch deck screws ($5). For the bar top, use pressure-treated plywood ($25) cut to size, sanded smooth, and sealed with multiple coats of polyurethane ($15).
Add a foot rail using metal pipe ($15-20) secured to the front of the bar. Install simple shelving inside the bar area using pallet wood or 1×6 boards ($10). Add hooks underneath for hanging bar tools ($5).
Finish with outdoor paint or stain ($20) in a color that complements your space.
Total cost: $80-100 for a custom bar that would cost $500+ commercially.
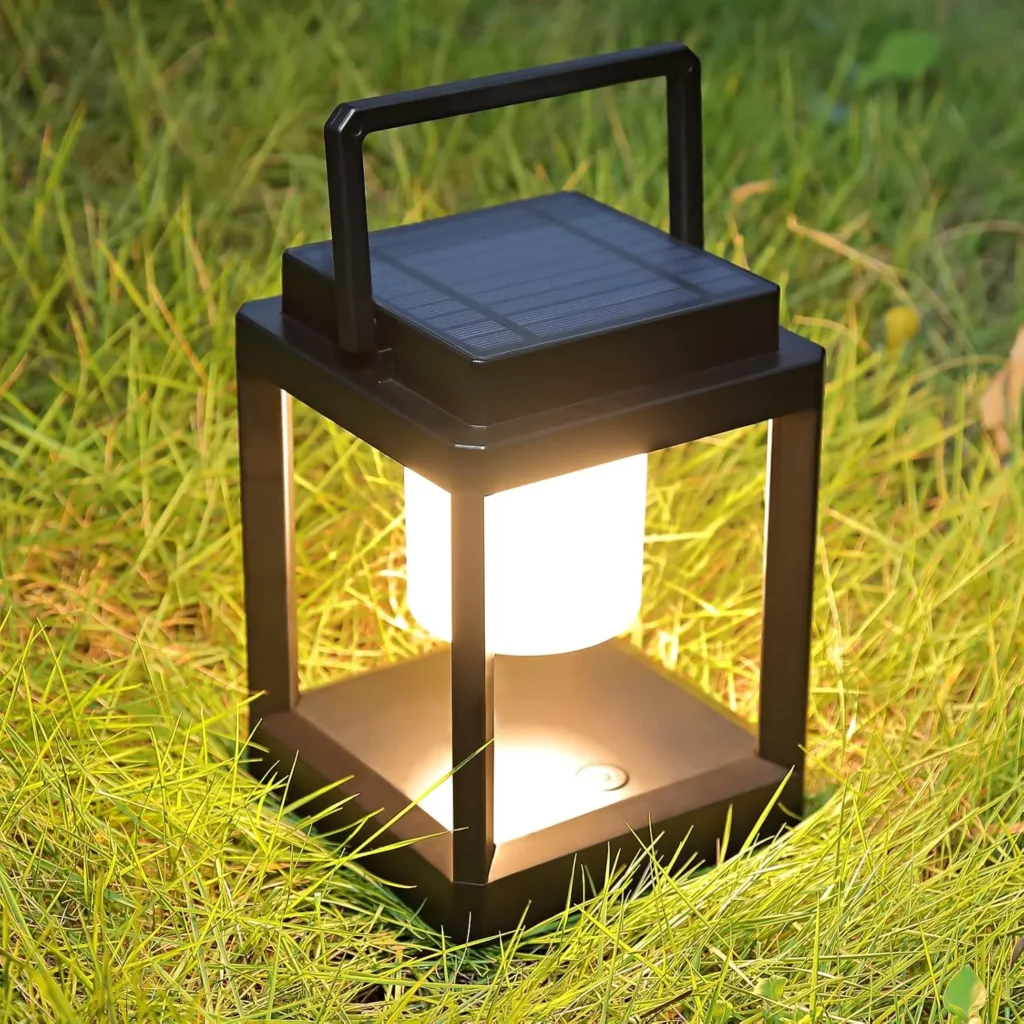
Enhance the ambiance of your outdoor kitchen with budget-friendly lighting options like string lights or solar-powered lamps. Strategically place these around your cooking and dining areas to create a warm, inviting atmosphere that extends your outdoor enjoyment into the evening hours.
DIY Tips: Purchase outdoor-rated string lights ($15-30 depending on length) or solar path lights ($20 for a set of 6-8). For string lights, install eye hooks ($5) along the perimeter of your outdoor kitchen area or on nearby posts, trees, or fencing.
Hang lights in a zigzag or perimeter pattern, securing with zip ties where needed. For a more permanent installation, use conduit piping ($10-15) to create posts that support the lights.
Solar lights require no wiring—simply push stakes into the ground along pathways or around the cooking area.
For additional ambiance, add mason jar lanterns by placing tea lights or small LED lights ($10) inside jars and arranging on tables or counters.
Total cost: $30-60 for lighting that transforms your space after sunset.
The outdoor kitchen trend continues to evolve in 2025, with a focus on sustainability, modular designs, and seamless indoor-outdoor integration.
Eco-friendly materials are becoming increasingly popular, with high-density polyethylene (HDPE) cabinets offering durability and recyclability.
For those with higher budgets, luxury additions like pizza ovens, specialized grills, and dedicated beverage stations are trending.
However, the beauty of outdoor kitchen design lies in its scalability—you can start small with a basic setup and expand over time as your budget allows.
Frequently Asked Questions on DIY Budget Outdoor Kitchen Ideas
What is the cheapest way to build an outdoor kitchen?
The most cost-effective approach is using repurposed materials like pallets or cinder blocks, selecting prefabricated countertops, and choosing a basic but functional grill. Position your kitchen close to your indoor kitchen to minimize plumbing and electrical work costs.
How much does a DIY outdoor kitchen typically cost?
A basic DIY outdoor kitchen can cost between $1,000-$4,000, depending on materials and equipment choices. Using repurposed materials and focusing on essential elements can keep costs at the lower end of this range.
What materials are best for outdoor kitchen countertops on a budget?
Concrete is an excellent budget-friendly option that offers durability and customization. Other affordable alternatives include sealed wood, tile, or laminate designed for outdoor use.
Do outdoor kitchens add value to a home?
Yes, outdoor kitchens typically offer a 70-80% return on investment. They’re particularly valuable in warmer climates where outdoor living spaces can be used year-round.
How can I protect my outdoor kitchen during winter months?
Use weatherproof covers for appliances, drain water lines to prevent freezing, clean thoroughly before covering, and consider a simple wood frame with a tarp cover for additional protection in harsh weather conditions.
Conclusion
Creating an affordable outdoor kitchen is entirely achievable with these 15 budget-friendly ideas. By focusing on repurposed materials, DIY projects, and smart storage solutions, you can design a functional and stylish outdoor cooking space without breaking the bank.
Whether you’re drawn to the rustic charm of pallet constructions, the modern appeal of concrete countertops, or the practicality of mobile cooking stations, these ideas offer something for every style preference and skill level.
The beauty of these approaches lies in their flexibility—start with basic elements and expand your outdoor kitchen as your budget allows.
Remember that the most successful outdoor kitchens balance functionality with personal style.
By incorporating elements that reflect your taste while meeting your cooking needs, you’ll create an inviting space that enhances your home’s value and provides countless opportunities for memorable gatherings with friends and family.
Meet Madison Brooks, a former tech professional turned kitchen design expert who discovered her passion while transforming her own cramped kitchen. With a focus on mindful minimalism, intuitive organization, and thoughtful tools, she helps others create serene, efficient kitchen spaces. Her practical wisdom makes kitchen transformation achievable for everyone.