Ugh. Is there anything more soul-crushing than opening a kitchen cabinet only to have a clanging, crashing avalanche of cookware tumble out?You just want to make some pasta, and suddenly you’re in a live-action reenactment of a cymbal solo gone wrong.
You’re ducking for cover, the dog is barking, and your simple dinner now requires a hard hat and a safety briefing. Yeah, I’ve been there. For years, my kitchen was a warzone of misplaced lids and nested pots that seemed to defy the laws of physics.
I developed a system so simple, so effective, that my kitchen now brings me a weird sense of peace. And I’m not hoarding it. Consider this your official invitation to steal my entire fool-proof method for organizing your pots and pans.
No more digging. No more noise. Just beautiful, accessible, cookware-ready serenity. Let’s get into it.
In This Article
- 1 Why Your Current System is (Probably) a Hot Mess
- 2 The Golden Rule: Ditch the Stack, Embrace the Vertical
- 3 Step 1: The Great Kitchen Purge (Be Ruthless!)
- 4 Step 2: Know Thy Cookware & Thy Cabinet
- 5 First, Sort Your Keepers:
- 6 Second, Assess Your Storage Space:
- 7 Step 3: Choosing Your Weapon (A.K.A. The Organizers)
- 8 Cabinet Solutions for Vertical Storage
- 9 Pot and Pan Racks for Drawers
- 10 Tiered Cabinet Shelves
- 11 Pull-Out Cabinet Organizers
- 12 Taming the Beast: Lid Storage Solutions
- 13 Going Rogue: The Hanging Pot Rack
- 14 Step 4: Assembling Your Master System
- 15 My Personal Kitchen Setup (For Inspiration)
- 16 Maintenance: Keeping the Chaos at Bay
- 17 You’ve Got This!
Why Your Current System is (Probably) a Hot Mess
Before we build something new, we have to understand why the old thing is broken. Most of us just shove our pots and pans into the biggest cabinet we have and call it a day. It seems logical, right? They’re big, so they get the big space. But this strategy has a few fatal flaws.
- The Nesting Doll Dilemma: We nest pots inside each other to save space. Seems smart, but it’s a trap. To get the one you want at the bottom, you have to unstack the entire precarious Jenga tower. It’s a recipe for frustration and dropped Dutch ovens.
- The Lost Lid Labyrinth: Where do the lids go? Tossed on top? Leaning against the side? Thrown into a separate, black-hole-like container where they all slide together into an inseparable metal disc? Finding the right lid becomes a chore of its own.
- The “Out of Sight, Out of Mind” Problem: That beautiful braiser you spent good money on? It’s buried in the back behind the stockpot you use twice a year. You forget you even own it, so you never use it. It’s a waste of space, money, and culinary potential.
Sound familiar? I thought so. The good news is, fixing this isn’t about buying a bigger kitchen or even a ton of fancy organizers (though a few key ones help). It’s about adopting a new mindset: accessibility over everything else.
The Golden Rule: Ditch the Stack, Embrace the Vertical
This is the single most important takeaway from this entire article. If you remember nothing else, remember this: Stop stacking your cookware horizontally and start storing it vertically.
I know, it sounds crazy. It feels like it will take up more space. But trust me on this—it’s a complete game-changer. Storing your pots, pans, and lids vertically, like files in a filing cabinet, means you can see and grab exactly what you need without moving anything else.
No more unstacking. No more avalanches. Just grab and go. This one principle is the bedrock of the entire system. Everything we do from here on out is about making vertical storage work for your specific kitchen.
Step 1: The Great Kitchen Purge (Be Ruthless!)
You can’t organize clutter. You can only shuffle it around. So before we talk about where anything is going, we have to figure out what’s staying. This is the hardest but most cathartic part.
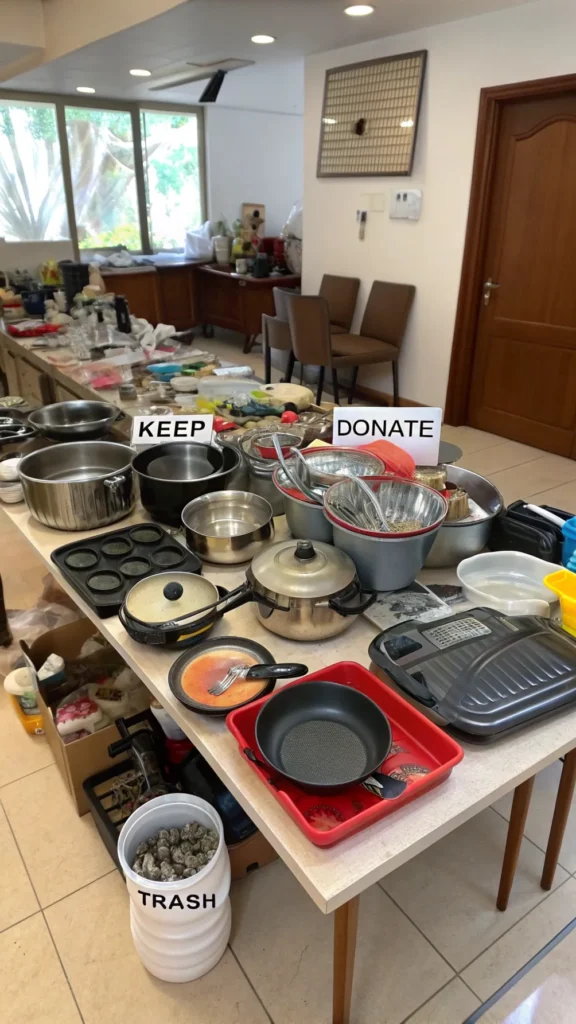
Pull every single pot, pan, lid, baking sheet, and roasting pan out of your cabinets. I mean every. last. piece. Pile it all on your kitchen table or floor. Take a good, hard look at it.
Now, channel your inner minimalist tyrant and ask these questions about each item:
- Have I used this in the last year? Be honest. That novelty cornbread pan shaped like a ear of corn? If it’s not earning its keep, it’s gotta go.
- Is it warped, scratched beyond repair, or just plain crappy? That non-stick skillet that’s now more stick than non? Teflon that’s flaking into your food? It’s not just disorganized; it’s a health hazard. Thank it for its service and let it go.
- Does it have a lid? If you have a pot with no lid or a lid with no pot, what’s the point? Unless you’re using the lid for something else or the pot as a planter (no judgment), it’s time to say goodbye.
Create three piles: Keep, Donate/Sell, and Trash. Be brutal. That pot set you got as a wedding gift 15 years ago but always hated? Donate it. The warped baking sheet? Recycle it if you can. You’re not just making space in your cabinet; you’re making space in your head. A curated collection of cookware you actually love and use is the goal.
Step 2: Know Thy Cookware & Thy Cabinet
Now that you have a refined, glorious collection of keepers, it’s time to play matchmaker with your kitchen space. You need to assess two things: what you have to store and where you can store it.
First, Sort Your Keepers:
- Everyday Drivers: Your go-to skillet, your favorite saucepan, your daily-use non-stick. These need prime real estate—easy to reach and grab.
- Specialty Items: The giant stockpot for Thanksgiving, the lobster pot, the paella pan. These can live in harder-to-reach spots since they only come out for special occasions.
- Bakeware: Baking sheets, muffin tins, casserole dishes. These often need a different strategy.
Check Next: 13 Clever Kitchen Drawer Organisation Ideas: Easy, Affordable, Practical
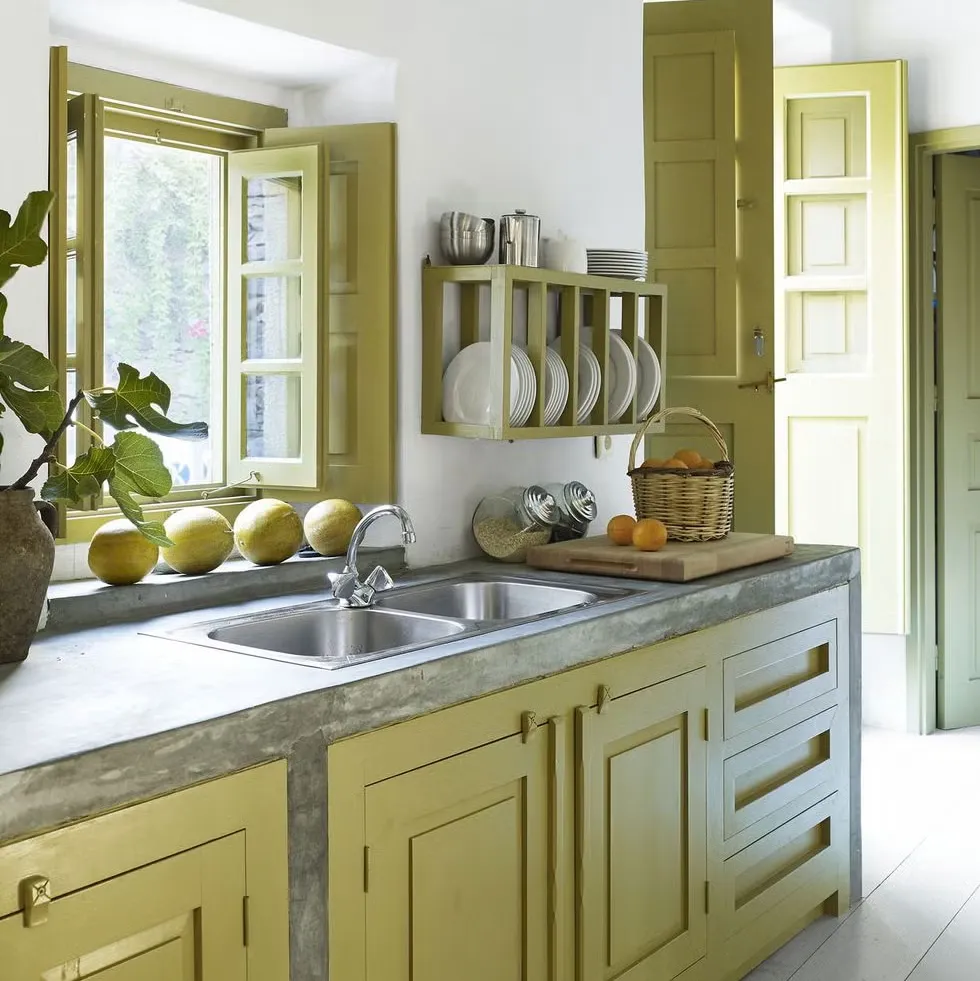
Second, Assess Your Storage Space:
- Deep Cabinets: Ideal for vertical storage with pull-out organizers.
- Lower Cabinets: Great for heavy items but can be a pain to bend into.
- Drawers: The holy grail for pots and pans if you have deep, sturdy ones.
- Open Wall Space: Perfect for a hanging pot rack if you’re willing to go for it.
- Corner Cabinets: Often a wasteland, but a lazy Susan can make them useful.
The key is to match the item’s frequency of use with the accessibility of the space. Your everyday skillet shouldn’t be buried in a deep corner, and your once-a-year turkey roaster doesn’t need to front and center.
Step 3: Choosing Your Weapon (A.K.A. The Organizers)
This is where the magic happens. To achieve vertical storage, you need the right tools. IMO, you don’t need to buy everything, but a few strategic purchases will change your life. Here’s the breakdown of your options.
Cabinet Solutions for Vertical Storage
Pot and Pan Racks for Drawers
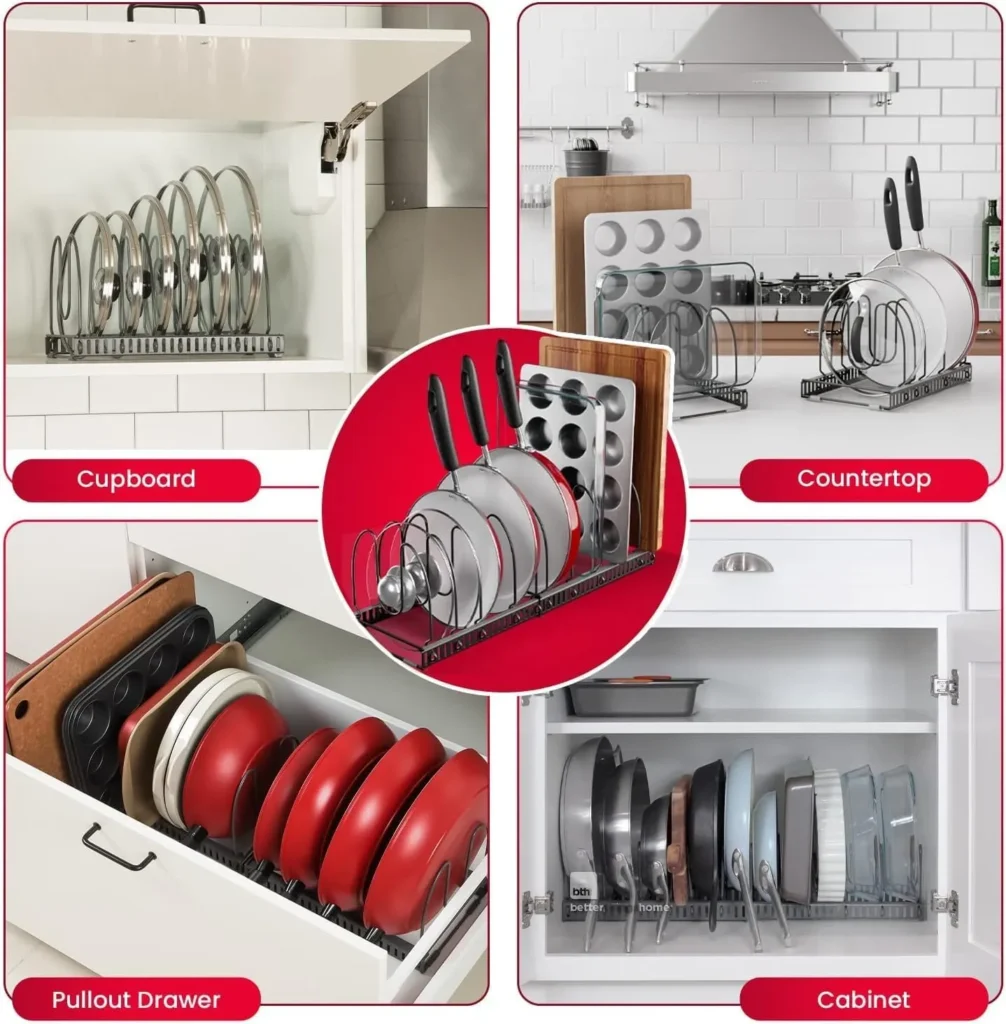
If you are lucky enough to have a deep, sturdy drawer near your stove, this is arguably the best solution.
- How it works: You install a rack system (usually metal wire) that creates vertical dividers within the drawer.
- Pros: Keeps everything separated, visible, and incredibly easy to access. Just pull the drawer open and everything is right there. No bending or digging.
- Cons: Requires a large, deep drawer. Can be pricey for good quality ones.
- Best for: Your collection of frying pans, saucepans, and their matching lids. This is my personal favorite method for my daily drivers.
Tiered Cabinet Shelves
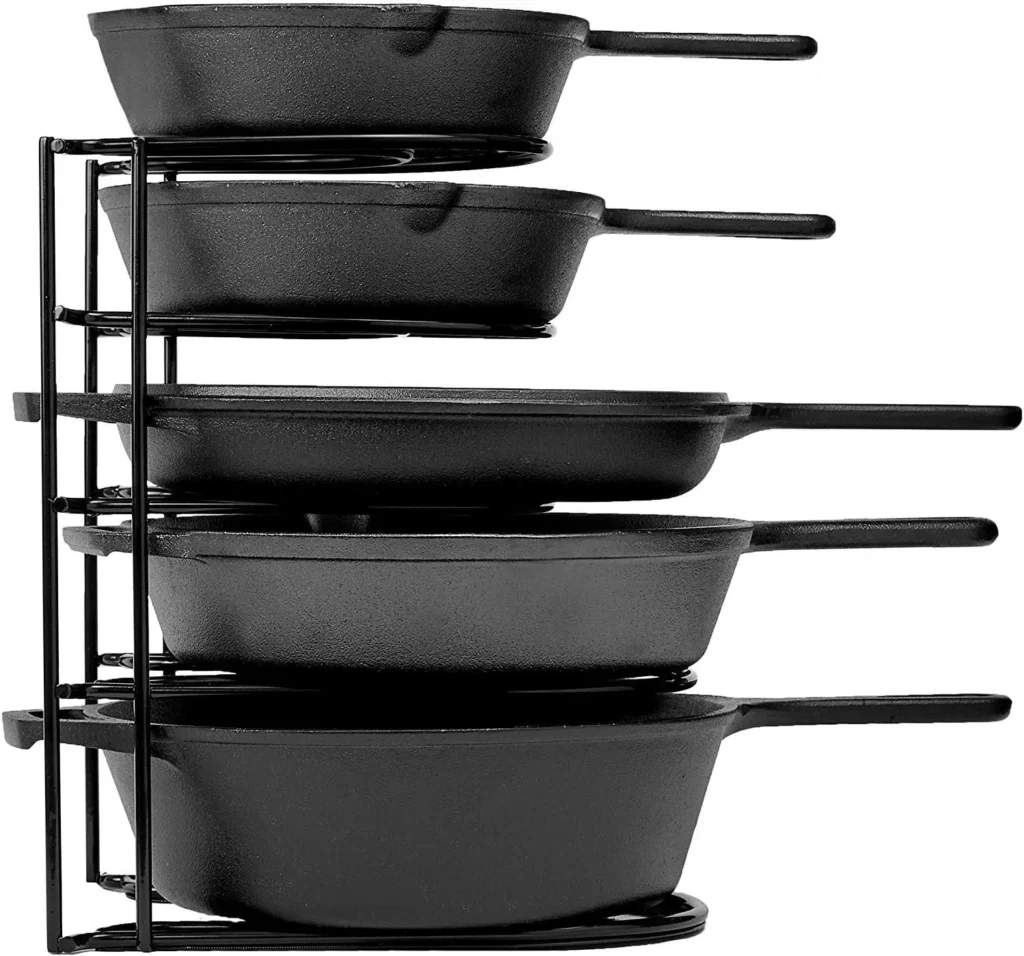
These are the workhorses of cabinet organization. They create two levels out of one, effectively doubling your vertical space.
- How it works: A shelf sits on your cabinet base, and another shelf tiers above it. You store cookware on both levels.
- Pros: Inexpensive, readily available, and incredibly effective at letting you see and access items in the back. No more losing that small saucepan behind the big pot.
- Cons: You still have to stack items on each tier if your collection is large, which can bring back some of the old problems.
- Best for: Cabinets where you want to store a lot of items. I use a tiered shelf for my smaller pots and saucepans.
Pull-Out Cabinet Organizers
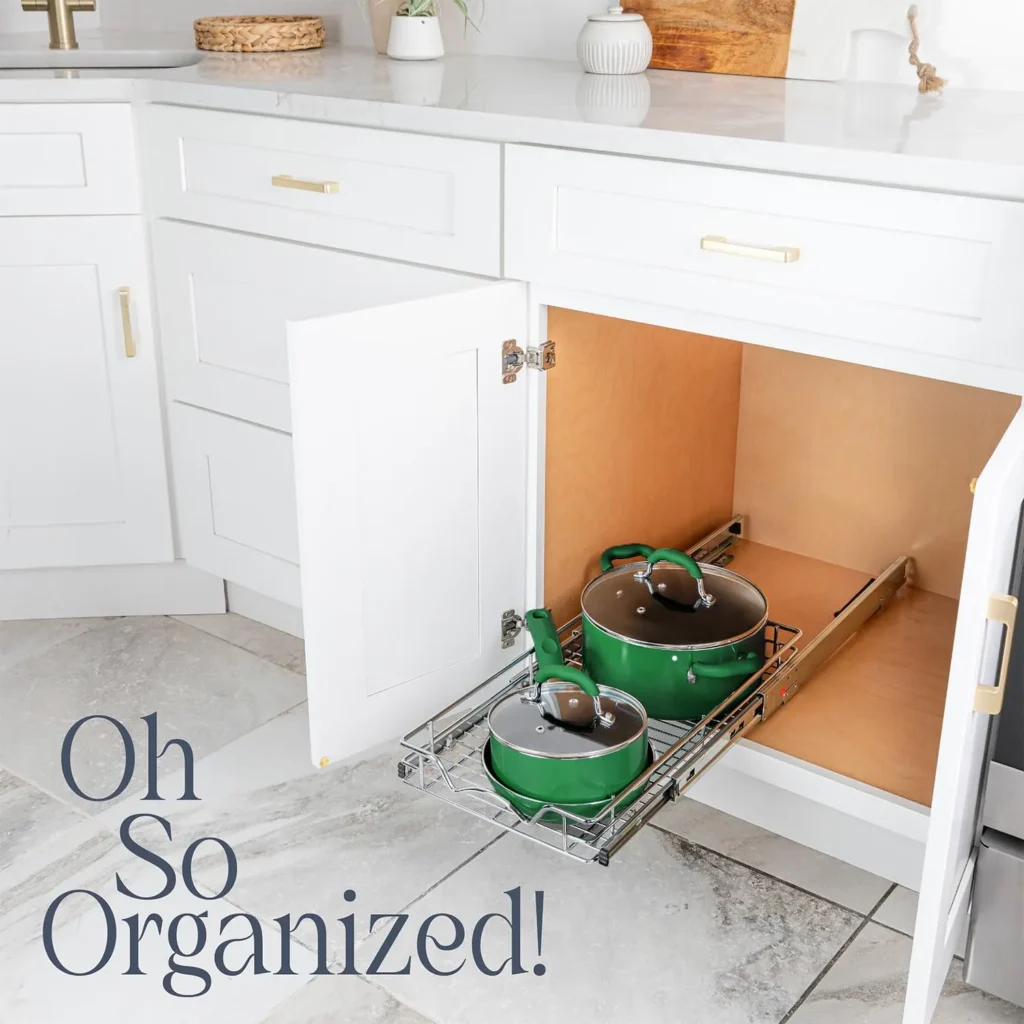
These are the premium option, but oh boy, are they luxurious.
- How it works: It’s essentially a slide-out drawer system that you install into your existing lower cabinet.
- Pros: It brings the entire contents of the deep, dark cabinet into the light. No more getting on your hands and knees to fish something out from the back. You get full, easy access to everything.
- Cons: The most expensive option and usually requires some installation skill (or hiring a handyman).
- Best for: Anyone who is serious about a forever-home kitchen upgrade and hates bending over.
Taming the Beast: Lid Storage Solutions
Lids are the arch-nemesis of pot and pan organization. But they don’t have to be. Here’s how to corral them.
- Over-the-Door Racks: You can get racks that hang on the inside of your cabinet door. This is a fantastic way to utilize wasted space. Just be sure your cabinet door can close properly with the added thickness.
- Adhesive Lid Holders: Small, plastic hooks with adhesive backing that you stick to the side or top of your cabinet interior. You can slide lids between them. Simple and cheap.
- File Sorters or Magazine Holders: No, really. A sturdy metal or wooden file sorter placed inside your cabinet is a perfect holder for lids standing on their edges. It’s a genius, affordable hack.
- The Best Method I’ve Found: Store the lid with the pot. Wait, what? After all that talk about separating them? Hear me out. With vertical storage, you can often slide the lid right into the pot or pan it belongs to, handle sticking out. Since everything is standing up and not stacked, you can still grab the pot without the lid getting in the way. This keeps matched sets together forever.
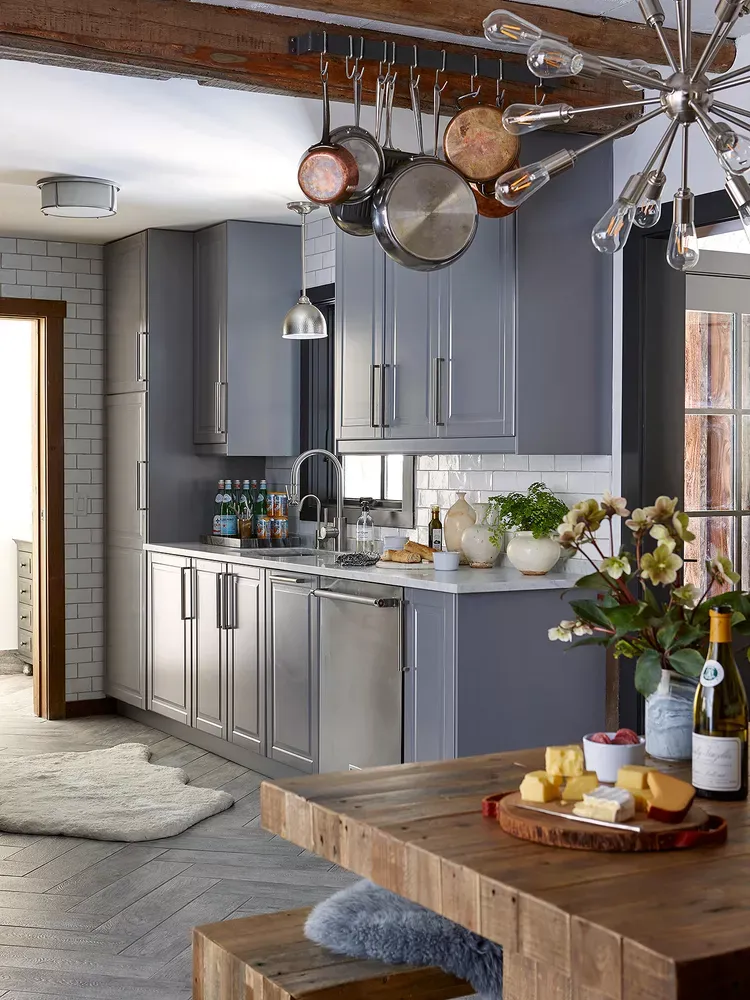
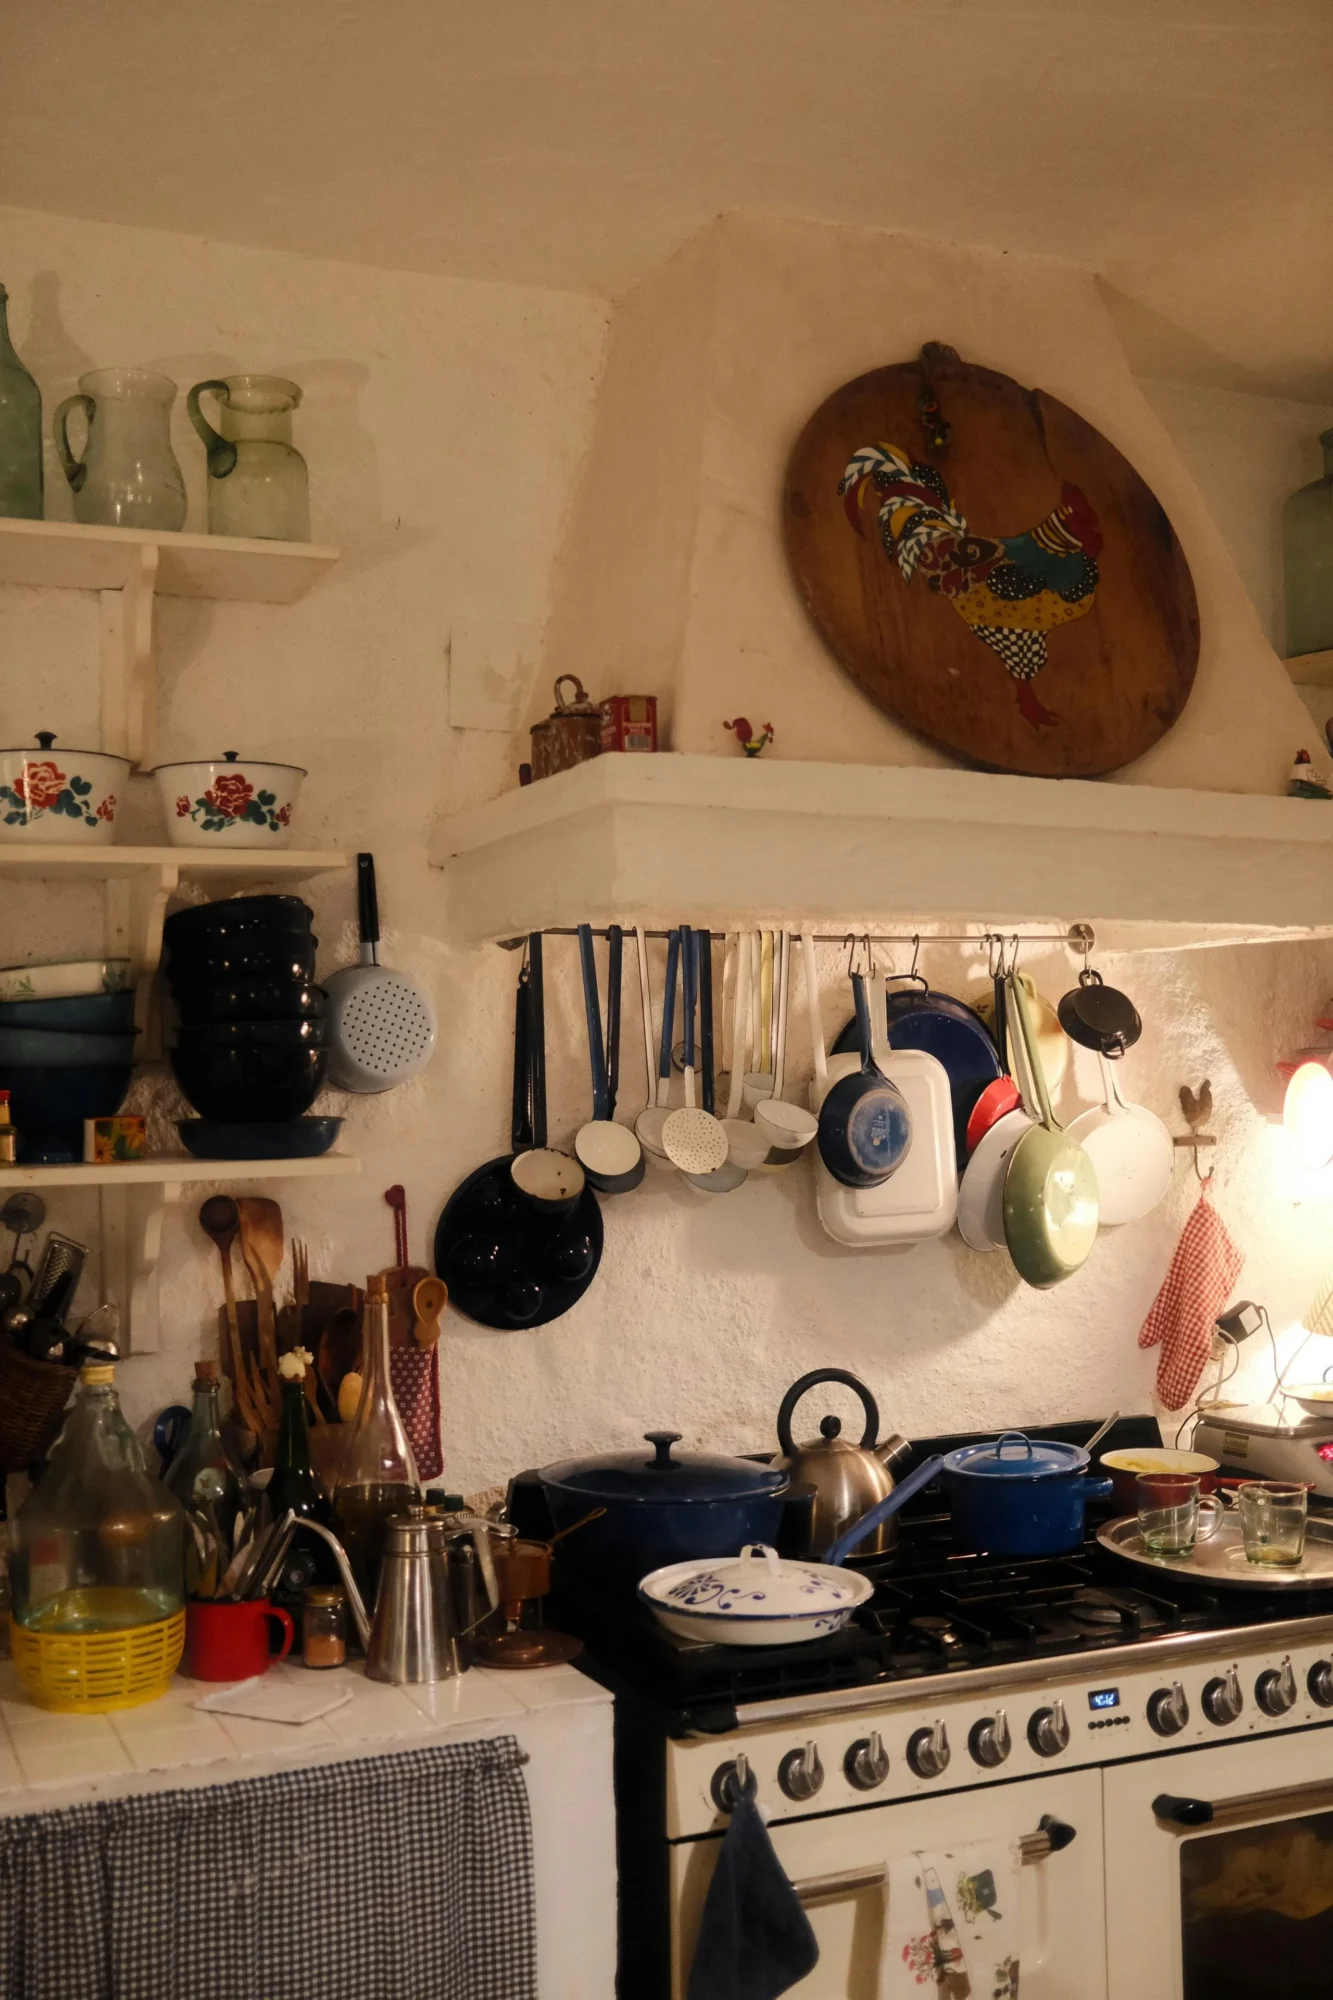
Going Rogue: The Hanging Pot Rack
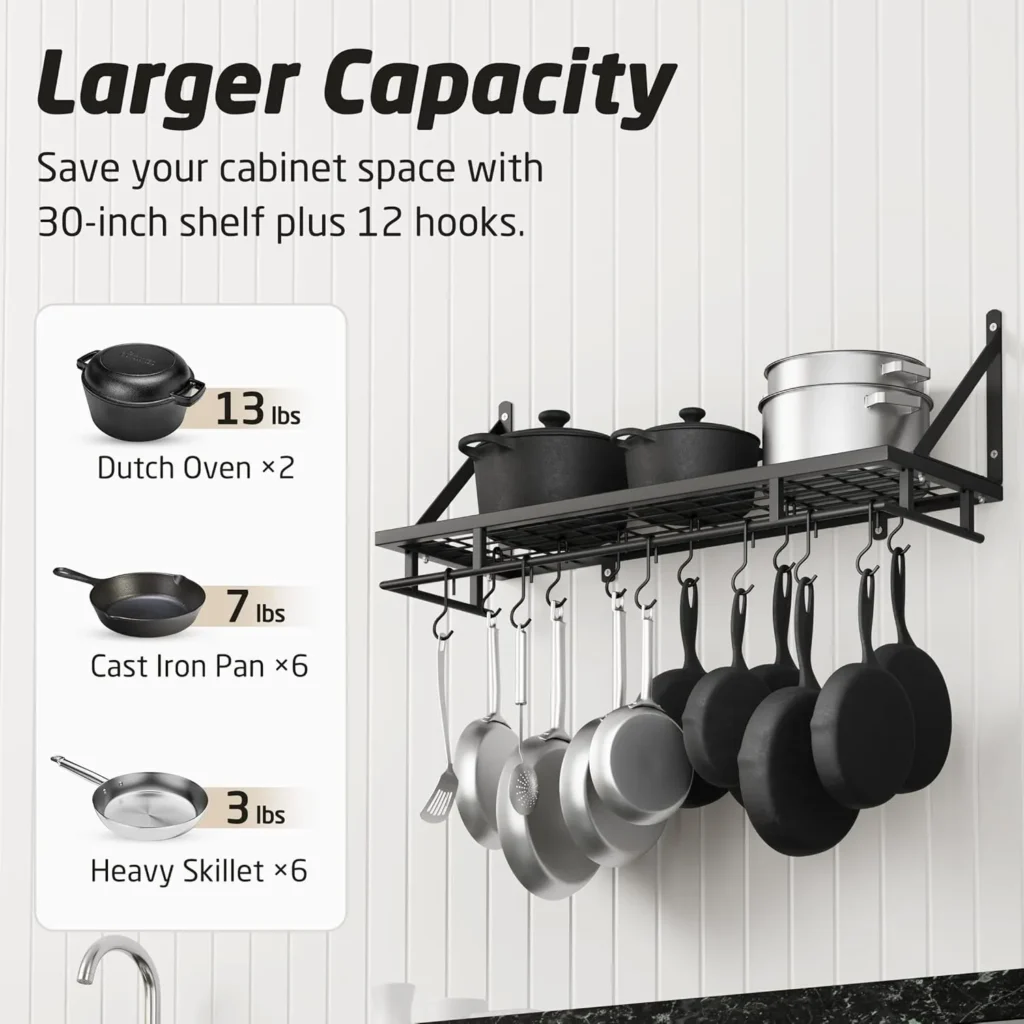
If you have the space and the style, a ceiling-mounted or wall-mounted pot rack is a stunning and supremely functional option.
- Pros: It’s a beautiful statement piece. It frees up all your cabinet space. It makes every pot instantly accessible and adds a professional chef’s-kitchen vibe.
- Cons: It requires installation into ceiling joists or wall studs (do not skip this step!). It can collect dust and kitchen grease over time, so you have to be diligent about cleaning.
- Best for: Those with larger kitchens and a collection of beautiful cookware they want to show off.
Step 4: Assembling Your Master System
Okay, you’ve purged, you’ve assessed, and you’ve bought your organizers. Now for the fun part: putting it all together.
- Clean Everything: Wipe down those empty cabinets. It’s your fresh start.
- Place Your Organizers: Install your drawer dividers, place your tiered shelves, or set up your pull-out systems.
- Load ‘Em Up:
- Place your most frequently used items in the most accessible spots—the front of the drawer, the top tier of the shelf, the easiest-to-reach hooks on the rack.
- Store by category and frequency of use. Group all saucepans together. All skillets together. All baking sheets together.
- Heavy items on the bottom. Always. This is for safety and stability. Your cast iron Dutch oven should not be on a high, precarious shelf.
- Lid Strategy: Implement your chosen lid solution. If you’re using a door rack or holder, place it right next to where the corresponding pots live.
The goal is to create a logical flow. When you’re cooking, you shouldn’t have to trek across the kitchen for a lid or dig for a pan. Everything for a single task should be within arm’s reach.
My Personal Kitchen Setup (For Inspiration)

Just so you know I’m not making this up, here’s exactly what I did in my own very-average-sized kitchen:
- Deep Drawer by the Stove: I installed a drawer organizer rack. This holds my everyday non-stick skillet, my stainless steel skillet, my saute pan, and my two most-used saucepans. Their lids slide right into the pot or stand next to them in the divider.
- Lower Cabinet to the Right of the Stove: This is for my less-frequent pots. I use a tiered shelf organizer. The top tier holds my smaller specialty pots (like a small butter warmer and a steamer insert). The bottom tier holds my medium-sized soup pot and a griddle. The lids are stored on the cabinet door using an over-the-door rack.
- Bottom of a Pantry Cabinet: This is where my heavy and specialty items live. My giant stockpot, my roasting pan, and my Dutch oven. They are just sitting there, not stacked, because I only need them a few times a year. Their lids are stored with them.
- Bakeware: I use a deep, lower cabinet with a simple, upright organizer (like a file sorter) for my baking sheets, cooling racks, and muffin tins. They all stand vertically on their sides. It. Is. Magic.
This system took me a weekend and maybe $100 in organizers. The return on investment in saved time and daily frustration is immeasurable.
Maintenance: Keeping the Chaos at Bay
An organization system is not a “set it and forget it” thing. It’s a living, breathing system.
- The One-In, One-Out Rule: Whenever you buy a new shiny piece of cookware, get rid of an old one. This prevents the creep of clutter.
- Do a Quick 5-Minute Tidy: While you’re waiting for the kettle to boil or the microwave to ding, quickly open the cabinet and make sure everything is standing up straight and in its place. It prevents a small mess from becoming a big one.
- Re-assess Every 6 Months or So: Your cooking habits change. Maybe you’ve gotten into baking and need to promote your baking sheets to a better spot. It’s okay to tweak the system!
You’ve Got This!
Look, I get it. Organizing the pots and pans cabinet ranks just above cleaning the gutters on the list of Fun Home Activities.
But the sheer bliss of opening a cabinet and finding exactly what you need, exactly when you need it, is a feeling that never gets old.
It’s not about having a Pinterest-perfect kitchen. It’s about making your life easier, one well-placed pot at a time. You deserve a kitchen that works for you, not against you.
So, are you ready to end the avalanche for good?
Steal my method, adapt it to your space, and take back your kitchen. Your future self, calmly whipping up a weeknight dinner without the cacophony of crashing metal, will thank you. 🙂
Now if you’ll excuse me, I’m going to go open my cabinet just to admire it. Don’t tell anyone. 😉
Featured image source