Hate that feeling when a deep drawer swallows your favorite spatula like it’s offering a sacrifice to the kitchen gods? Same here. Those “black hole” drawers waste time, energy, and, let’s be honest, your sanity.
Let’s fix that with practical, real-world Deep Kitchen Drawer Organization Ideas that make every inch reachable, visible, and ridiculously easy to keep tidy. FYI, I’ve tested most of these in busy, small kitchens where every centimeter counts, so you get the good stuff, not theory. 🙂
In This Article
- 1 1) Full-extension slides: see it all, grab it fast
- 2 2) Vertical dividers for pans, lids, boards
- 3 3) Two-tier risers: build a second level
- 4 4) Pegboard systems: custom-fit big cookware
- 5 5) Tiered insert trays for small stuff
- 6 6) Bins-in-a-drawer: labeled zones that behave
- 7 7) Corner drawers and swing-outs: fix the blind spot
- 8 8) Pull-out inner drawers: drawers inside drawers
- 9 9) Tall canisters and container families
- 10 10) Full pull-out racks for wraps, foils, and rolls
- 11 Bonus ideas that punch above their weight
- 12 What to put where: smart zoning for speed
- 13 Real-world combo layouts you can steal
- 14 Common mistakes (and how to avoid them)
- 15 Quick install checklist
- 16 What I’d choose first (IMO)
- 17 Tiny kitchens, big wins
- 18 Maintenance that keeps it tidy
- 19 Quick-hit product types to search for
- 20 Conclusion: no more black holes, promise
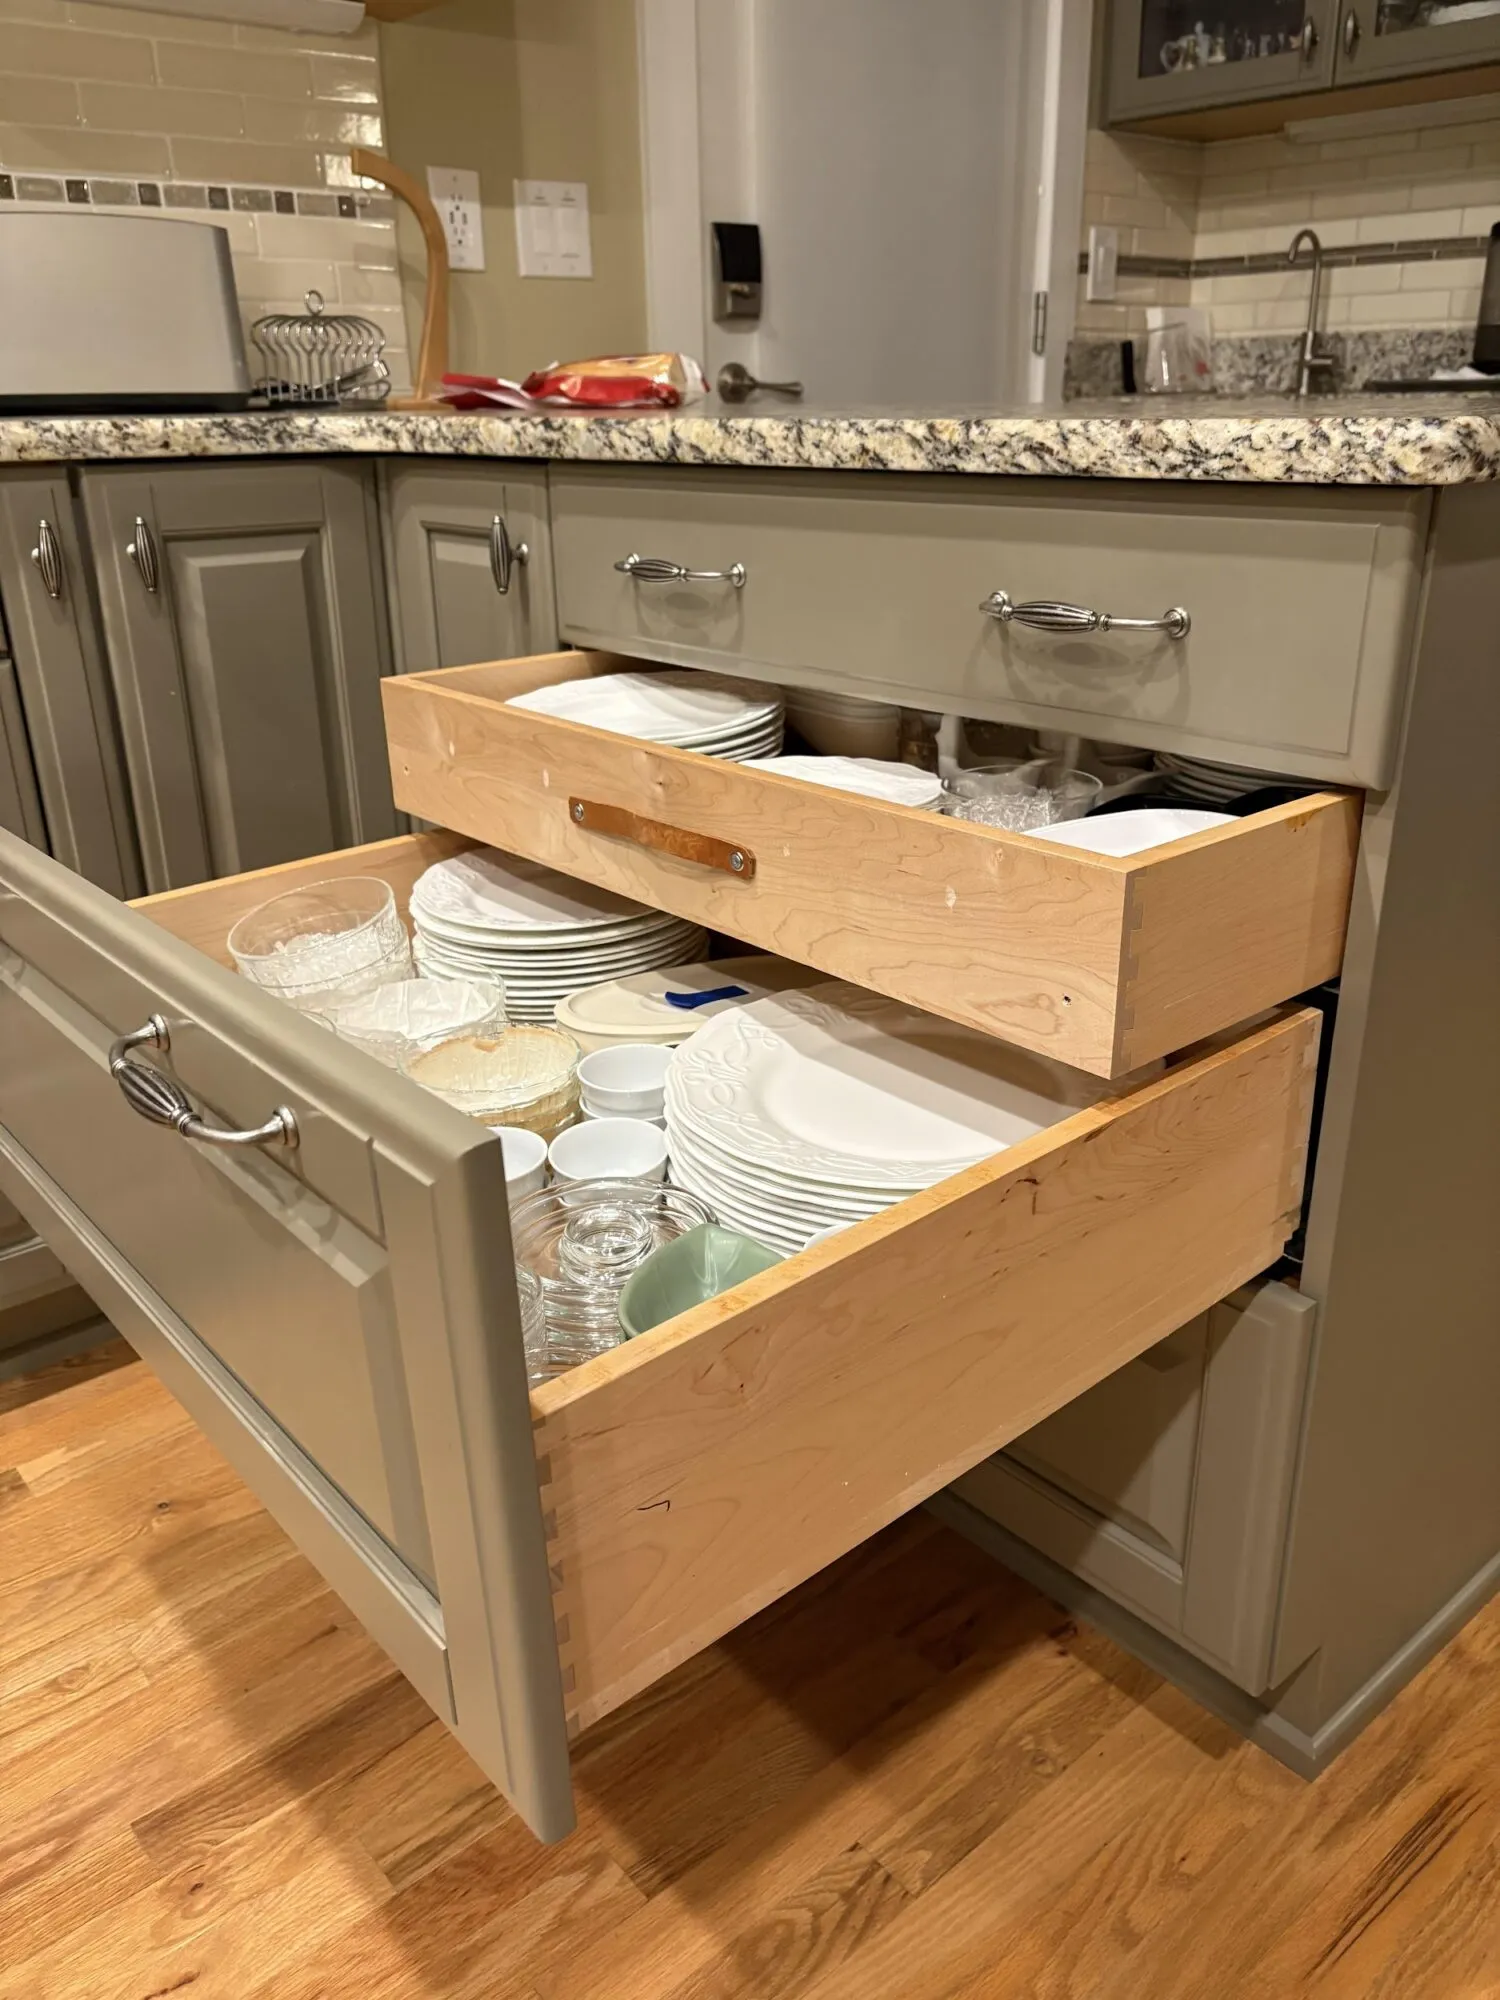
1) Full-extension slides: see it all, grab it fast
If your drawer doesn’t open fully, it’s not a deep drawer—it’s a trap. Install full-extension drawer slides so the back row stops pretending it’s Narnia and starts acting like storage you actually use.
You’ll see everything at once and stop rebuying what you already own. Pair this with sturdy boxes so nothing topples when you pull to the max.
- Why it works: Full extension makes every inch visible and reachable without digging.
- Pro tip: Combine with soft-close slides to prevent shifting your perfectly arranged rows.
2) Vertical dividers for pans, lids, boards
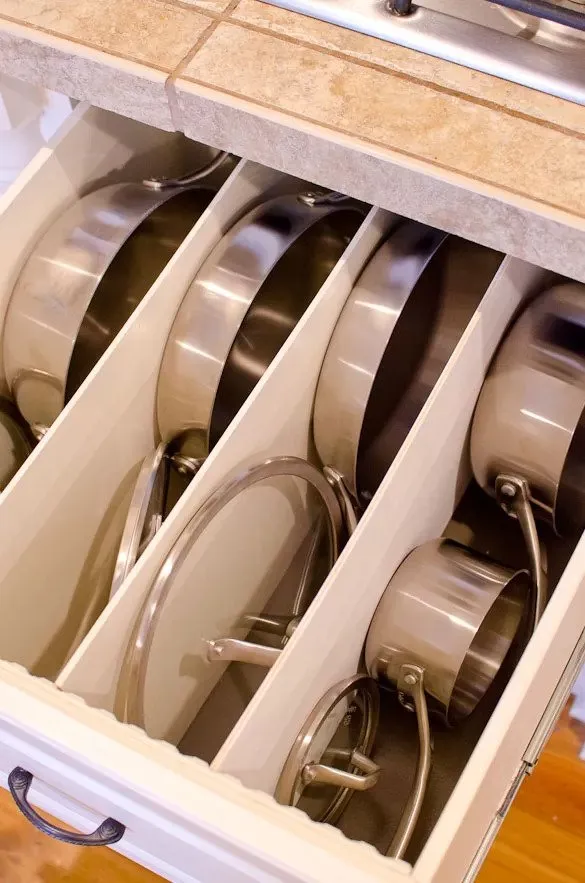
Deep drawers shine when you stand things up. Use adjustable vertical dividers for cutting boards, baking sheets, pans, and even pot lids. Store “like with like,” and keep the tallest pieces at the back for easy scanning. Ever noticed how stores rack trays vertically? Same logic, zero chaos.
- Ideal items: Sheet pans, cooling racks, platters, chopping boards, trays.
- Setup tip: Choose dividers that lock in place so they don’t slide under weight.
3) Two-tier risers: build a second level
Turn dead air space into usable upper tiers with stackable risers or tiered organizers. You create a mezzanine inside the drawer so light items (measuring cups, small bowls) sit above heavier ones (pots, appliances). It’s like adding a shelf—without losing access to the bottom.
- Best for: Deep drawers that always feel half-empty at the top.
- Keep it stable: Use non-slip mats or risers with legs that lock.
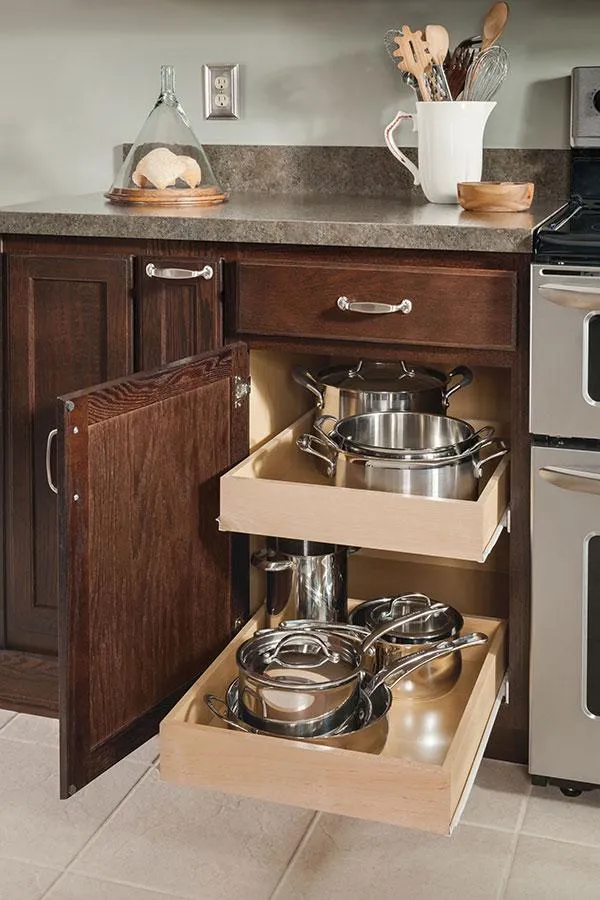
4) Pegboard systems: custom-fit big cookware
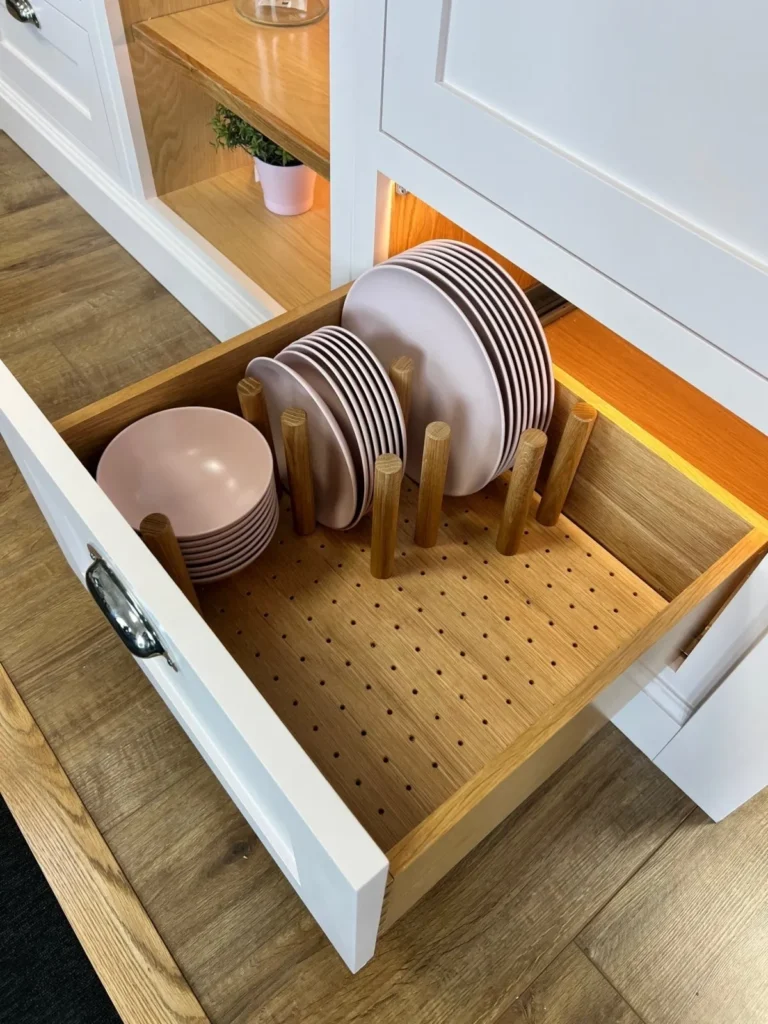
For pots, pans, mixing bowls, and oddly sized lids, a drawer pegboard locks your layout in place. Move the pegs to frame each item so nothing shifts when you open or close the drawer. IMO, this beats loose bins for heavy cookware because it’s sturdy, grippy, and endlessly customizable.
Must Check : Stop the cabinet shuffle: 10 kitchen cabinet organization layout based on how you actually cook
- Why it’s great: Heavy items don’t slide; lids stand upright; sets nest perfectly.
- Setup tip: Map your most-used set in the front-left for fastest reach.
5) Tiered insert trays for small stuff
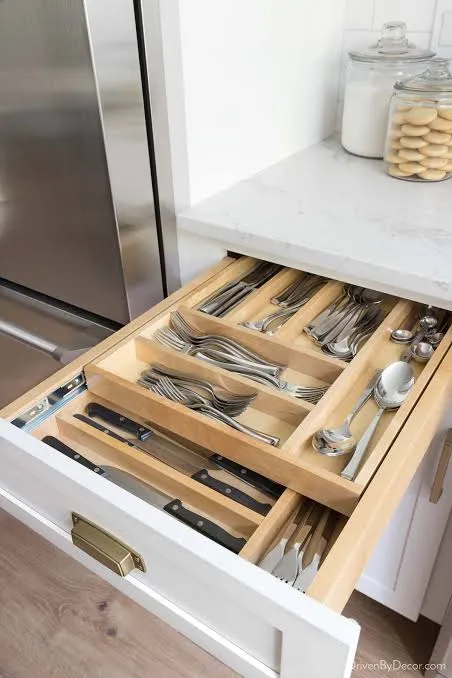
If utensils scatter into a deep abyss, add a tiered cutlery or gadget tray that glides back and forth. You’ll keep daily tools on the top tier and specialized tools below. Ever wondered why tiered spice racks work? Same visibility, same “grab in 2 seconds” effect.
- What to store on top: Everyday spatulas, tongs, peelers, scissors.
- Bottom tier: Graters, zesters, garlic presses, pastry gadgets.
6) Bins-in-a-drawer: labeled zones that behave
Treat a deep drawer like a mini cabinet: line it with clear, labeled bins. Create zones—snacks, baking, meal prep, breakfast—which makes it insanely easy for everyone to put things back correctly. If you’ve got kids or partners who “can’t find things,” this saves arguments. You’re welcome.
- Label logic: Use category names, not item names, for flexibility (e.g., “Baking” not “Flour”).
- Sizing: Choose low-profile bins in the front and taller ones in the back for visibility.
7) Corner drawers and swing-outs: fix the blind spot
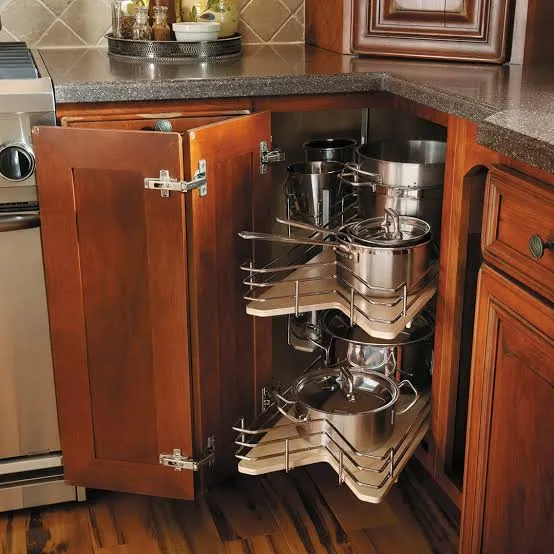
If your deep drawer sits near a corner or you’re dealing with a blind corner cabinet, use corner drawer kits or swing-out/slide-out corner units. They bring contents out to you, which means zero crawling on the floor to rescue a saucepan from the shadows. Yes, it feels magical. No, you won’t miss the old setup.
- Options: Swing-out trays, blind-corner pull-outs, diagonal corner cabinetry.
- Payoff: Full use of the hardest-to-reach real estate without bruised shins.
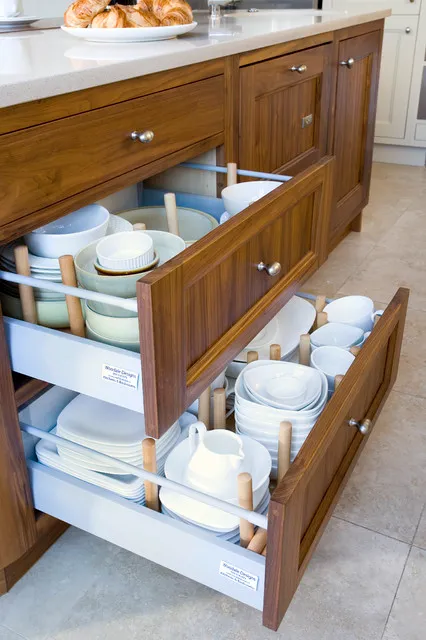
8) Pull-out inner drawers: drawers inside drawers
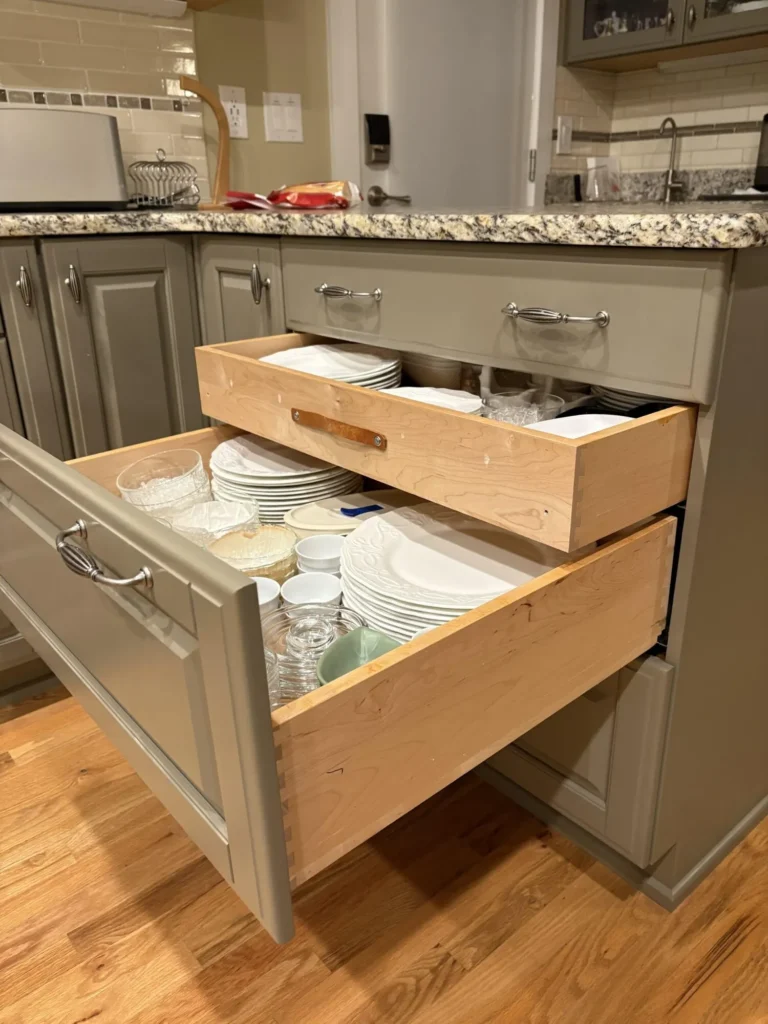
Install shallow pull-out trays inside the deep drawer. You create layers: the top pull-out holds spices, wraps, or tea tins; the bottom holds bulkier items like pots, mixers, or food storage sets. It’s a neat hack when you can’t replace the whole drawer but still want better access.
- Good use cases: Pantries-in-a-drawer, breakfast stations, baking kits.
- Quick win: Full-extension inner trays prevent the dreaded arm-deep rummage.
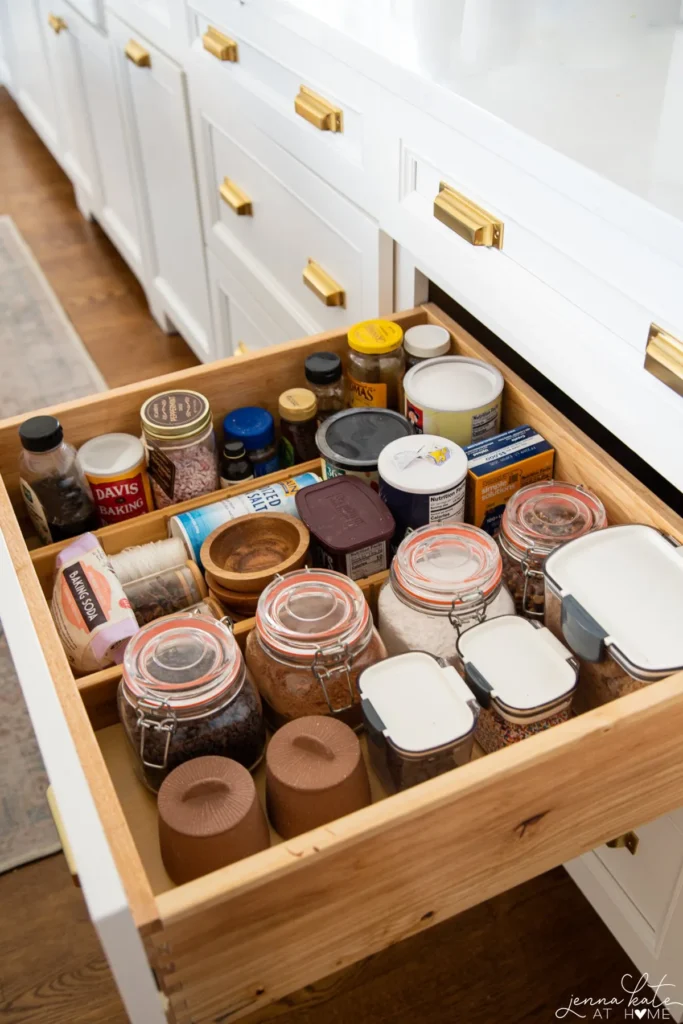
9) Tall canisters and container families
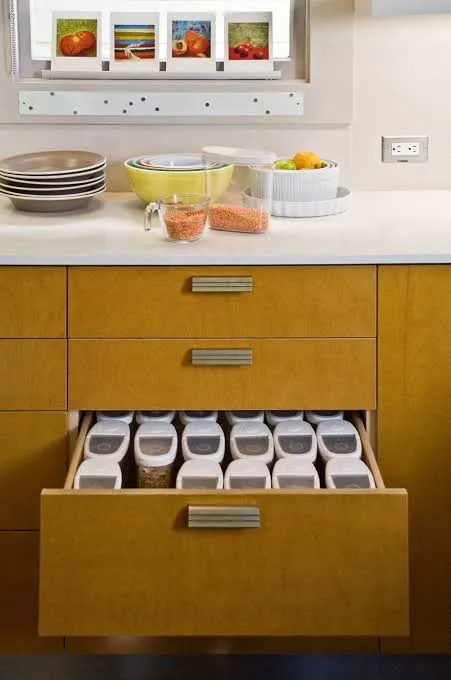
Go vertical with uniform, stackable containers—grains, snacks, pasta, coffee, and baking supplies all store tall and tight in deep drawers. Standardize the brand and size so everything Tetris-fits. You’ll see levels, consume FIFO, and stop losing half-open packets at the back. Ever wondered why pro pantries look so calm? This is the move.
- Label clearly: Front-facing labels + capacity notes help refills stay consistent.
- Access tip: Place heaviest containers with grips toward the handle side.
10) Full pull-out racks for wraps, foils, and rolls
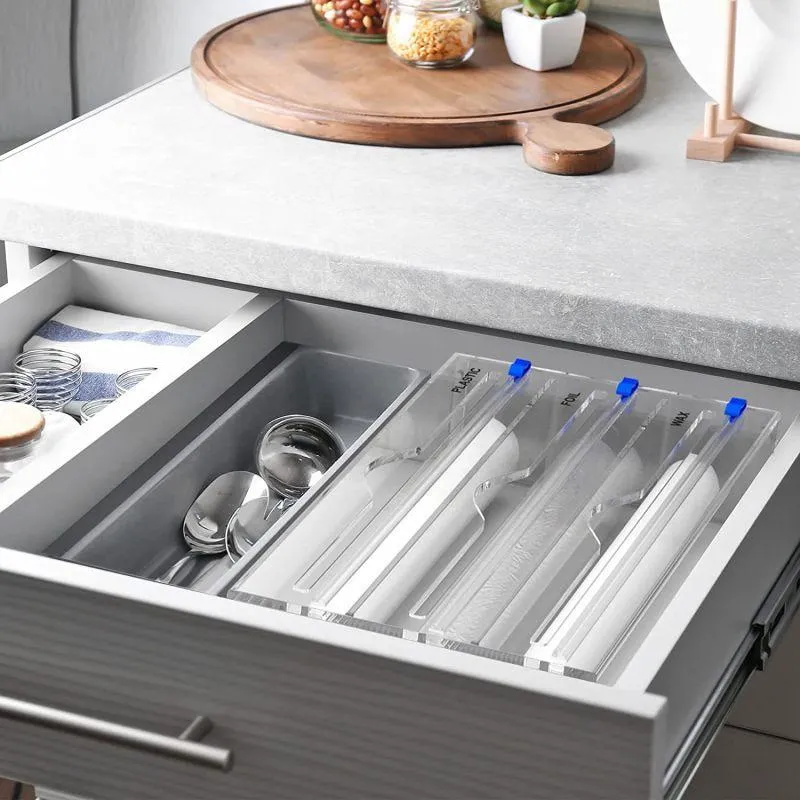
Line a deep drawer with slim pull-out racks that hold foil, parchment, cling film, zip bags, and freezer paper upright. You grab and go—no unspooling, no crushed boxes. This also frees a whole cabinet shelf for better things than 20 half-crushed foil boxes (we’ve all been there).
- Bonus: Mount a cutter accessory inside the drawer front for clean wraps.
- Organization: Keep extras in the back row, active rolls in the front row.
Bonus ideas that punch above their weight
- Drawer liners for grip and easy cleanup: Liners protect the base and keep organizers from sliding, which keeps your layout intact after every open/close. Choose wipeable, non-slip material.
- Hidden charging or utility drawers: If your deep drawer sits near a prep area, convert one into a tech/utility hub with outlets and organizers for scales, thermometers, timers, and labelers. Less counter clutter, more flow.
- Appliance “garage” drawers: Move the blender, toaster, immersion blender, or mixer to a deep drawer with vertical dividers and cord channels. You’ll keep counters clear while everything stays plugged or easy to deploy.
What to put where: smart zoning for speed
- Front-left: Daily-use tools or containers you grab multiple times a day. This is your prime, ergonomic spot—treat it like VIP seating.
- Middle: Heavy cookware or bins you use weekly—balanced weight, easy lift-out.
- Back/top tier: Infrequent or seasonal items, backups, and refills. Keep them visible but not hogging prime space.
Real-world combo layouts you can steal
- The Baker’s Drawer: Vertical dividers for trays on the left, a tiered insert for cutters and piping tips on the right, and canisters for flour and sugar in the back. You’ll prep faster and clean up without a mess.
- The Everyday Cooking Drawer: Pegboard for a pot and pan set, a fixed slot for lids, and a small bin for ladles and tongs. It’s fast, logical, and compact.
- The Lunch & Snack Station: Clear bins for snacks, wraps, and containers, plus a mini rack for zip bags. Kids can self-serve without wrecking your system. Freedom at last.
Common mistakes (and how to avoid them)
- Over-stacking heavy items: Deep drawers tempt stacking, but that kills access and strains slides. Use vertical dividers or pegboards instead.
- Random bins that don’t fit: Mismatched container sizes waste space and cause shifting. Measure first, then buy uniform pieces that fit your drawer’s footprint.
- Ignoring corners: Blind corners aren’t “just annoying”—they’re fixable with swing-outs or corner drawers, and the difference feels huge.
Quick install checklist
- Measure interior width, depth, and height (clearance to the top rail matters).
- Choose the right hardware: full-extension, soft-close slides rated for your load.
- Map your zones on paper before buying organizers—then buy to fit the plan.
What I’d choose first (IMO)
- For cookware: Pegboard base + lid channel + full-extension slides. It’s durable and ergonomic.
- For gadgets: Tiered insert + labeled gadget bins so nothing tangles.
- For corners: Swing-out or blind-corner pull-out—life-changing for small kitchens.
Tiny kitchens, big wins
- Swap one base cabinet for pull-out drawers and you’ll feel like you doubled storage. The ease of seeing everything reduces duplicates and boosts cooking flow.
- Use taller containers and tiered organizers to capture vertical space in deep drawers instead of stacking stuff flat.
Maintenance that keeps it tidy
- Quarterly edit: Pull, wipe, relabel, and reset. It takes 20 minutes, and you’ll save hours later.
- Use “return-to-home” rules: Everyone puts items back in the labeled zone—no exceptions. Yes, even guests. 😉
Quick-hit product types to search for
- “Full-extension soft-close slides 100 lb” for heavy drawers.
- “Adjustable vertical pan dividers for drawers.”
- “Drawer pegboard insert cookware.”
- “Tiered utensil tray gliding.”
- “Blind corner pull-out organizer” or “swing-out corner shelves.”
Conclusion: no more black holes, promise
You don’t need a bigger kitchen—you need smarter drawers. With full-extension slides, vertical dividers, tiered systems, pegboards, and corner pull-outs, you’ll reach every corner without crouching, digging, or muttering unprintable words under your breath. Start with one deep drawer this weekend, set zones, and build from there. Your future self will open those drawers and smile like a weirdo, and honestly, that’s the goal. FYI, a little planning beats wrestling a stuck pot at 7 a.m. every time. :)