The dream of an outdoor kitchen usually dies the moment you see the price tag on a pre-fab grill island. Five thousand dollars for a glorified table with a hole in it? No thanks. But you don’t need a contractor or a second mortgage to cook outside in style.
You can absolutely build a killer setup for under a grand if you get creative with materials and stop trying to replicate a magazine spread perfectly. My own backyard setup cost less than a new iPhone, and honestly, it cooks the same burgers as the expensive ones.
Let’s explore the Outdoor Kitchen Diy on a Budget and look at how you can pull this off without your backyard looking like a construction site.
In This Article
- 1 1. The “IKEA Hack” Rolling Station
- 2 2. The Cinder Block & Stucco “Built-In”
- 3 3. The Repurposed Potting Bench
- 4 4. The Galvanized Stock Tank Island
- 5 5. Tile-Over-Plywood Countertops
- 6 6. The “Pass-Through” Window Shelf
- 7 7. Modular Restaurant Prep Tables
- 8 8. The Reclaimed Pallet Bar
- 9 9. A Drop-In Cooler Station
- 10 10. The “Skinned” Grill
- 11 11. Vertical Storage & Lighting (The “Vibe” Layer)
- 12 What Makes It Look “Cheap” (And How to Avoid It)
- 13 Final Thoughts
1. The “IKEA Hack” Rolling Station
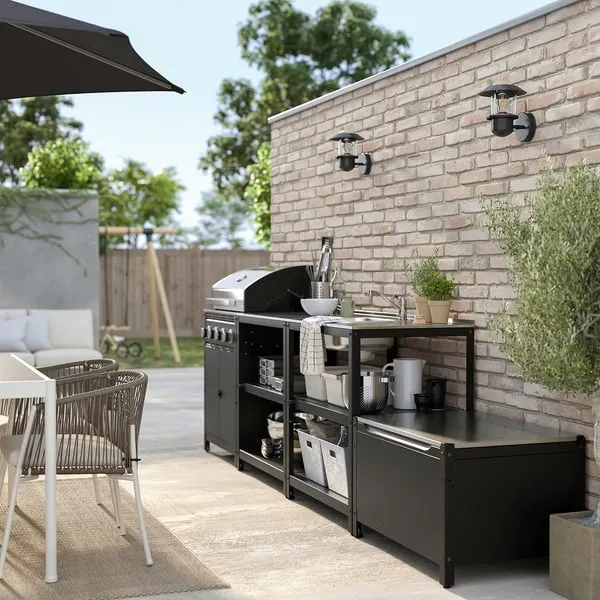
We all know IKEA for indoor furniture, but their stainless steel/outdoor lines are absolute gold for budget outdoor kitchens. Specifically, look at the GRILLSKÄR or BROR series. You aren’t just buying a cart; you are buying the bones of your kitchen.
Why this works:
These units are modular. You buy two or three, line them up, and bolt them together. Suddenly, you have a six-foot stainless steel prep station with shelves. To make it look “custom” rather than “I bought this yesterday,” focus on the placement.
- Anchor it visually: Place the carts against a wall or a slat fence.
- Add weight: Place heavy potted plants on the bottom shelves to hide the wheels (or remove the wheels entirely).
- Uniformity is key: Use matching bins on the shelves to store charcoal and tools.
This method gives you that industrial, professional chef vibe for about $300–$500, depending on how many units you grab.
2. The Cinder Block & Stucco “Built-In”
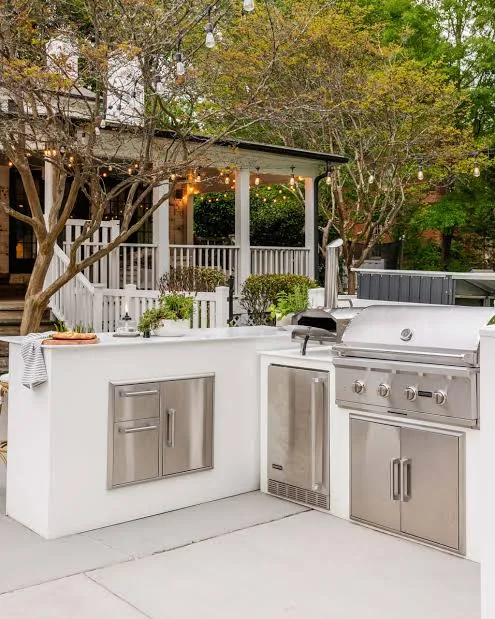
If you want the look of a permanent stone structure without the masonry price, cinder blocks are your best friend. They cost about two bucks a piece. You stack them, bond them with construction adhesive or mortar, and you have a rock-solid base.
The secret sauce:
Don’t leave them gray and exposed unless you want your patio to look like a prison yard :/ . Coat the exterior with surface-bonding cement or stucco.
- Stack the blocks: Create a “U” or “L” shape.
- Leave a gap: Measure specifically for your grill to slide in.
- Finish it: Trowel on the stucco. It dries white or you can paint it.
For the countertop, pour your own concrete slabs or use large pavers. This entire project creates a heavy, permanent structure that looks like you paid a mason thousands of dollars. Total cost often lands around $400.
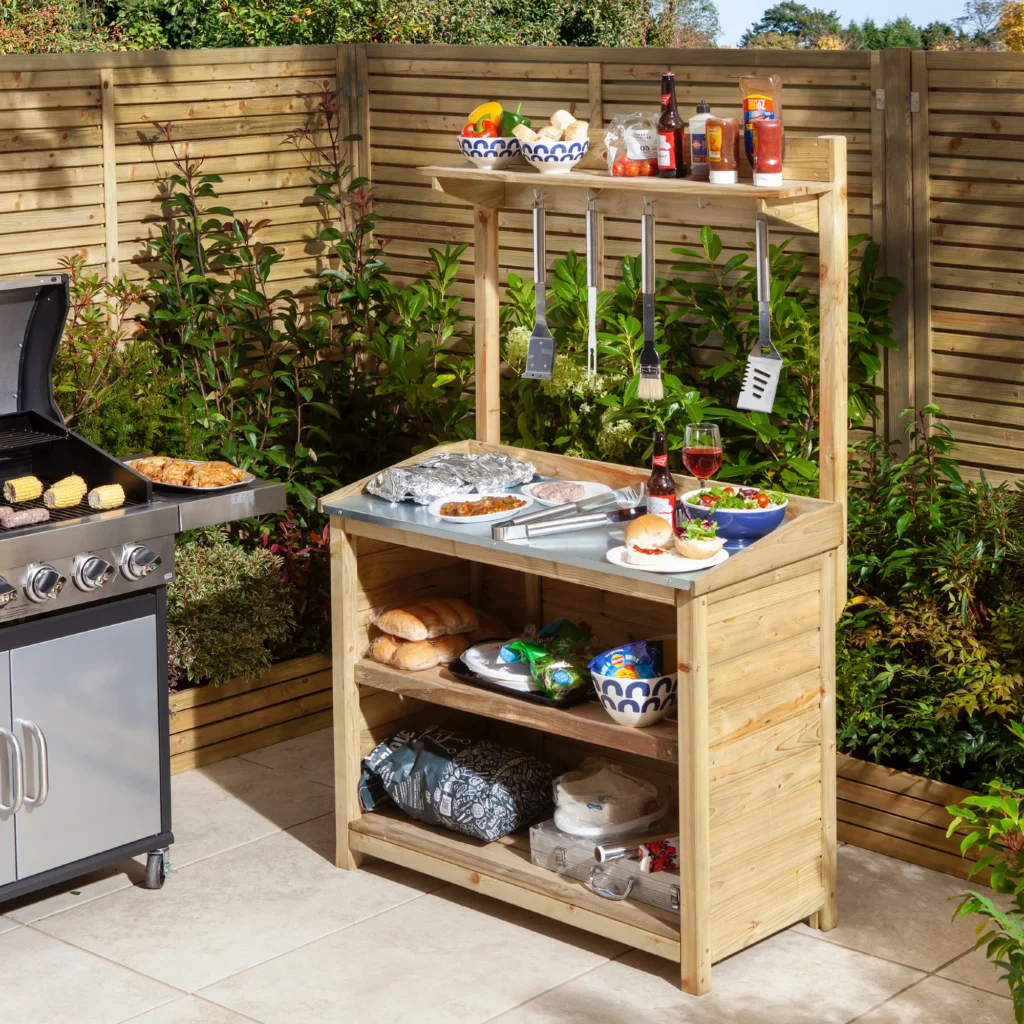
3. The Repurposed Potting Bench
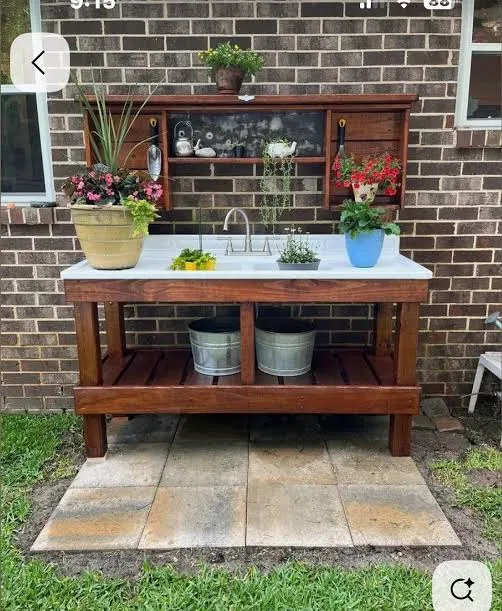
Have you ever noticed that a “potting bench” looks suspiciously like an “outdoor kitchen prep station”? Potting benches often come with a built-in sink basin (meant for soil) and shelves.
The Strategy:
Buy a sturdy wood potting bench. These usually run $150–$250. Then, upgrade it.
- Swap the basin: Take out the flimsy plastic soil bin and drop in a stainless steel hotel pan filled with ice for drinks.
- Add a faucet: If you don’t want to run plumbing, hook up a garden hose to a basic cold-water faucet.
- Seal the wood: This is crucial. Factory finishes on these benches are weak. Apply a marine-grade spar urethane to protect it from rain and grease.
This is the fastest route to a functional station with water access. FYI, I used this method for a dedicated “pizza station” and it works perfectly for holding the oven and prepping dough.
4. The Galvanized Stock Tank Island
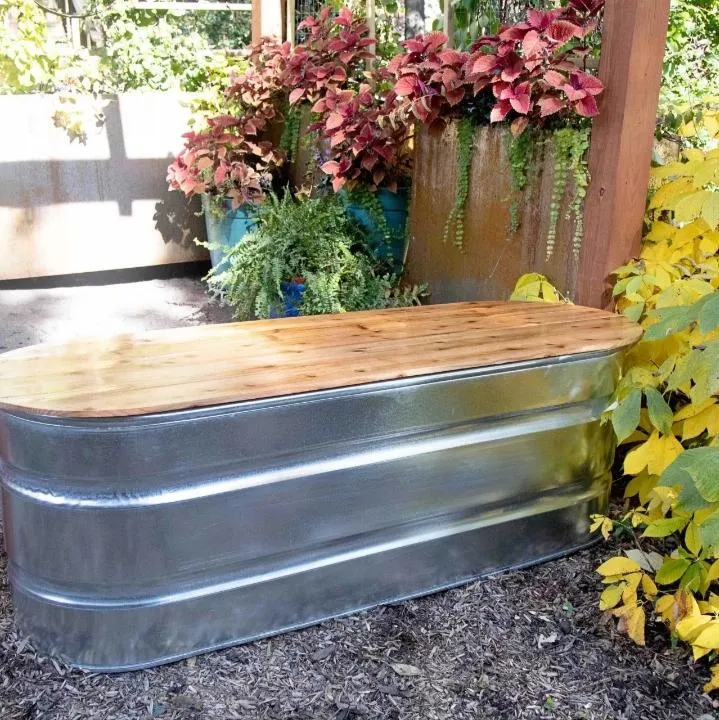
The modern farmhouse aesthetic is still huge, and nothing screams “rustic-chic” like a galvanized stock tank. You usually see these used as plunge pools, but they make incredible kitchen islands.
How to execute this:
Flip a 4-foot or 6-foot stock tank upside down. This becomes your base. It’s weather-proof, sturdy, and visually interesting.
Check Next:
- The Top: You need a solid surface. Cut a piece of butcher block (seal it well!) or exterior-grade plywood topped with galvanized sheet metal.
- Cut-outs: Use an angle grinder to cut a door in the side of the tank. Use the cutout piece as the door itself by adding hinges. Now you have storage inside the tank.
This creates a massive, unique focal point for your patio. It’s distinct, durable, and costs roughly $300 total.
5. Tile-Over-Plywood Countertops
Granite and quartz blow the budget immediately. But you can get the look of high-end stone or fun patterns using ceramic tile. You just need a solid substrate.
The Build:
- Build a frame: Use pressure-treated 2x4s.
- Add the base: Screw down exterior-grade plywood.
- Waterproof: Add a layer of cement backer board (like HardieBacker).
- Tile it: Use large-format porcelain tiles (fewer grout lines) or patterned cement tiles.
Warning: Grout is the enemy outdoors. It stains and cracks. Use an epoxy grout or a high-quality sealer. This approach lets you mimic a Mediterranean villa look for the price of a trip to Home Depot. IMO, this is the best way to inject color into your design.
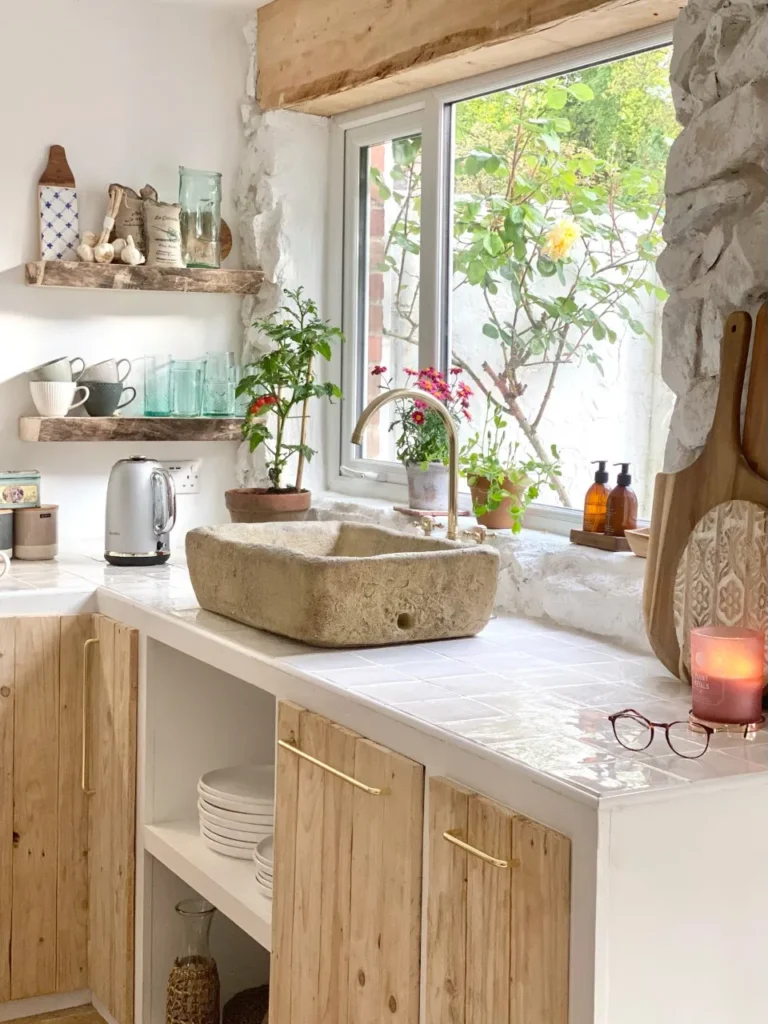
6. The “Pass-Through” Window Shelf
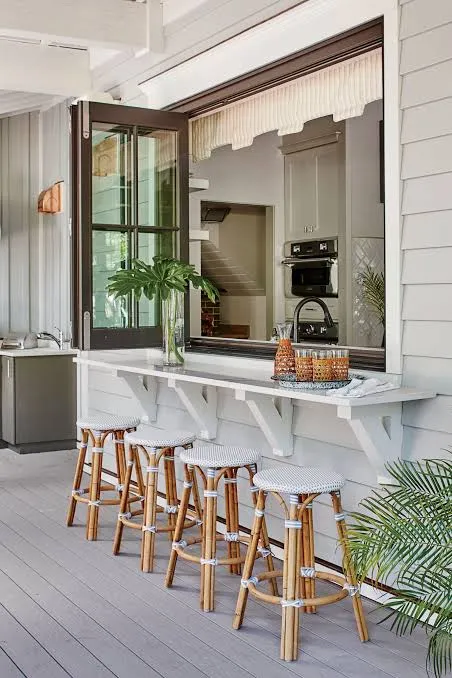
Why build a whole new kitchen when you have a perfectly good one inside? If your indoor kitchen layout puts the sink or prep area against an exterior wall with a window, utilize it.
The Concept:
Install a wide, sturdy shelf directly under the kitchen window on the outside of the house. Add two bar stools.
- Material: Live-edge wood looks expensive here, or even a simple piece of treated lumber stained dark.
- Brackets: Use heavy-duty, decorative iron brackets.
- Function: Open the window. Pass food, drinks, and dirty dishes back and forth.
You eliminate the need for an outdoor sink or fridge because the indoor ones are right there. This “kitchen” costs about $100 and connects your indoor and outdoor entertaining spaces seamlessly.
7. Modular Restaurant Prep Tables

Forget “residential” outdoor furniture. Go to a restaurant supply store (or their website). Stainless steel prep tables are designed for abuse, heat, and sanitation.
Why choose commercials?
They are cheaper than “patio furniture” because they aren’t marketed to homeowners. You can get a robust, 48-inch stainless steel table for under $200.
- The Setup: Buy two. Put your tabletop grill or pizza oven on one. Use the other for chopping and plating.
- Storage: The bottom shelf is open. Use galvanized buckets or wooden crates to organize charcoal, wood chips, and tongs.
- Modification: Add hooks to the side rim to hang your towels and grill brush.
This creates a sleek, “Top Chef” aesthetic that says you care about the cooking, not just the fluff.
8. The Reclaimed Pallet Bar
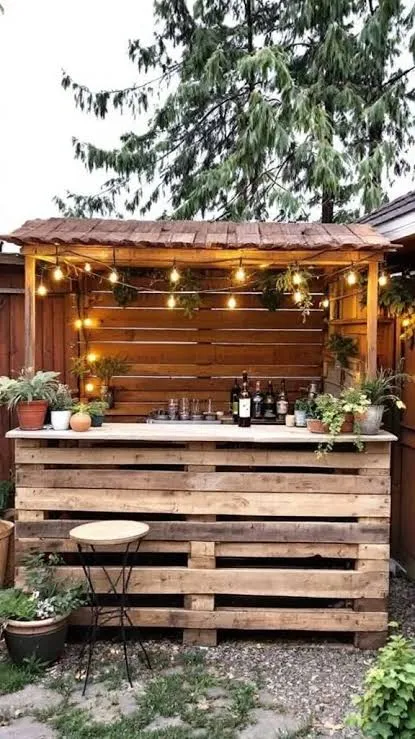
Pallets are free or cheap, but they often look trashy. The trick to making a pallet bar look high-end is finishing work. You aren’t just stacking raw wood; you are using the pallets as a frame.
Making it look legit:
- Cladding: Don’t leave the pallet slats visible. Cover the front with horizontal shiplap, corrugated metal, or cedar pickets.
- The Top: Don’t use pallet wood for the counter (too many splinters/chemicals). Splurge on a nice piece of sealed pine or concrete pavers for the top.
- Paint: Paint the base a deep charcoal or black. It hides imperfections and looks modern.
You essentially build a box frame for free and spend your budget strictly on the countertop and paint. Total cost? Maybe $150.
9. A Drop-In Cooler Station
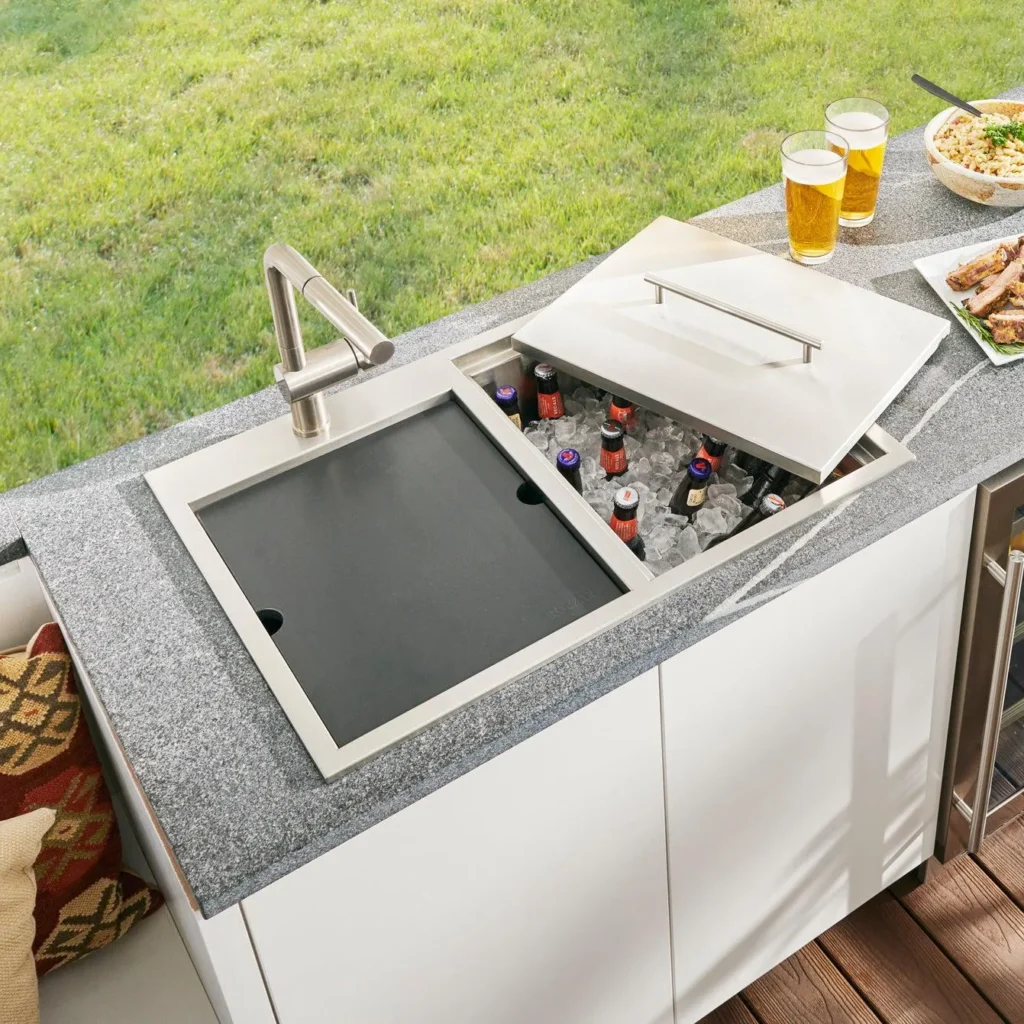
Outdoor fridges are a nightmare. They are expensive, they break constantly in extreme weather, and they use electricity. A built-in cooler is superior for a budget build.
The Hack:
Build a simple wood frame (or use the countertop idea from #5). Cut a rectangular hole in the countertop. Take a standard cooler (or a plastic hotel pan), remove the lid (or hinge it), and drop it into the hole.
Why it wins:
- Insulation: Standard coolers hold ice longer than cheap mini-fridges stay cold.
- Drainage: Drill a hole in the bottom of the cooler and run a tube out the bottom of your island. As the ice melts, it drains onto the lawn.
- Cost: A cooler costs $40, a fridge costs $400+.
You get cold drinks right next to the grill without wiring electricity. Smart, right?
10. The “Skinned” Grill

You probably already own a grill. It’s likely a standalone cart with wheels. Building a whole new island often means buying a “drop-in” grill head, which is pricey. Instead, keep your current grill and build around it.
The Visual Trick:
Build a U-shaped island (using the wood or cinder block methods mentioned above) that fits your existing grill snugly.
- The Fit: Leave a few inches of clearance for heat venting—this is critical for safety!
- The Look: Once the grill is rolled into the nook, the side tables of the grill should sit flush with your new countertops.
- The Wheels: Create a removable “kick plate” at the bottom to hide the grill’s wheels.
To the naked eye, it looks like a built-in unit. But when the grill eventually rusts out, you just roll it out and buy a new standard cart grill.
11. Vertical Storage & Lighting (The “Vibe” Layer)
A kitchen isn’t just a counter; it’s a room. If your setup is just a table against a fence, it feels temporary. You need to define the vertical space to make it feel like a “kitchen.”
Budget Ambience:
- Vertical Garden: Screw a piece of lattice or a few horizontal boards to the fence behind your prep station. Hang small pots of basil, rosemary, and thyme. It’s functional decor.
- Bistro Lights: String lights are non-negotiable. Run them from the house to a pole near the grill. It creates a “ceiling” that defines the space.
- Hooks and Rails: Install a simple metal rail (like IKEA’s SUNNERSTA) on the wall or your island to hang utensils.
This “layering” costs under $100 but makes the difference between “a grill in the yard” and “an outdoor kitchen.”
What Makes It Look “Cheap” (And How to Avoid It)
You can use the cheapest materials on earth, but poor execution will give you away. Avoid these common pitfalls to ensure your budget project looks premium:
- Ignoring the Level: If your island is crooked, it looks like a failed shop class project. Spend time leveling the ground or using adjustable feet.
- Unfinished Edges: Exposed plywood edges or raw cut timber scream “unfinished.” Use trim, edge banding, or paint to seal every raw edge.
- Clutter: A $10,000 kitchen looks cheap if it’s covered in rusty tools and ash. Keep your budget setup spotless.
Final Thoughts
You don’t need a contractor to enjoy cooking under the stars. Whether you stack concrete blocks or hack an IKEA cart, the food tastes the exact same. Start with one module—maybe just the prep table—and expand later.
The best part? If you hate it in five years, you aren’t out five grand. Now, go measure your patio and get to work 🙂 .