Here’s exactly how to pull off gorgeous, budget-friendly diy christmas kitchen decor with dollar-store finds, step by step, without the stress or the sticker shock.
Yes, it looks high-end, and yes, it holds up while the oven does its annual peppermint-bark marathon. Ready to make the heart of the home feel festive without draining the gift fund? Let’s get to it.
In This Article
- 1 Why dollar-store Christmas decor works
- 2 What you’ll pick up first
- 3 Step-by-step plan (the smart route)
- 4 Coffee & Cocoa Bar Glow-Up
- 5 Cabinet Wreaths & Ribbon (Zero Clutter)
- 6 Sink & Window Garland (The Charming Focal Point)
- 7 Open Shelves or Backsplash Moment
- 8 Pizza pan “sign” (easy showstopper)
- 9 Wooden spoon wall accents
- 10 Centerpiece That Doesn’t Steal Space
- 11 Three Quick DIYs That Look “Boutique”
- 12 1) Beaded charger plate sign
- 13 2) Farmhouse pedestal riser
- 14 3) Glitter lid candy jar upgrade
- 15 Gingerbread Touches (Trend-Proof & Adorable)
- 16 Functional Decor That Actually Works
- 17 Color & Style Guide (Keep It Cohesive)
- 18 Pro Tricks for a High-End Finish
- 19 Practical Layout Do’s & Don’ts
- 20 Dollar-Store Shopping Checklist
- 21 Quick Win: 60-Minute Setup Plan
- 22 A few friendly opinions (from many holiday kitchen battles)
- 23 Final touch-ups that matter
- 24 Wrap-up
Why dollar-store Christmas decor works
Dollar-store decor stretches the budget while keeping style on point, especially when mixing a few natural elements like greenery with simple upgrades like paint, ribbon, and beads for a high-end look.
With a few techniques—decoupage, chalk paint, beaded trim, and clever repurposing—you can turn pizza pans, wooden spoons, jars, and trays into cozy, durable decor that looks boutique-level.
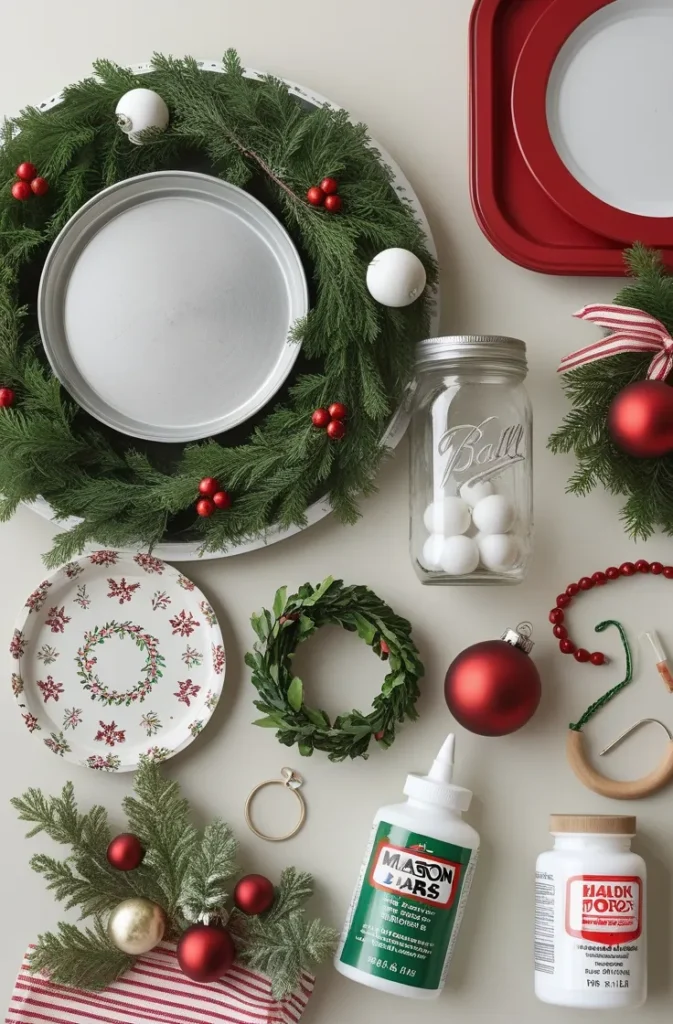
What you’ll pick up first
Grab basics that can become multiple projects: pizza pans, charger plates, mason jars, faux greenery, ribbon, half-wood beads, craft sticks, Mod Podge, acrylic or chalk paint, hot glue, and cabinet knobs or drawer pulls if available.
For a cohesive “classic kitchen Christmas,” pick one palette—red-and-white, natural woods with evergreen, or gingerbread neutrals—then buy ribbon and napkins that match.
Step-by-step plan (the smart route)
You’ll decorate in zones: coffee/cocoa bar, cabinet fronts, sink/window, open shelves or a backsplash moment, and a compact centerpiece that doesn’t block baking. Why zones? Because targeted styling looks intentional and saves time and money.
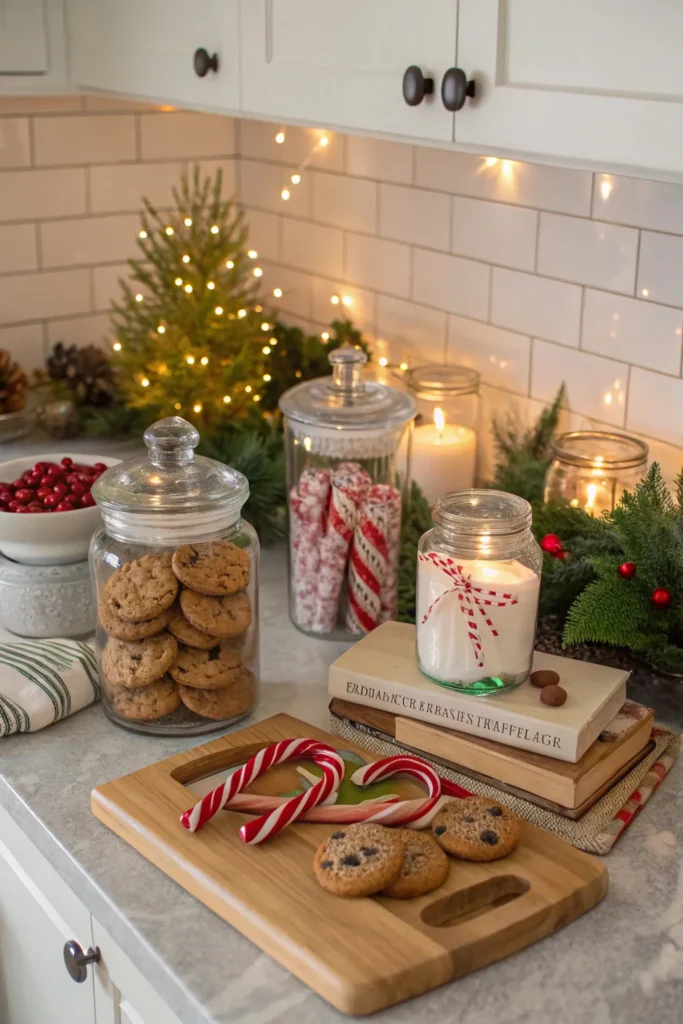
Coffee & Cocoa Bar Glow-Up
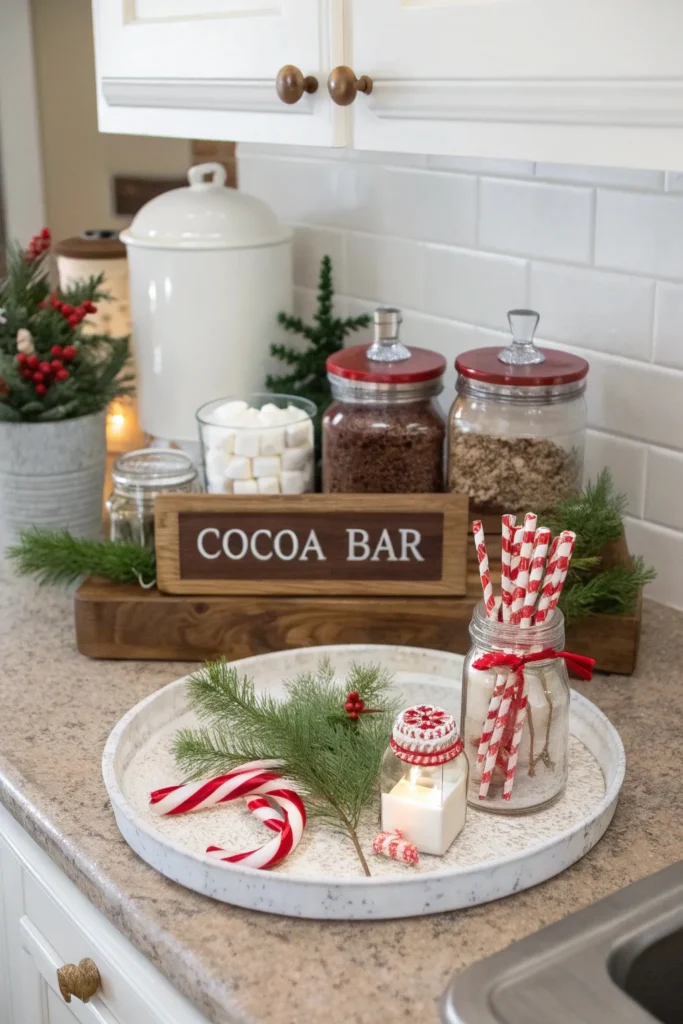
Create a mini-cozy bar that screams “five-minute cocoa break,” then add subtle sparkle. Ever noticed how a tiny beverage station makes a whole kitchen feel festive? Exactly.
- Use a dollar-store tray or shallow pizza pan as the base and decoupage it with a seasonal napkin; seal with Mod Podge for wipe-ability.
- Add labeled jars for cocoa, marshmallows, and peppermint sticks using mason jars and simple ribbon ties; tie on a tiny sprig of greenery.
- Make a mini “Cocoa Bar” sign from a charger plate or small wood panel—paint, stencil or hand-letter, and edge with half-wood beads for a boutique finish.
- Style with one battery tea light lantern or string a short micro-LED strand around the tray edge to add warmth without cords.
Pro tip: Keep it at arm’s reach but off the main prep surface—end of the counter, breakfast nook cart, or a side shelf works best IMO.
Cabinet Wreaths & Ribbon (Zero Clutter)
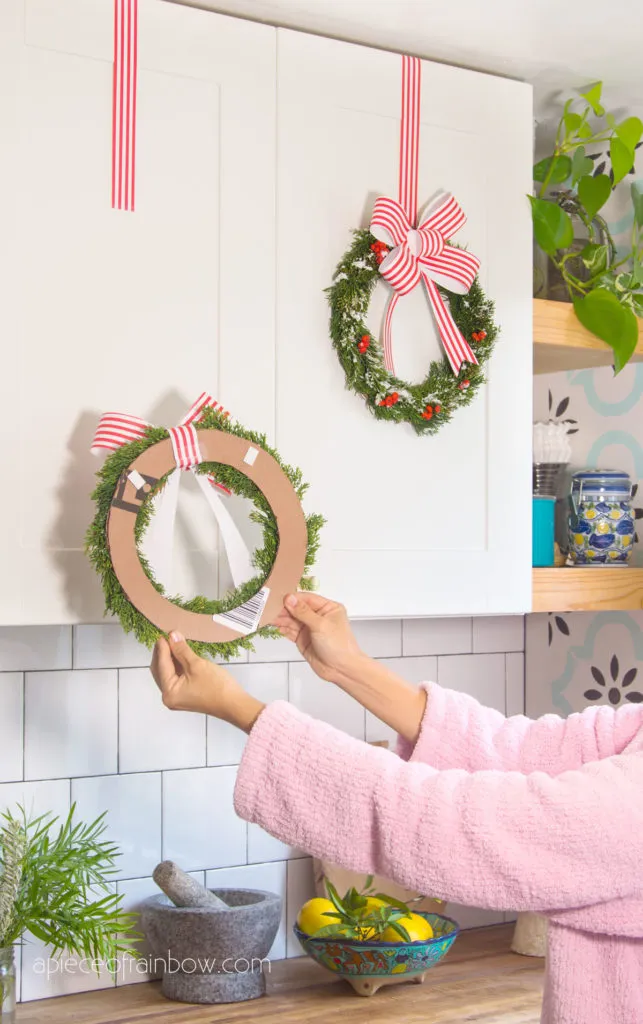
Want impact without losing a single inch of prep space? Dress up the cabinet fronts with simple wreaths and ribbon, which stay out of the way yet feel festive.
- Hang small faux wreaths from cabinet doors with wide ribbon; tape the ribbon inside the door with painter’s tape or command hooks.
- Alternate ribbon textures—velvet for luxe, plaid for farmhouse, satin for classic—within the same color family to keep the look unified.
- Add a tiny bell or wooden tag with “Joy,” “Noel,” or a gingerbread cutout for character.
FYI: This trick works especially well in rentals or small kitchens since it steals exactly zero counter space.
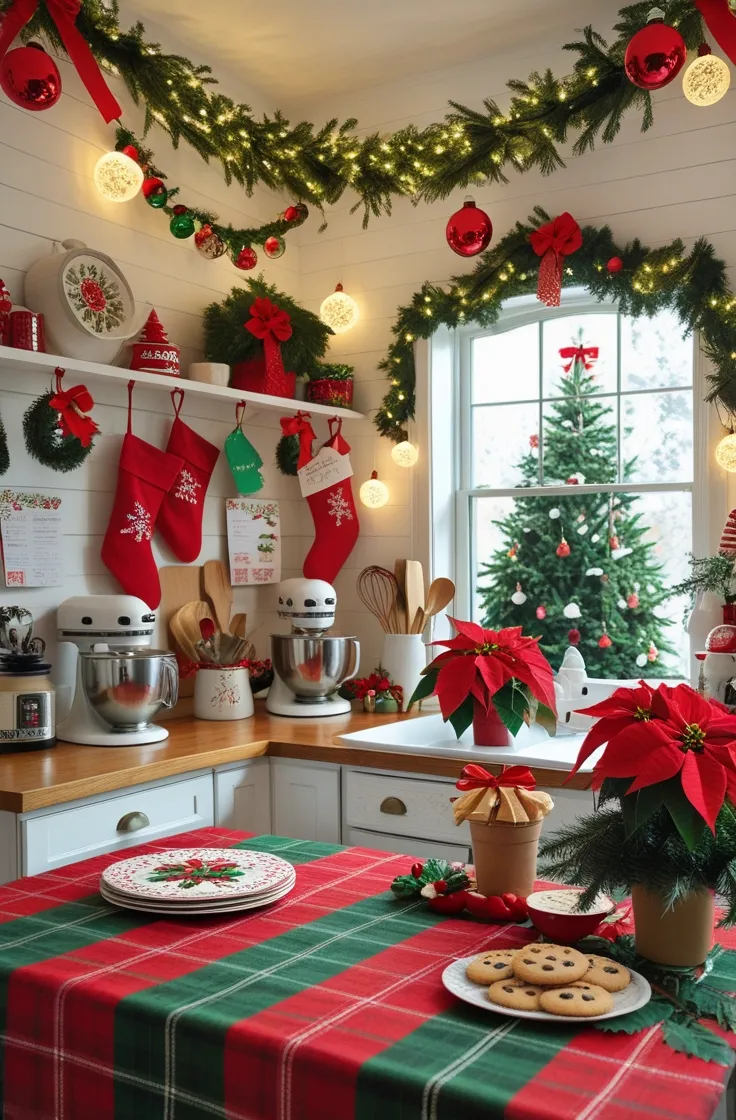
Sink & Window Garland (The Charming Focal Point)
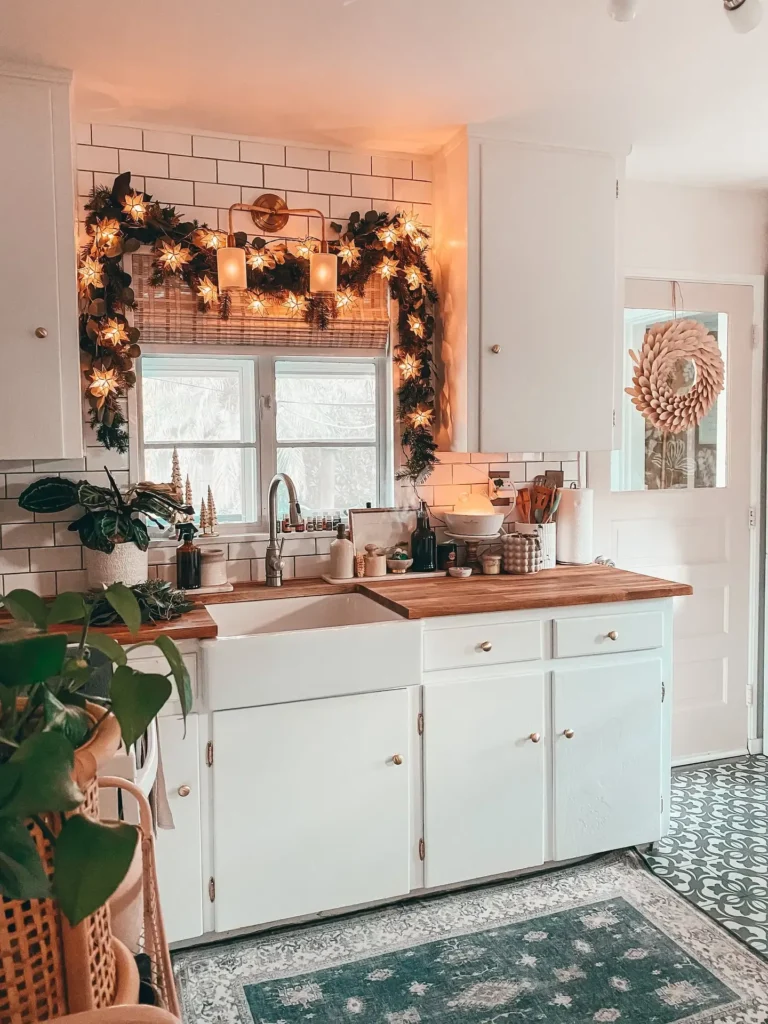
That little slice of real estate above the sink can carry the whole kitchen’s Christmas vibe, so give it simple greenery with a sparkle upgrade. Ever wondered why everyone posts their sink windows on Instagram in December? Because it works.
- Drape faux garland along the window ledge or frame; add wood beads or mini ornaments in this year’s palette.
- Hang one small wreath centered with a ribbon tail or layer two ribbon styles for dimension.
- Tuck in a battery candle or two for glow that reflects in the window at night.
If the sill is deep, add a cookie cloche or Christmas cookbook on a stand to double as decor that actually functions.
Open Shelves or Backsplash Moment
Make a small vignette that says “Santa bakes here,” but keep it shallow and cleanable (grease happens). Want it high-end on a $5 budget? Go with pizza-pan art.
Pizza pan “sign” (easy showstopper)
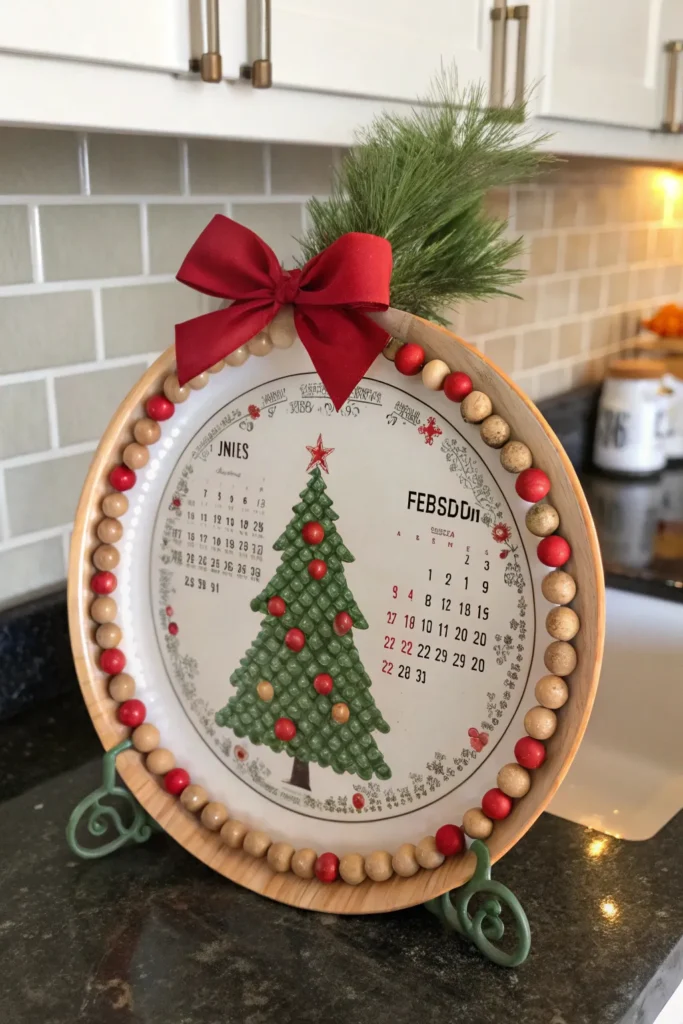
- Paint or decoupage the pan with a seasonal calendar print or napkin; seal; hot glue half-wood beads around the rim; add greenery and a bow.
- Prop it on a plate stand or command-hook it to the backsplash for a temporary holiday focal point.
Wooden spoon wall accents
- Paint dollar-store wooden spoons white or gingerbread-brown, then hand-letter short phrases: “Bake,” “Joy,” “Cocoa,” “Cookies.”
- Tie a ribbon loop to hang or stand them in a crock with candy canes for a cute utensil moment.
Check Next: How to Style a Kitchen Island Christmas Centerpiece That Steals the Show
Use no more than three elements in one vignette—like sign + crock + mini tree—so the space reads clean and curated.
Centerpiece That Doesn’t Steal Space
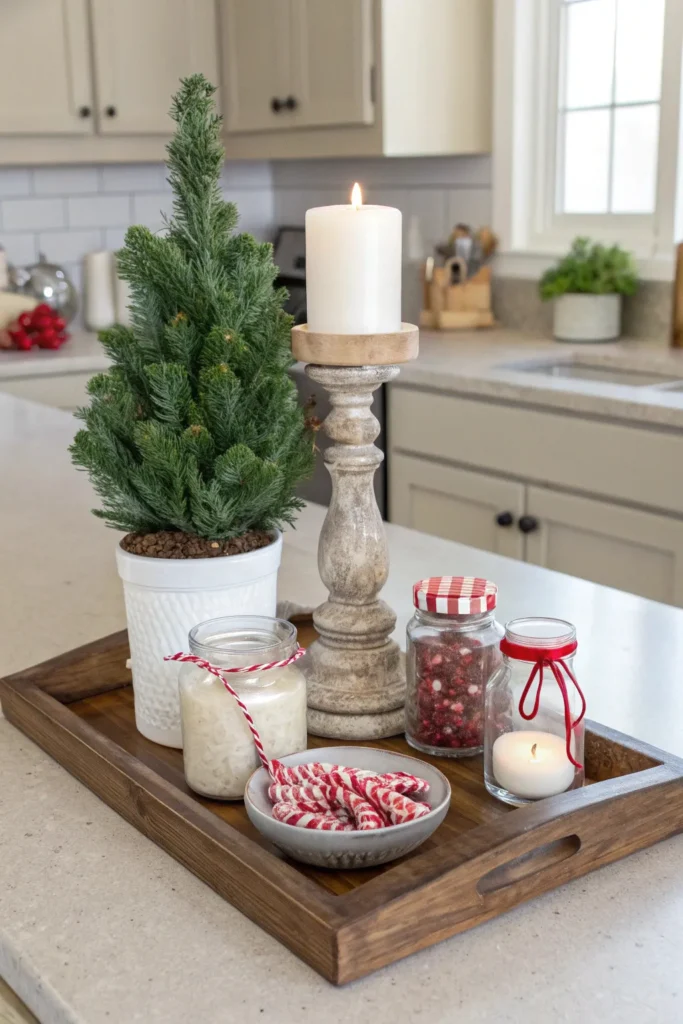
Create a low-profile centerpiece that slides when you need whisking room and looks good from every angle. No one loves knocking over a topiary with a mixing bowl.
- Use a low tray or pedestal riser made from a wood plaque and a pillar candle holder; paint and seal.
- Add a small faux tree, a jar candle, and a bowl of wrapped peppermints; tuck in a ribbon tail for motion.
- Keep heights under the line of sight so conversations flow, and flour stays off the decor.
If the island doubles as prep space, store the whole setup on a tray so you can slide it aside in one move.
Three Quick DIYs That Look “Boutique”
These projects punch above their weight and cost less than a drive-thru lunch. Want compliments from guests who “never find anything good at Dollar Tree”? You’ll get them. 🙂
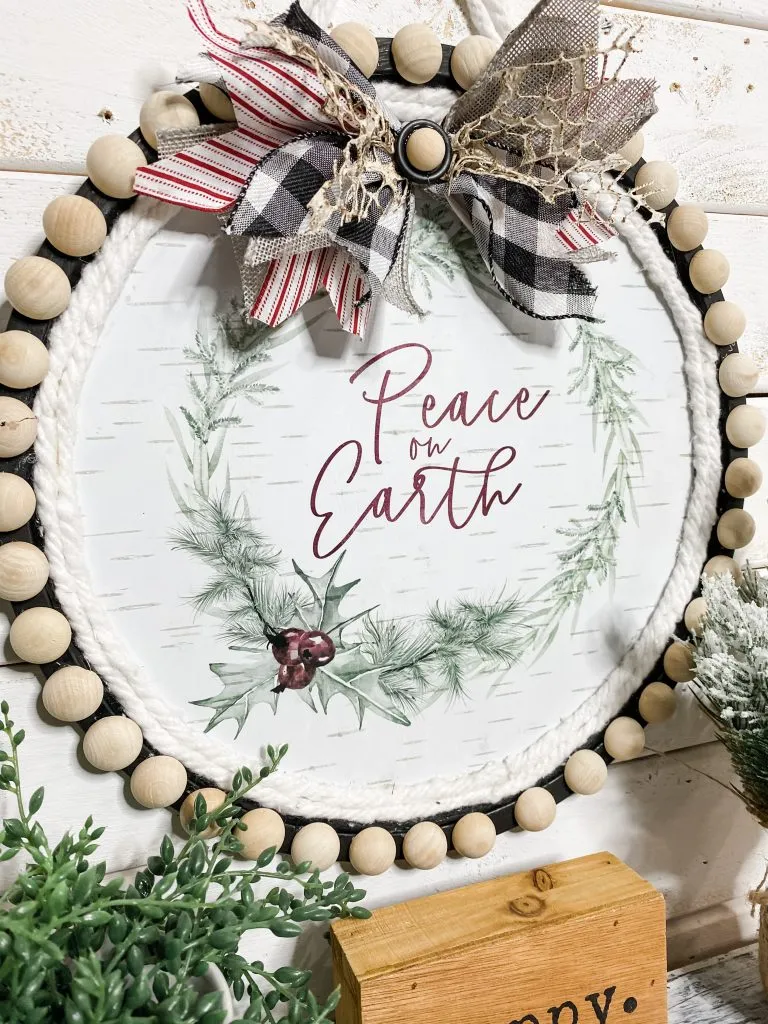
1) Beaded charger plate sign
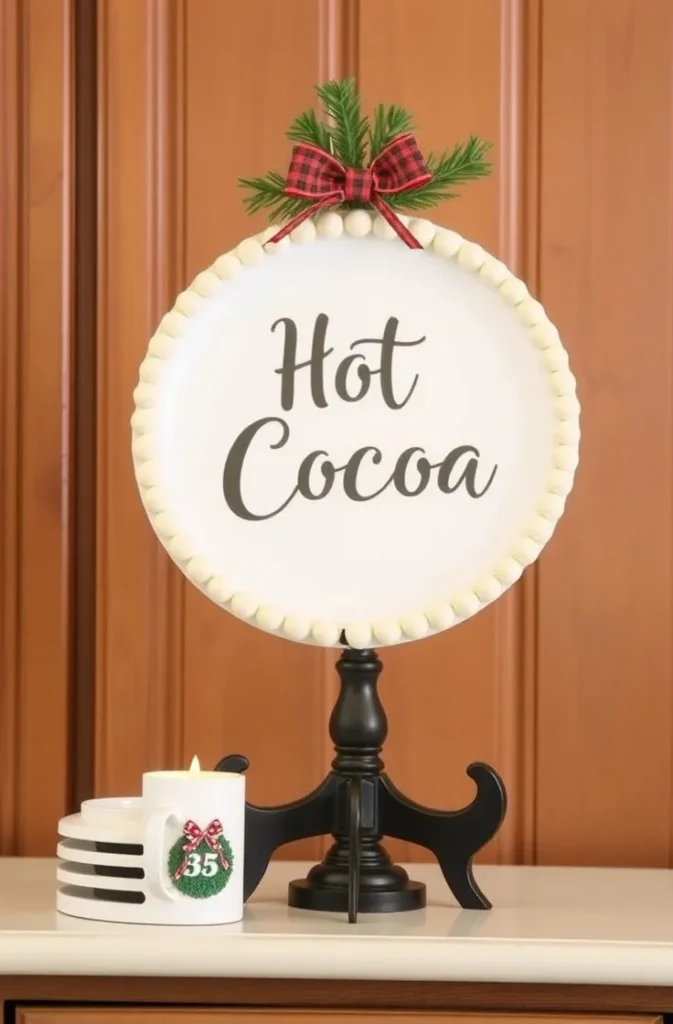
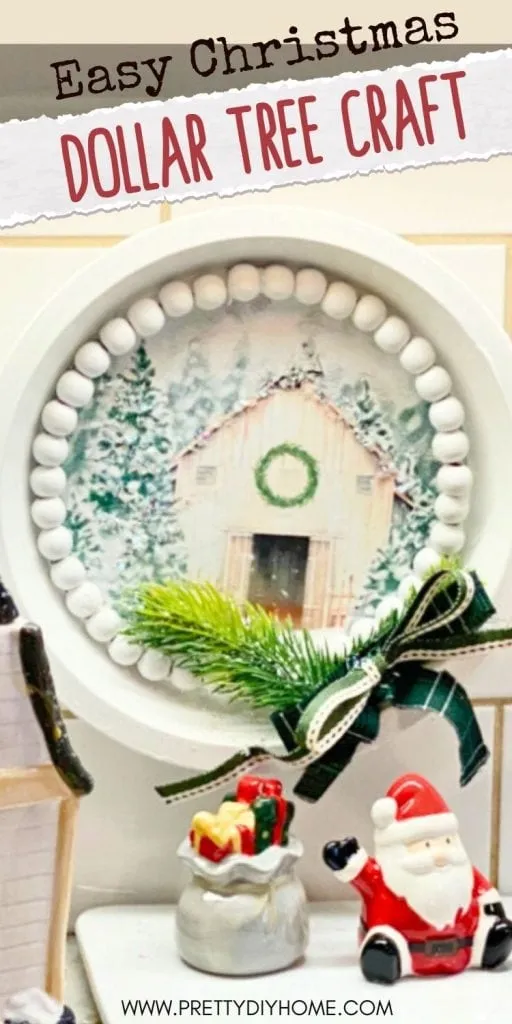
- Paint a charger plate matte white or pine green; stencil “Hot Cocoa 25¢” or “Gingerbread Bakery.”
- Hot glue half-wood beads around the rim; add a small bow and greenery sprig at the top.
- Display on a plate stand near the cocoa bar.
2) Farmhouse pedestal riser
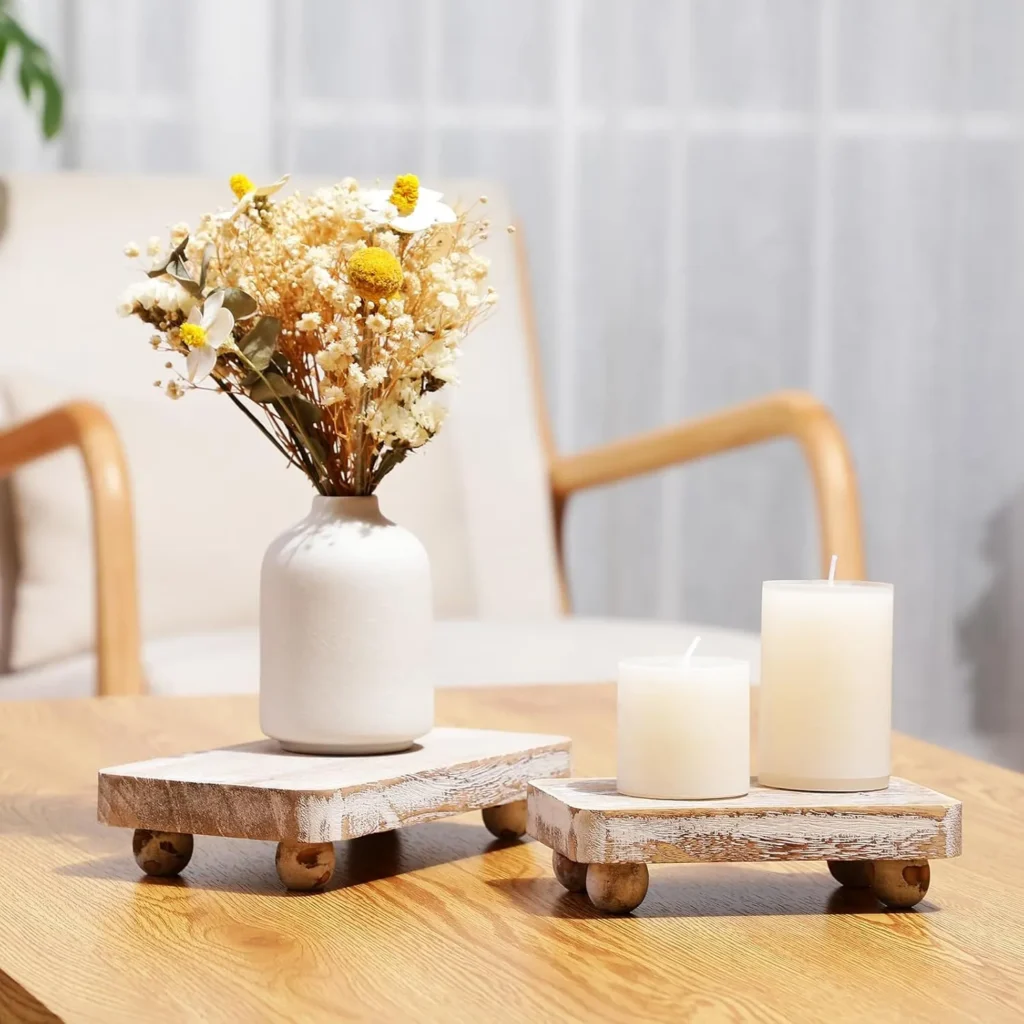
- Glue a wooden tray to an inverted pillar candle holder; paint and distress; seal for wipe-downs.
- Use it to lift a candle + cloche or a cookie jar for visual layers.
3) Glitter lid candy jar upgrade
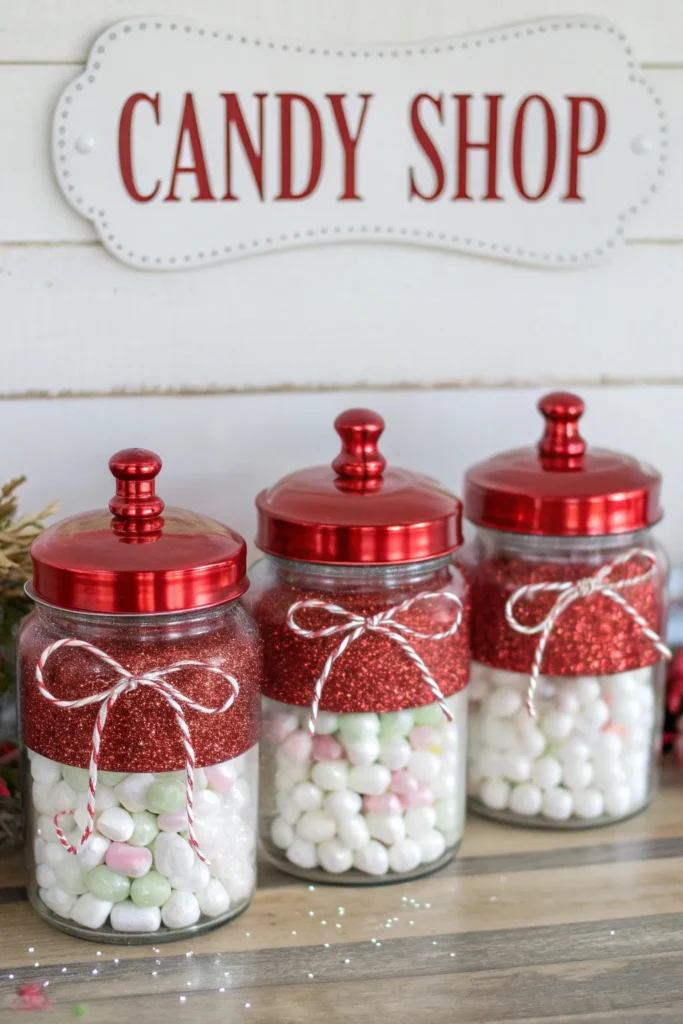
- Spray-paint a jar lid red; screw in a crystal-style knob; tie baker’s twine with a tiny charm.
- Fill with peppermints or mini marshmallows and line up three jars for a “candy shop” vibe.
Gingerbread Touches (Trend-Proof & Adorable)
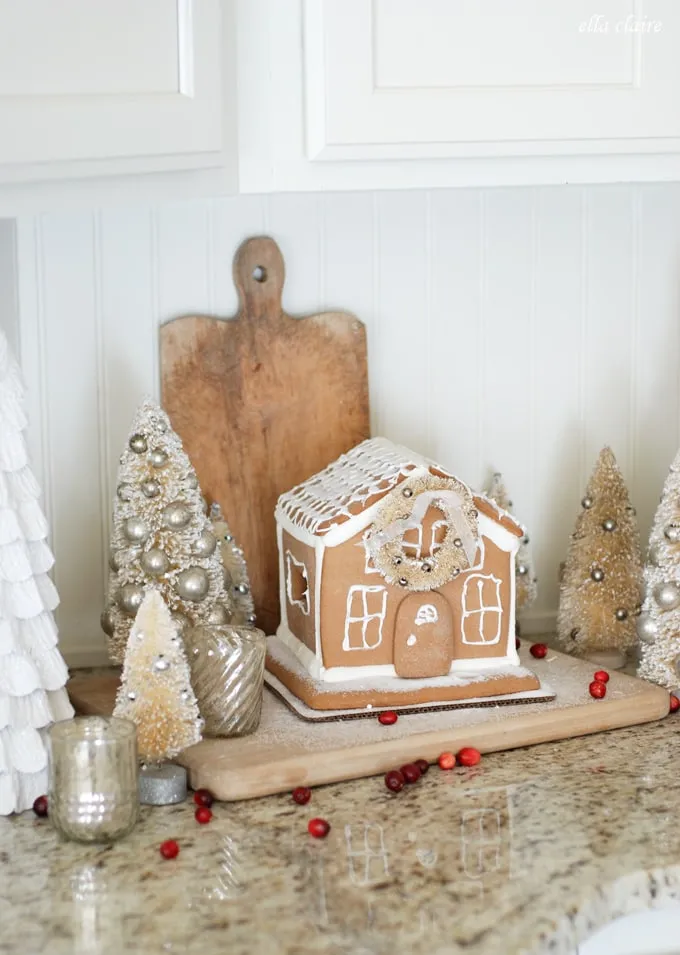
Gingerbread accents never go out of style, and they nail the cozy kitchen aesthetic—bonus points if you fake-bake a little display. Who needs a scented candle when the whole space screams “cookies”?
- Add gingerbread ornaments to the window garland or cabinet wreaths for warmth and nostalgia.
- Display one gingerbread cutting board with regular boards to create a quick vignette.
- Craft faux-bake accents from air-dry clay or salt dough if you love a DIY; seal well if near moisture.
Functional Decor That Actually Works
Decor that doubles as storage or serving keeps your kitchen practical—because baking season doesn’t pause for cute things. Ever tried to cook around a six-piece ceramic village? Exactly.
- Use jars and cloches for edible decor: cookies, cocoa mix, candy canes—festive and functional.
- Style cutting boards, cookbooks, and dish towels as decor, then put them back into service as needed.
- Add micro-LEDs or battery candles instead of cords near prep zones for safety and easy cleanup.
Color & Style Guide (Keep It Cohesive)
Choose one of these easy palettes so the whole room sings the same carol instead of karaoke chaos. Pick a lane and stick to it across ribbon, ornaments, beads, and prints.
- Classic red, white, and evergreen with candy-cane stripes for timeless warmth.
- Scandi neutrals with wood beads, kraft paper tones, and minimalist greenery for calm, modern vibes.
- Gingerbread browns with white piping accents and plaid ribbon for cozy, nostalgic charm.
Tie it all together with repeating elements like the same ribbon or bead style in every zone so the space feels designed, not random.
Pro Tricks for a High-End Finish
Small tweaks make cheap materials look “custom,” not “craft hour.” Want that Pottery Barn energy on a pizza-pan budget? Try these.
- Distress edges lightly with a sanding block after painting to add texture and hide imperfections.
- Use half-wood beads to frame signs or lids—instant depth and detail.
- Seal surfaces that you’ll wipe down with a matte topcoat for durability and easy cleaning.
Practical Layout Do’s & Don’ts
Keep surfaces usable and walkways clear, and the decor will feel intentional—not like it sprouted overnight. You’ll thank yourself when the cookie sheets roll out.
- Keep decor away from stovetops, sinks, and primary prep zones; elevate decor on trays so it moves as one unit.
- Limit open-shelf items to 3–5 pieces per shelf for visual breathing room and faster dusting.
- Use command hooks and removable tape for stress-free takedown in January.
Dollar-Store Shopping Checklist
Walk in with a plan, walk out with pieces that play well together. No random cart chaos allowed. Well, mostly. 😉
- Trays, pizza pans, and charger plates for signs and risers.
- Mason jars, faux greenery, ribbon, half-wood beads, and mini ornaments.
- Acrylic/chalk paint, Mod Podge, hot glue sticks, and command hooks.
If you see a seasonal napkin print you love, grab it—you can decoupage three different projects from one pack and get a cohesive look.
Quick Win: 60-Minute Setup Plan
Short on time? Do this power hour and call it a day. You’ll feel festive by dinner.
- Cocoa tray: decoupage, add jars, and one mini light strand.
- Two cabinet wreaths on the main run with matching ribbon.
- One pizza-pan sign with a bow and greenery on the backsplash.
- Low centerpiece on a riser with a candle and mini tree.
A few friendly opinions (from many holiday kitchen battles)
I always anchor the palette first, then buy ribbon and beads that match—decor turns cohesive instantly and I avoid overbuying. I also prioritize wipeable surfaces and battery lights because December kitchens get wild, and I want quick resets between batches. And IMO, one strong focal point—like the window garland or pizza-pan sign—does more than ten tiny trinkets ever will.
Final touch-ups that matter
Before calling it done, check lighting at night—add one more tea light if the zone feels flat—and take a quick photo to spot clutter or gaps that eyes miss in real time. Ever noticed how a photo reveals the one thing that feels off-center? Fix it, and the whole room clicks.
Wrap-up
You can transform the kitchen into a cozy, functional Christmas hub with dollar-store supplies, a unified palette, and a few high-impact DIYs that clean up easily. Pick two zones to start, repeat your ribbon and bead elements, and let that cocoa bar do the heavy lifting. FYI: once the gingerbread accents show up, even the grumpy oven timer feels festive. 😉