Hiding the everyday eyesores in your kitchen doesn’t take a remodel—it takes smart, simple systems that keep your counters clear and your sanity intact.
If you juggle a toaster, blender, air fryer, stand mixer, and a coffee setup, you probably feel like they’ve staged a coup on your countertop, right ?
Same here—and after testing tons of setups, these favorite kitchen appliances organization ideas free up counter real estate fast while keeping everything easy to use and easy to put away.
In This Article
- 1 Why hide appliances?
- 2 1) Appliance garage for daily drivers
- 3 2) Pull-out shelves in lower cabinets
- 4 3) Lift-up mixer shelf (aka stand-mixer elevator)
- 5 4) Pantry zones for occasional gadgets
- 6 5) Tall cabinet with pocket doors (the all-in-one coffee bar)
- 7 6) Corner cabinet with lazy Susan
- 8 7) Slim utility shelving with a curtain or doors
- 9 8) Open shelves (but curated)
- 10 9) Integrated panels for big appliances
- 11 10) Roll-out cart “garage” for renters
- 12 11) Drawer dividers and cord management that actually stick
- 13 Smart organizing principles that make all 11 ideas work
- 14 What about small kitchens?
- 15 Budget vs. premium: what’s worth it?
- 16 Personal take: what actually sticks
- 17 Quick checklist to free up counter real estate
- 18 Conclusion
Why hide appliances?
Clearing counters makes your kitchen look bigger, feel calmer, and work faster—less visual noise, fewer cords, zero stress when guests “pop in” unannounced (of course they do).
Hiding small appliances doesn’t mean burying them; it means storing them in zones where you can grab, use, and return them in seconds—no contortions required.
1) Appliance garage for daily drivers

Think of an appliance garage as a mini parking bay with a door that hides your toaster, blender, or coffee machine but keeps them plugged in and ready.
You can choose pocket, lift-up, or sliding doors depending on your space and workflow—pocket doors slide back so nothing blocks your counter while you’re using gear.
If you love a clean, “nothing to see here” backsplash, a full-width garage along the counter looks seamless and keeps crumbs out of sight, too.
- Best door types: pocket for tight spaces; lift-up when you have vertical clearance.
- Pro tip: Add outlets and under-cabinet lighting inside the garage for one-and-done setup.
2) Pull-out shelves in lower cabinets
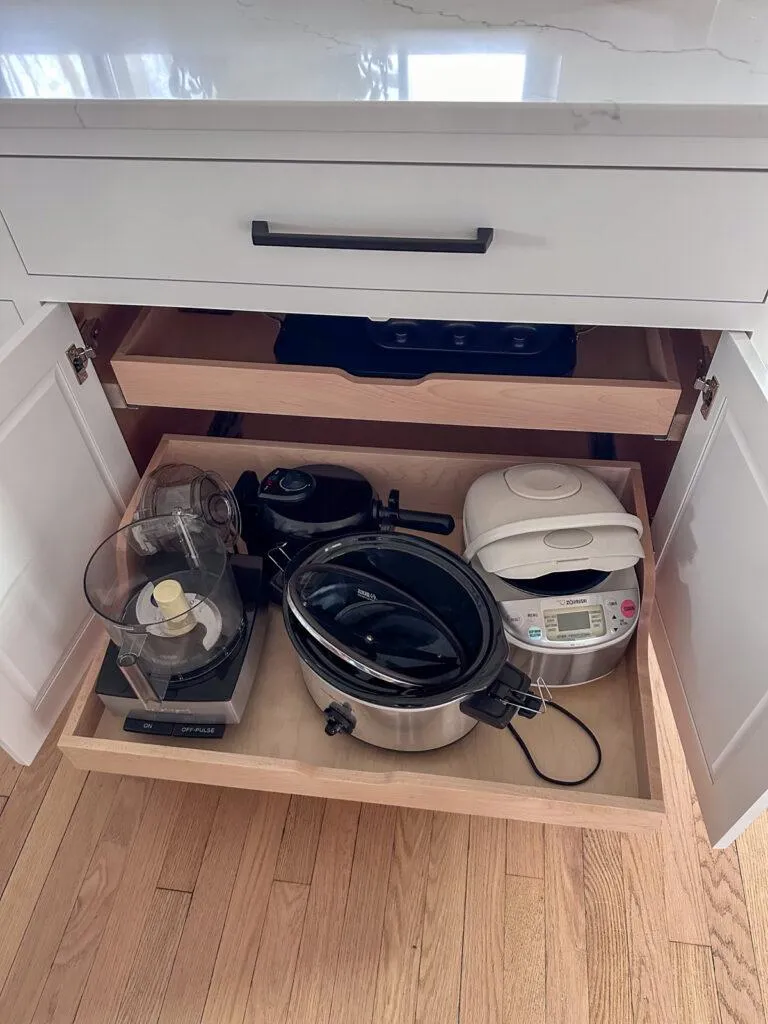
Install pull-out shelves (deep drawers on rails) in base cabinets so heavy appliances slide to you, not the other way around.
This reduces lifting, protects your wrists, and speeds up cooking since everything sits at reach height—IMO, this is the easiest retrofit for most kitchens. Keep cords corralled with clips so they don’t snag when you slide the shelf back in.
- Ideal for: air fryer, slow cooker, pressure cooker, indoor grill.
- Setup note: Put frequent-use items at waist height; stash seasonal gear lower down.
3) Lift-up mixer shelf (aka stand-mixer elevator)
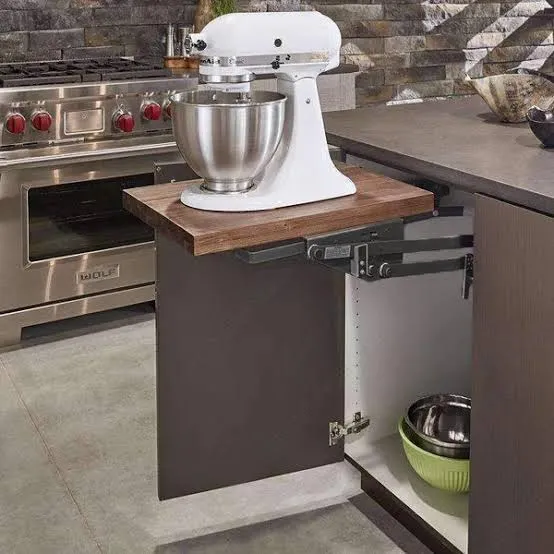
A lift-up shelf hides your bulky stand mixer in a base cabinet and springs it to counter height with one smooth motion—yes, it feels like magic every time.
If you bake weekly, this saves counter space all week and gives you instant access on bake day, no deadlifting required. Add a small bin on the same shelf for attachments so you don’t hunt for the dough hook mid-recipe.
- Key detail: Confirm clearance for the mixer head and bowl before installing hardware.
- Bonus: You can use the same mechanism for a bread maker if that’s your thing.
4) Pantry zones for occasional gadgets
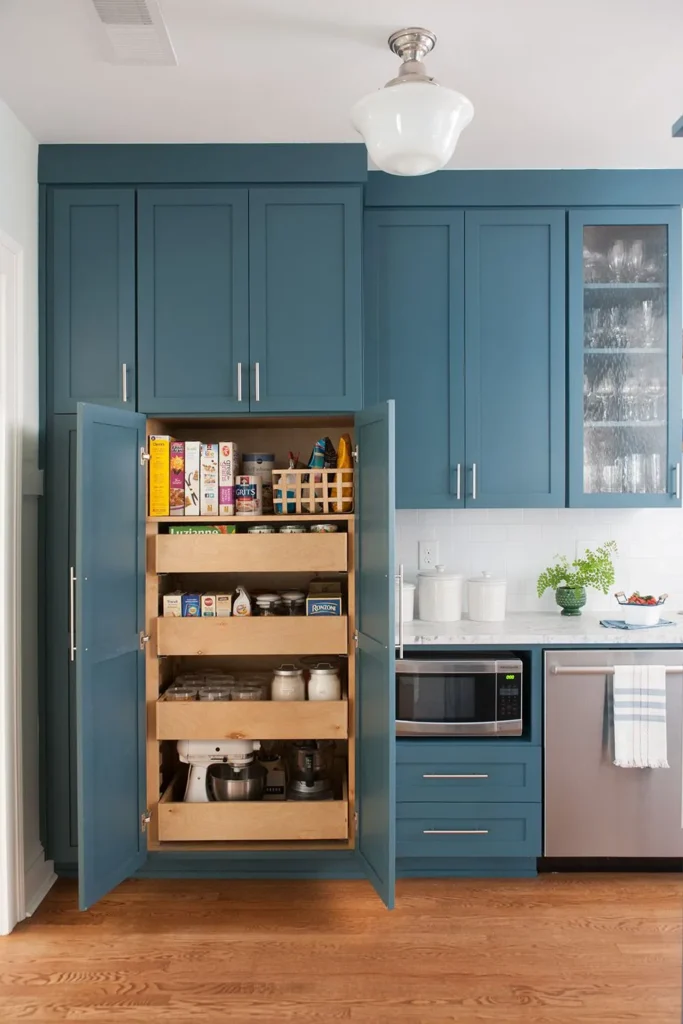
Turn part of your pantry into a “gadget bay” for appliances you use weekly or less—waffle maker, extra blender jar, holiday slow cooker.
Use a rolling cart inside the pantry so heavy items glide in and out without wrestling with shelves—your back will thank you. Label cords and parts with simple tags so everything returns to the same place after cleaning (future you approves).
- Organize by task: “Smoothies,” “Baking,” “Hot drinks,” etc., to stay friction-free.
- FYI: Keep heavier appliances between knee and chest height for safe lifting.
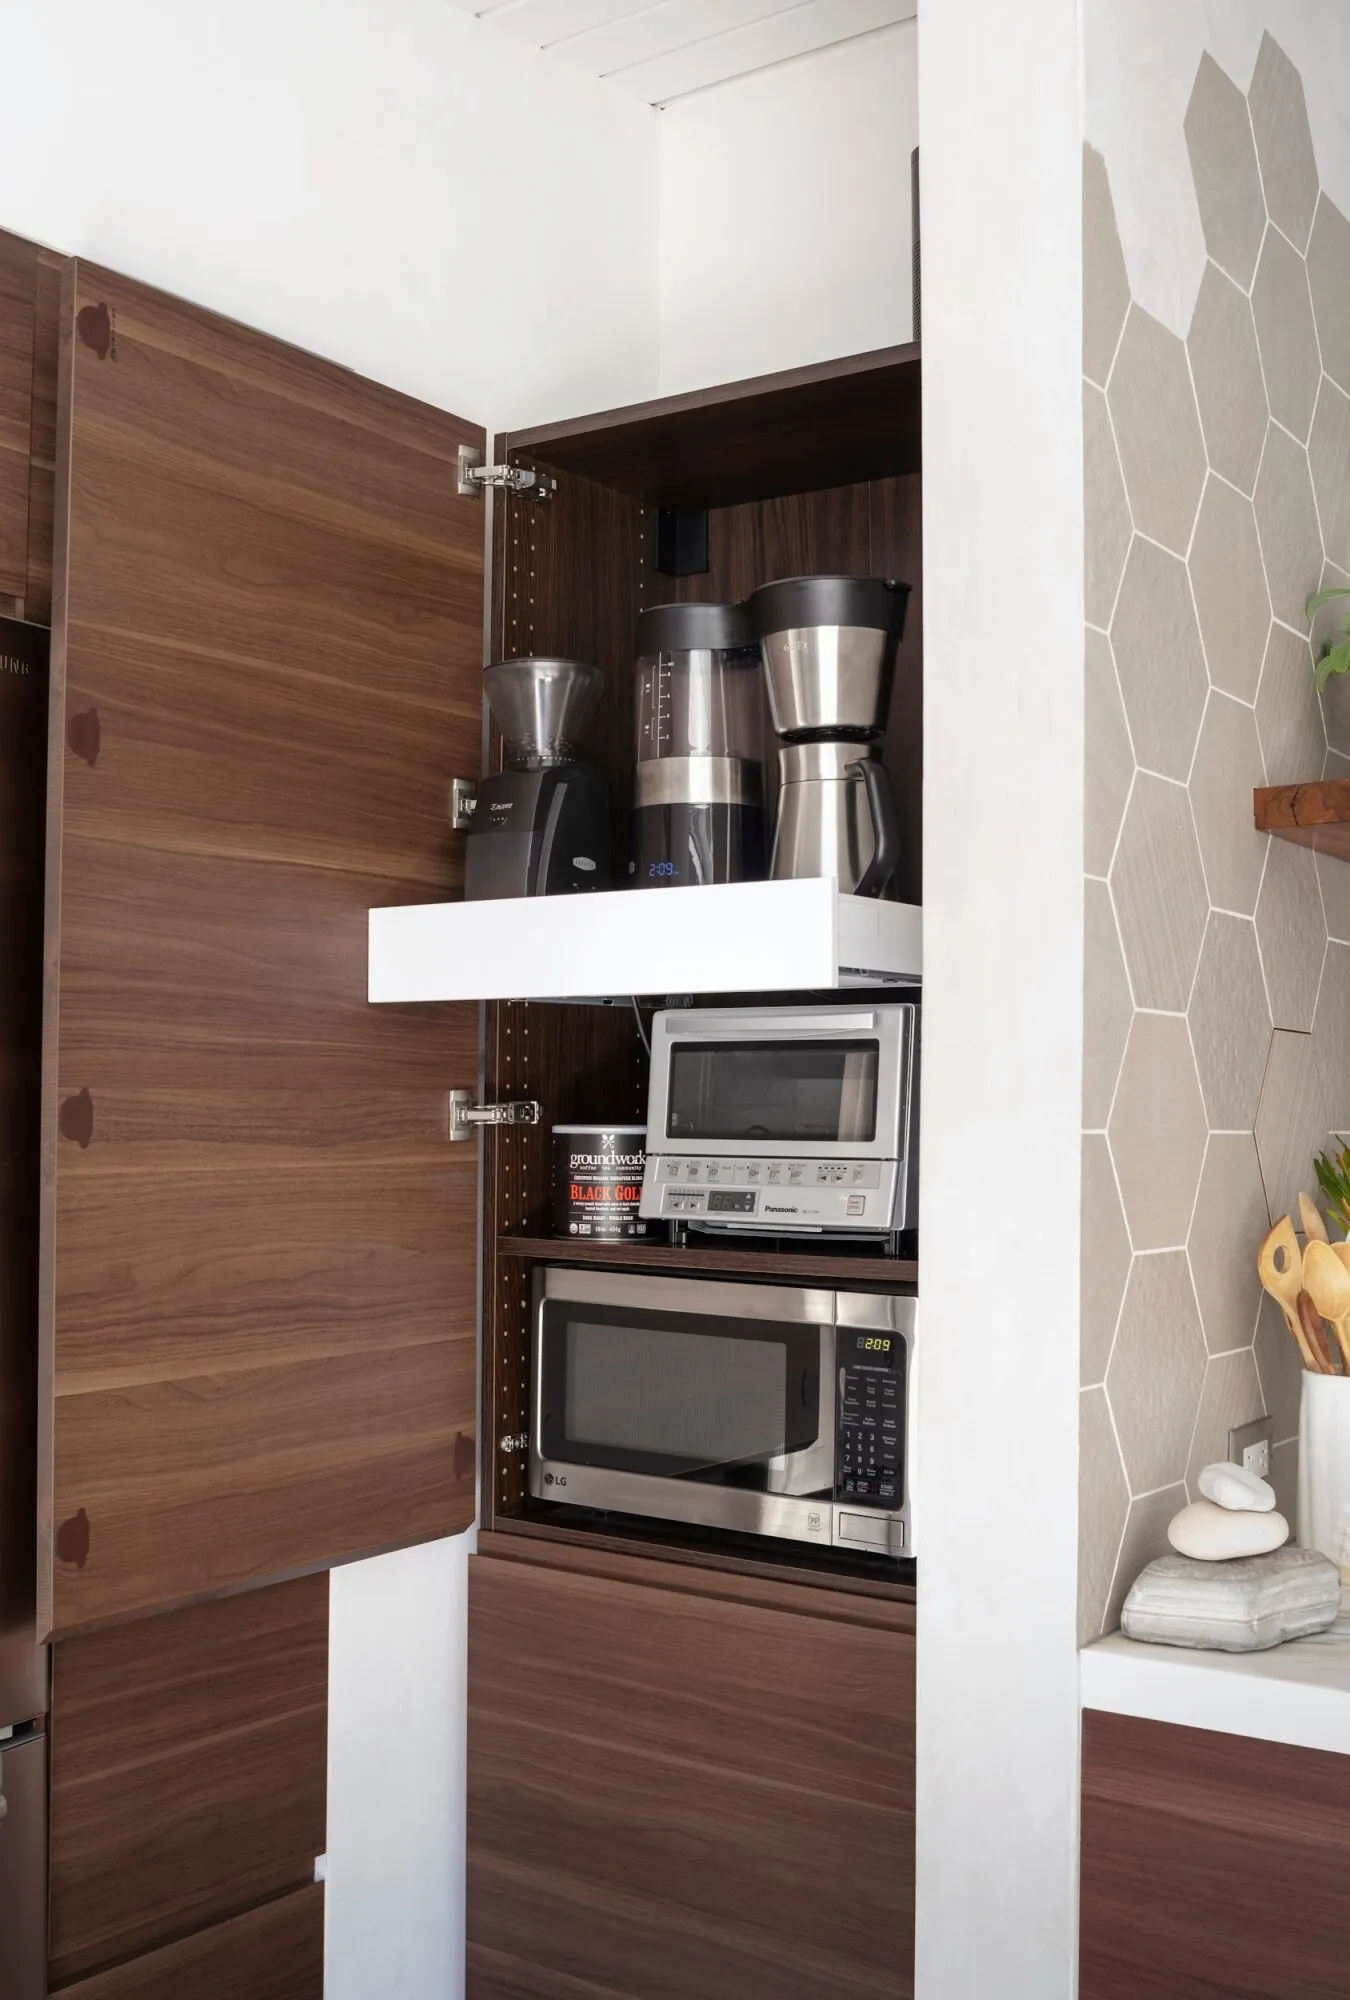
5) Tall cabinet with pocket doors (the all-in-one coffee bar)
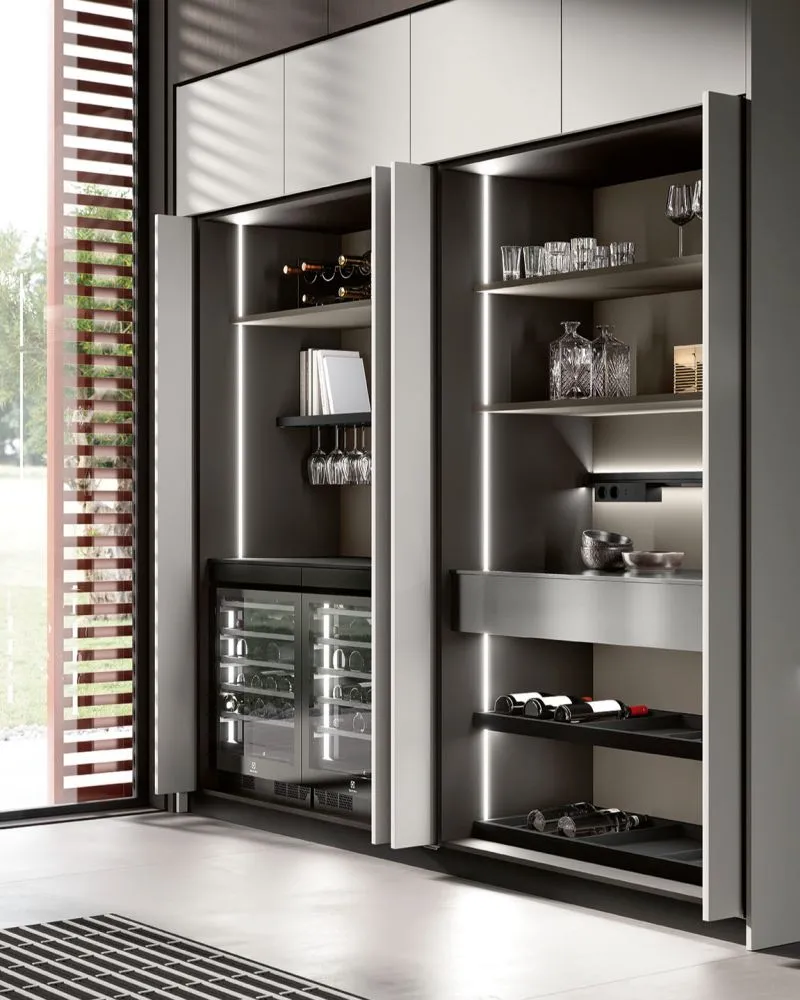
Convert a tall cabinet into a hidden coffee or breakfast bar with outlets, shelves, and a rollout tray for the espresso machine or grinder.
Pocket doors disappear into the sides so you can work with doors open, then slide them shut to hide the chaos—no one will ever know the grinder shed confetti this morning.
Add narrow drawers for pods, filters, tea tins, and syrups to build a complete station (and keep counters clean).
- Good for rental-friendly upgrades if you select modular interiors and avoid permanent wiring changes.
- Add motion lighting inside so it feels boutique-hotel-level slick.
6) Corner cabinet with lazy Susan
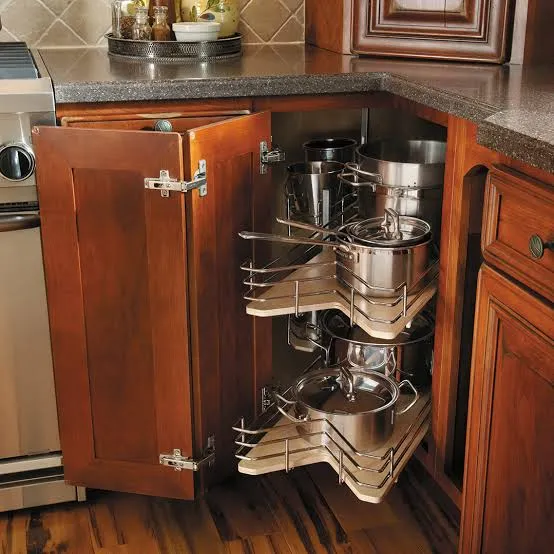
Those deep corner cabinets stop being black holes when you add a lazy Susan for medium-sized appliances like rice cookers or food processors.
Must Check: 10 Deep Kitchen Drawer Organization Ideas to reach every corner easily
The rotating platform puts handles front and center so you don’t dislocate a shoulder retrieving anything. Group by height and put the tallest items toward the outer edge to avoid scraping the underside of the counter.
- Great use of awkward space, especially in smaller kitchens.
- Pair with cord wraps to keep things tidy on the turntable.
7) Slim utility shelving with a curtain or doors
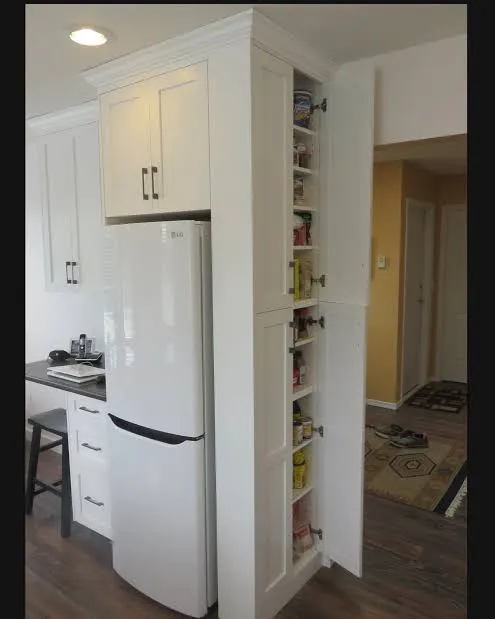
No pantry? Add a tall, slim utility shelf and hide it with a simple door, sliding panel, or even a neat fabric curtain for a budget-friendly appliance closet.
This trick tucks neatly into dead zones—between the fridge and wall, or in an unused corner. If you go with fabric, pick a fixed panel or taut rod so it looks intentional, not like laundry day.
- Place daily-use items at chest height, occasional items up or down by frequency.
- Add felt pads under heavy appliances so they slide without scraping.
8) Open shelves (but curated)
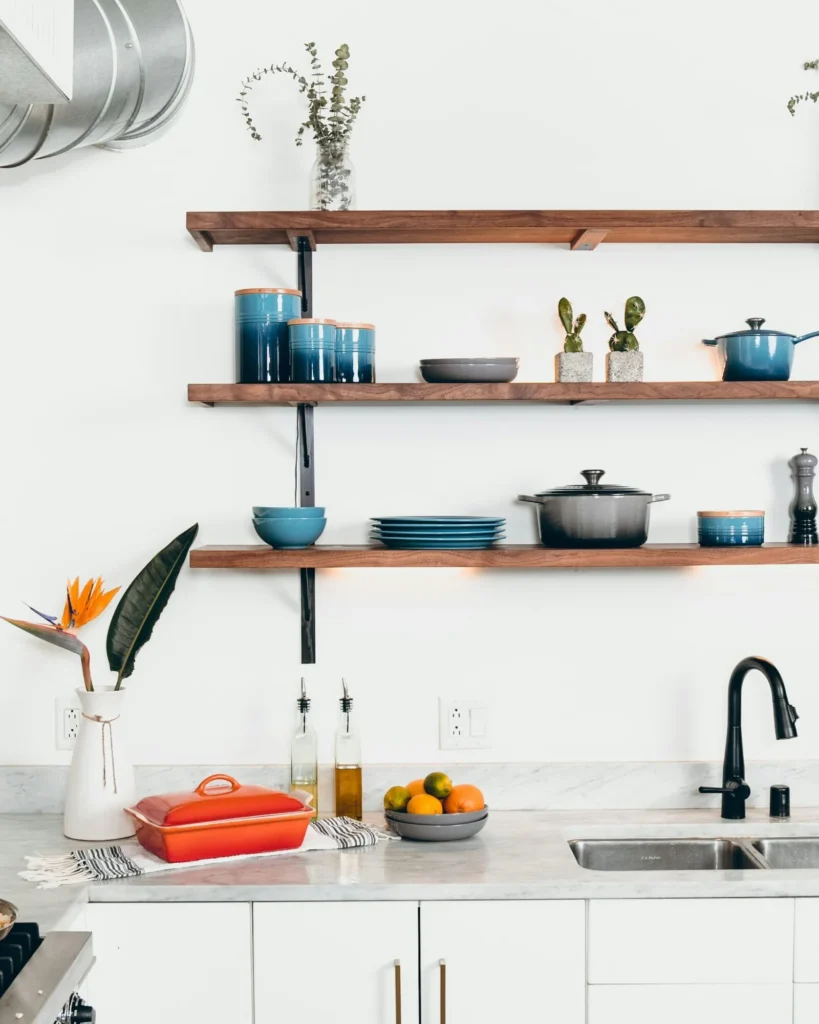
Use open shelving strategically for the one or two appliances that actually look good—matte black kettle, retro toaster—then stash the rest behind doors.
This keeps counters free but still gives you grab-and-go access when mornings run hot and messy. Keep the shelf load light so it reads “styled,” not “storage overflow”.
- Rule of three: two display items + one functional appliance per shelf looks balanced.
- Run a cord clip down the back to minimize the cable spaghetti.
9) Integrated panels for big appliances
If you’re remodeling, consider panel-ready dishwashers and fridges so they disappear behind matching cabinet fronts for a clean, continuous look.
You’ll cut visual clutter massively, which makes small kitchens feel bigger and calmer. If a full integration isn’t in budget, appliance skins and wraps can visually blend finishes with cabinets as a quick win.
- Panels cost more but deliver a truly seamless aesthetic.
- Make sure to keep ventilation clear and follow manufacturer specs.
10) Roll-out cart “garage” for renters
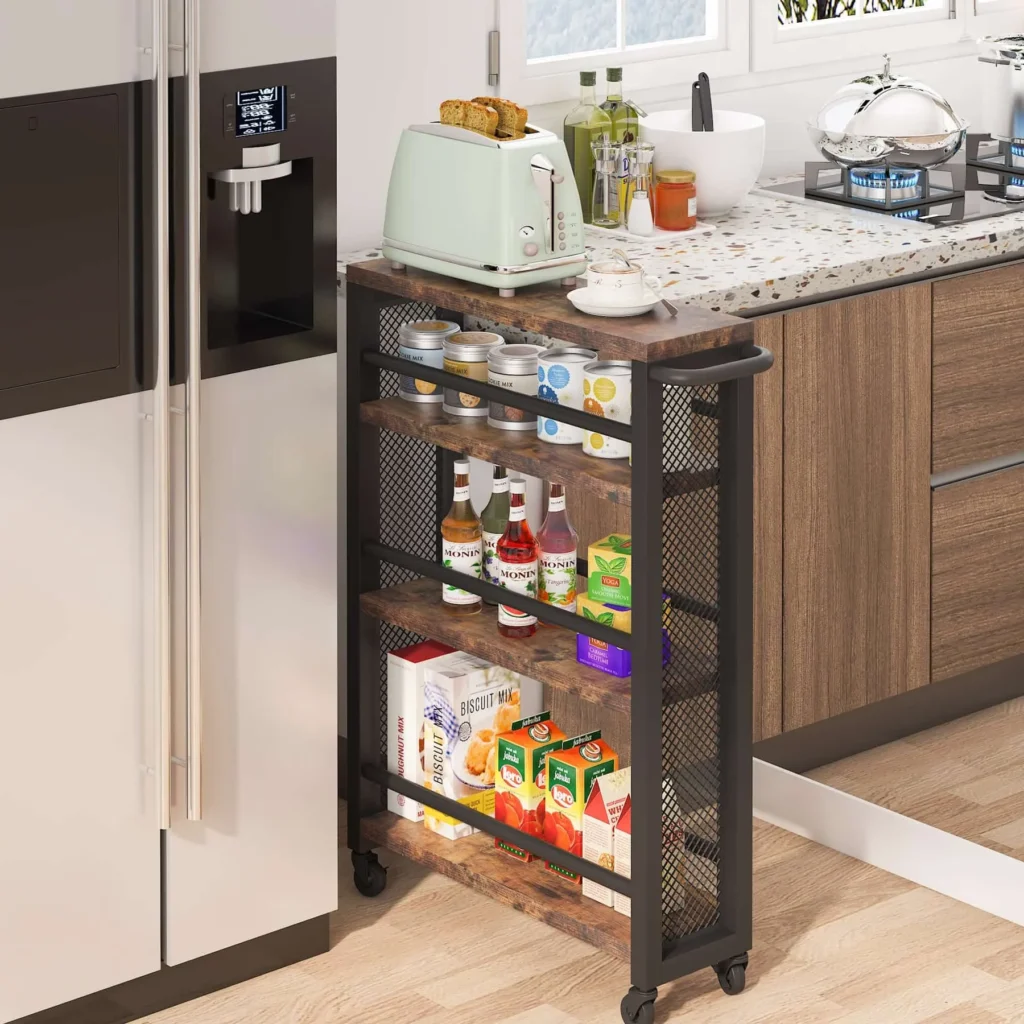
Park a sturdy, wheeled cart in a closet nook or beside a tall cabinet and load it with your blender, air fryer, and toaster—and roll it out when you need to cook.
This creates a flexible appliance garage without drilling or cabinets (renter-friendly and wallet-friendly). Use heat-safe mats on the cart top so you can use appliances right on the cart when space gets tight.
- Locking casters prevent wobbles mid-smoothie.
- Label shelves by task so setup becomes automatic.
11) Drawer dividers and cord management that actually stick

Cords cause half the chaos, so tame them with adhesive cord clips, short 1–2 ft extension leads, and Velcro wraps, and then assign a drawer or bin for each appliance’s extras.
Keep sharp attachments and small parts in lidded containers labeled by appliance so nothing migrates to the junk drawer (traitors). When you cut the cable clutter, every other organization upgrade works better and feels easier to maintain.
- Create a “charging lane” or outlet strip inside a cabinet to keep plugs out of view.
- Shorten cords with wraps so pull-outs don’t snag or yank.
Smart organizing principles that make all 11 ideas work
You’ll win the countertop war when you mix good storage hardware with the right habits, not just one or the other. Use these rules across your kitchen, no matter which ideas you pick:
- Store by frequency: daily on the counter or in an appliance garage; weekly on pull-outs; monthly in pantry zones.
- Keep function zones: a coffee station, a smoothie station, a bake station (tools live with their appliance).
- Measure before you buy: check height, door swing, and plug position so installations don’t surprise you later.
- Create a reset ritual: return appliances to their “home” immediately after use so clutter can’t respawn (like it loves to do).
What about small kitchens?
Compact spaces benefit the most from built-in appliance garages, pull-outs, and panel integration because these options minimize visual noise and maximize every inch.
Corner lazy Susans, slim utility shelves, and tall cabinet coffee bars make narrow footprints feel tailored, not cramped. If you rent, carts plus adhesive organizers give you mobile storage and zero-drama move-out—win-win :).
If you’re prioritizing impact on a budget, start with pull-out shelves and cord management; they deliver huge daily convenience for minimal cost. Mid-range upgrades like a slim utility shelf with a curtain and a dedicated pantry zone deliver clean counters without carpentry. Premium moves—appliance garages with pocket doors, lift-up mixer shelves, and panel-ready dishwashers—deliver the cleanest look and fastest workflows if you can invest now for long-term payoff.
- Quick wins: cord clips, labels, and a rolling cart “garage”.
- High impact: pocket-door appliance garage + outlets.
- Showstopper: fully integrated panels for large appliances.
Personal take: what actually sticks
After trying too many “clever” ideas that looked great for two weeks, the combo that stuck: a pocket-door appliance garage for the coffee station, pull-out shelves for the air fryer and Instant Pot, and a labeled bin for every appliance’s parts (yes, every last gasket).
That setup kept the counters clear without adding friction—because if putting something away takes three steps, everyone will ignore it, FYI.
The mixer lift-up shelf also turned baking from a “maybe later” to an instant yes—no more hauling a bowling ball across the kitchen.
Quick checklist to free up counter real estate
- Add one appliance garage for your top two daily gadgets.
- Convert one base cabinet to pull-outs for heavy appliances.
- Assign one pantry bay for monthly-use gadgets on a rolling cart.
- Tame cords with clips, short leads, and labels—no exceptions.
- Consider panel integration during your next refresh for a seamless look.
Conclusion
Clear counters change how your kitchen looks and how you cook, and you don’t need a contractor to make it happen—start with a garage, a pull-out, and a labeled bin system and watch the clutter vanish, like it finally took the hint.
If you crave a “showroom” feel, integrate panels or add pocket-door cabinets and enjoy that sleek, continuous line every time you walk in—chef’s kiss, every morning IMO.
Try one upgrade this week, then layer the next—your future self will cook faster, clean less, and actually see the counter again, which feels suspiciously like victory :/ in the best way.