Ever feel like your kitchen makes you do cardio before dinner, with spices on one side, pots on the other, and your sanity somewhere in the junk drawer? Same, and no thanks.
Let’s fix that with smart kitchen cabinet organization layout based on how you actually cook, not how a showroom thinks you should live. Because when your sink, stove, and fridge work as a team and your cabinets mirror your routines, you stop shuffling and start cruising.
FYI, this isn’t a one-size-fits-all blueprint—it’s a choose-your-own-efficiency adventure, grounded in functional kitchen flow principles like the work triangle and zones.
In This Article
- 1 Why habit-based layouts work
- 2 Triangle + zones: the core idea
- 3 Layout 1: the weeknight sprinter
- 4 Layout 2: the batch-cook boss
- 5 Layout 3: the baker’s dream aisle
- 6 Layout 4: the one‑pan minimalist
- 7 Layout 5: the entertainer’s zone
- 8 Layout 6: the small‑kitchen strategist
- 9 Layout 7: the “two cooks” lane system
- 10 Layout 8: the healthy‑prep fast lane
- 11 Layout 9: the zero‑waste organizer
- 12 Layout 10: the “no pantry” problem solver
- 13 Map your personal workflow
- 14 Storage upgrades that punch above their weight
- 15 Triangle vs. zones (you want both)
- 16 Keep it organized long‑term
- 17 Quick-reference: what goes where
- 18 When to break the rules
- 19 Speed upgrades you’ll feel today
- 20 Common mistakes that cause cabinet chaos
- 21 Mini setups for different cooks
- 22 A quick word on aesthetics
- 23 Your next 60 minutes: zero overwhelm
- 24 Conclusion
Why habit-based layouts work
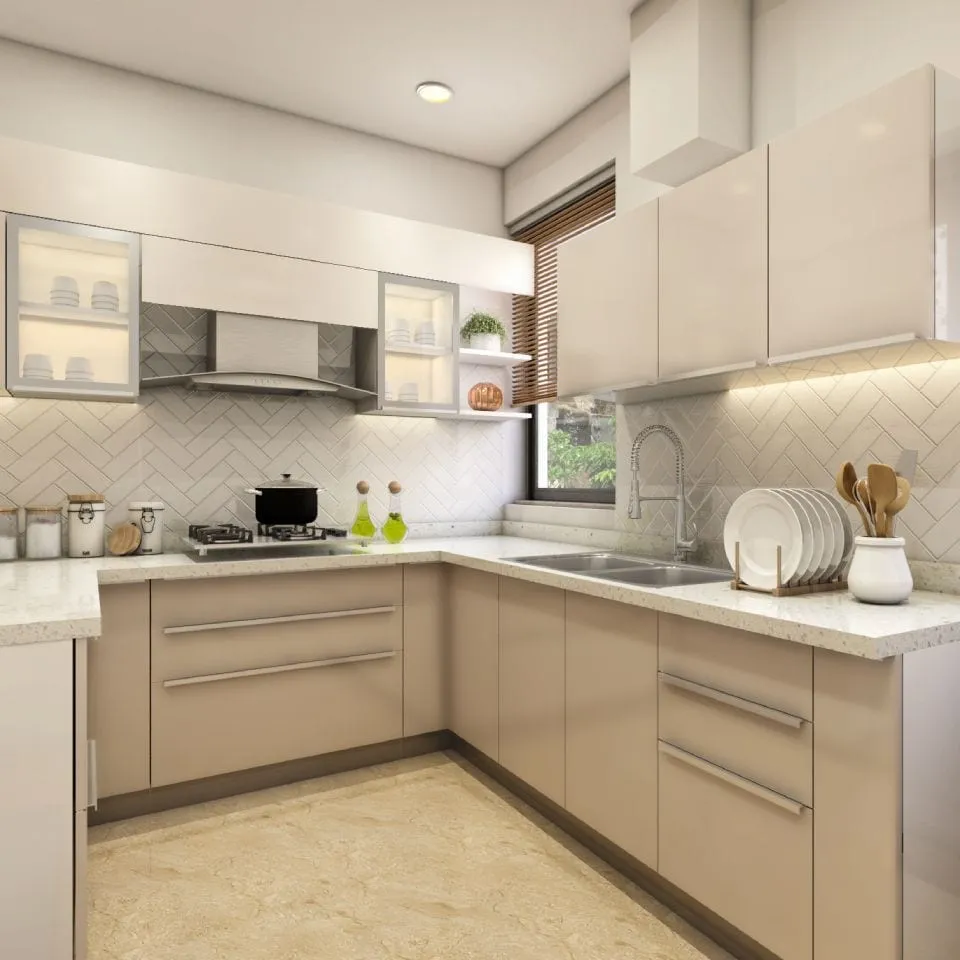
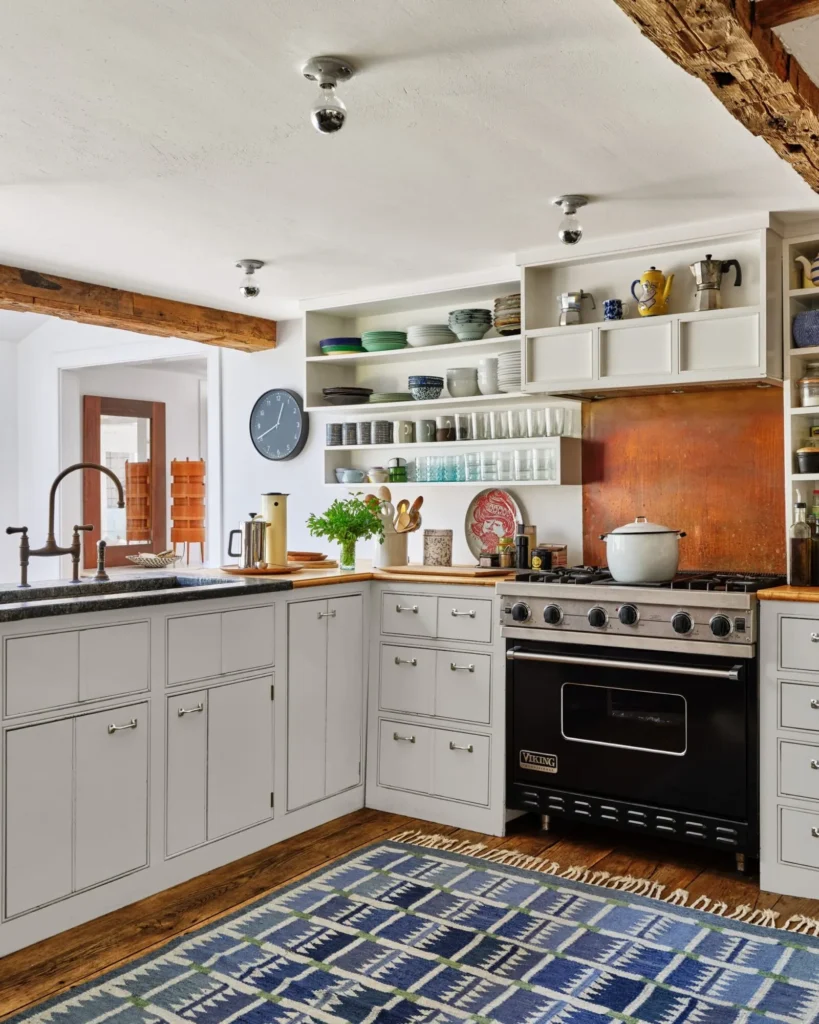
You cook in patterns: grab from fridge or pantry, prep, cook, plate, clean, repeat. When your cabinets support each step, you move less and think less, so dinner shows up faster and with fewer “where’s the colander?” moments. The classic work triangle (sink–stove–fridge) and modern zone design give you the structure; your habits supply the rules.
Triangle + zones: the core idea
- The triangle: place sink, stove, and fridge so you move between them easily, with comfortable spacing to cut steps.
- The zones: organize cabinets into Prep, Cooking, Cleaning, Consumables (food), and Non‑consumables (dishes/tools). Store things where you use them, not where they “fit.”
Layout 1: the weeknight sprinter
You crank out fast meals most days. Build a straight-line flow: fridge/pantry → prep → stove → sink. Keep tools on that path so your hands never wander.
- Upper over prep: everyday spices, oils, salt, pepper, mixing bowls.
- Drawer by prep: knives, cutting boards, measuring spoons/cups, peelers.
- Base near stove: pans, lids, splatter screen, high-heat utensils in a crock.
Pro tip: Keep the prep zone between sink and stove for a wash–chop–cook rhythm that feels effortless.
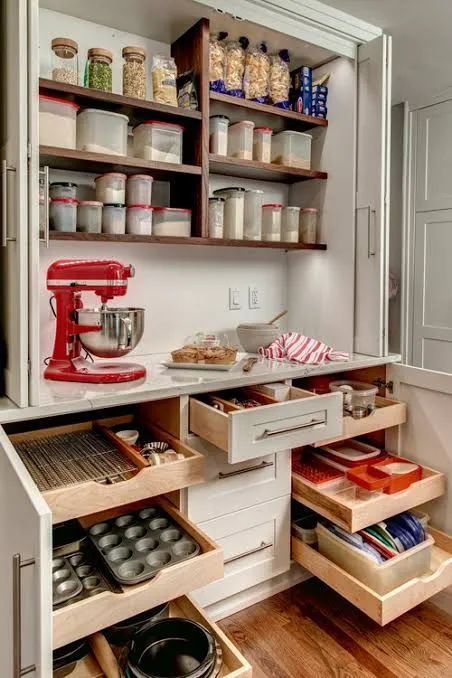
Layout 2: the batch-cook boss
You cook big on weekends and coast all week. Prioritize volume storage and staging areas, with cabinet space that swallows containers like a champ.
- Tall pantry with FIFO labels; date-sticker everything to stop waste.
- Upper near sink: food containers and lids, sorted by size; a bin just for lids.
- Deep drawer: sheet pans, casserole dishes, Dutch oven—your batch arsenal.
Pro tip: Park freezer-safe containers near the fridge for quick filling, labeling, and chilling.
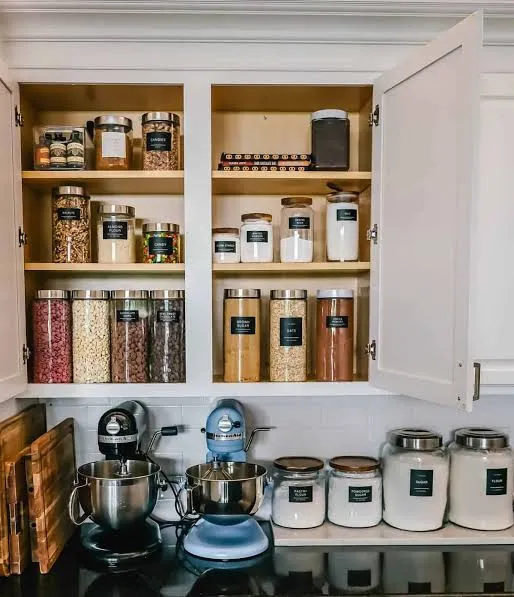
Layout 3: the baker’s dream aisle
You bake often and want flour nowhere near your laptop. Dedicate a clean “bake lane” and keep it tight.
- Base drawers under a clear counter: flours, sugars, cocoa, chips in airtight bins; attach scoops to lids.
- Upper above: baking powders, vanilla, sweet spices; label shelf edges.
- Narrow tray divider: cooling racks, sheet pans, cutting boards upright.
Pro tip: Use a lift-up mixer shelf in a base cabinet to save counter space and your back.
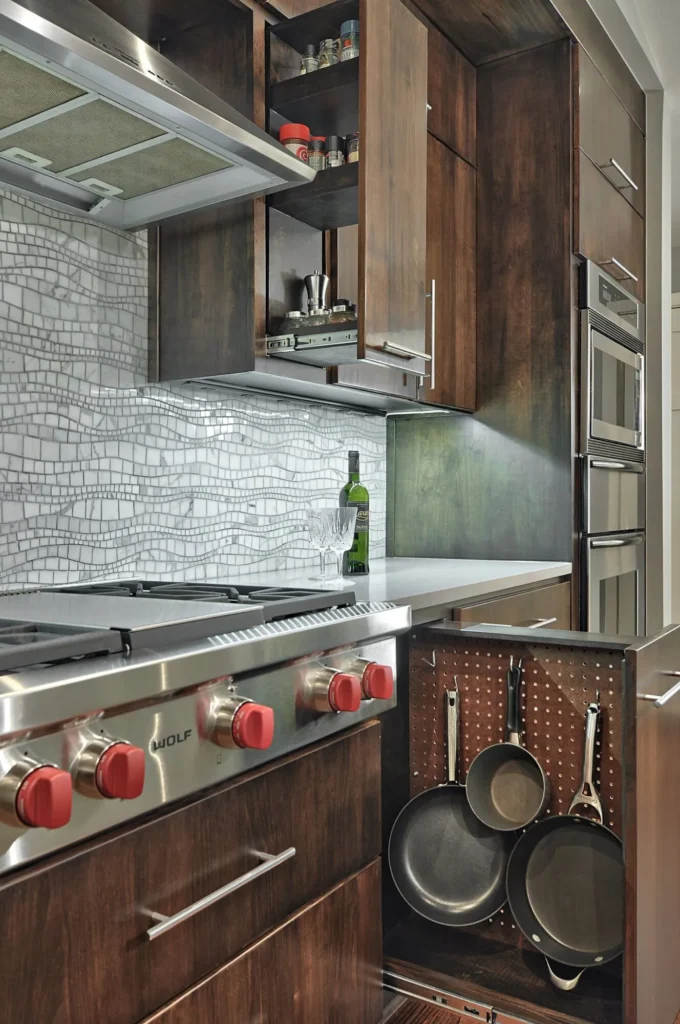
Layout 4: the one‑pan minimalist
Your menu lives on the stovetop. Cluster the kitchen around the cooktop and keep everything else lean.
- Base right of stove: daily pans and lids with a lid rack to stop the clang concert.
- Upper near stove: go-to spices, oils, hot sauces on tiered risers.
- Drawer under stove: spatulas, tongs, thermometer, trivets—your utility belt.
Pro tip: Hook pot holders near the stove so you never play “hand vs. 425°F.”
Layout 5: the entertainer’s zone

You plate for a crowd and love a buffet. Set a dish/serveware station close to the cleaning zone for lightning unloads and fast table setups.
- Uppers by dishwasher: plates, bowls, glasses for quick unload.
- Base drawers near the dining path: platters, large bowls, pitchers with dividers.
- Side cabinet: napkins, candles, bottle openers, spare cutlery—a party-in-a-box.
Must Check: 11 Jaw-Dropping Kitchen Countertop Organization Ideas to Maximize Your Space
Pro tip: Keep a small “grazing kit” with cheese knives, picks, and labels for instant boards.
Layout 6: the small‑kitchen strategist
Tight galley or single wall? Zone smart and use vertical storage to fake square footage. The triangle still guides you—even if it’s linear.
- Over‑fridge cabinet: rarely used appliances and bulk paper goods in labeled bins.
- Inside‑door organizers: cutting board racks, spice clips, shallow shelves.
- Corner helpers: lazy susans turn dead zones into MVPs.
Pro tip: Put the fridge and pantry nearest the prep stretch so you reduce back-and-forth steps.
Layout 7: the “two cooks” lane system
Two cooks means collisionsHome. Create parallel mini‑zones so no one blocks the fridge like a goalie.
- Two prep drawers: one by the sink, one by the stove—each with knives and a board.
- Split consumables: snacks near breakfast spot, cooking staples near prep.
- Duplicate basics: extra tongs and measuring spoons in both prep drawers.
Pro tip: Maintain clear walking paths with smart triangle spacing so traffic jams don’t start at 6 pm.
Layout 8: the healthy‑prep fast lane
You chop produce daily and assemble bowls like a pro. Make your fridge, prep, and consumables act like a salad bar.
- Upper at prep: grains, nuts, seeds, dressings, blender cups.
- Base drawer: salad spinner, prep bowls, mandoline, microplane with labeled dividers.
- Snack tier: one shelf/bin for grab‑and‑go, parked near the prep counter.
Pro tip: Use a shallow “use first” bin for produce to reduce waste and inspire quick meals.
Layout 9: the zero‑waste organizer
You compost, label, and rotate on autopilot. Set your cabinets to make sustainability easy.
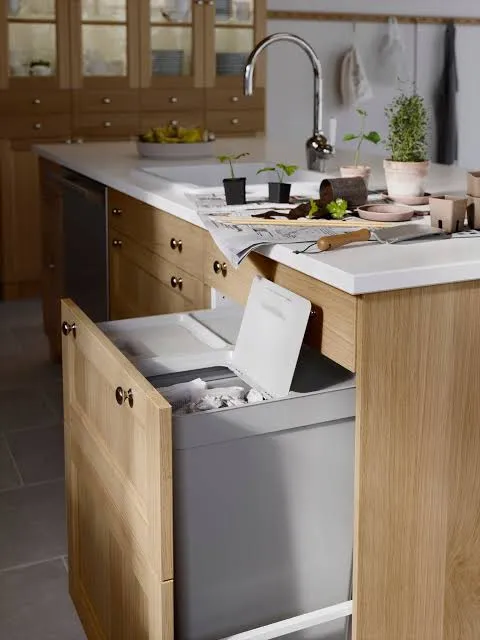
- Pull‑out by sink: trash, recycling, compost in one bay with clear liners and labels.
- Upper near sink: glass storage, beeswax wraps, reusable baggies; keep a grease jar and funnels.
- Pantry shelves with FIFO: front‑load older items, back‑load new; add date labels.
Pro tip: Schedule a 60‑day pantry audit and pivot meals toward near‑expiry foods (sanity saver, wallet saver).
Layout 10: the “no pantry” problem solver
No dedicated pantry? No biggie. Spread consumables near the prep zone and insert organizers like a Tetris master.
- Tall cabinet with pull‑outs: convert to a roll‑out pantry with tiered risers and can organizers.
- Over‑range shelf: daily oils, salt, pepper on heat‑safe risers.
- Toe‑kick drawers: stash sheet pans or wraps where they don’t hog prime real estate.
Pro tip: Use uniform clear bins with bold labels like Pasta, Breakfast, Snacks to scan and grab instantly.
Map your personal workflow
Walk through a typical meal and note where your hand reaches at each step; then place matching items within arm’s reach of that spot. It sounds obvious, but it transforms the way your kitchen feels. Draw your zones, assign cabinets, and let “closest-to-use” beat “where it fits” every time.
- Define the five zones: Prep, Cooking, Cleaning, Consumables, Non‑consumables.
- Assign cabinets by zone; avoid orphan items that live far from where you use them.
- Keep daily go‑tos between waist and eye level—prime real estate for speed.
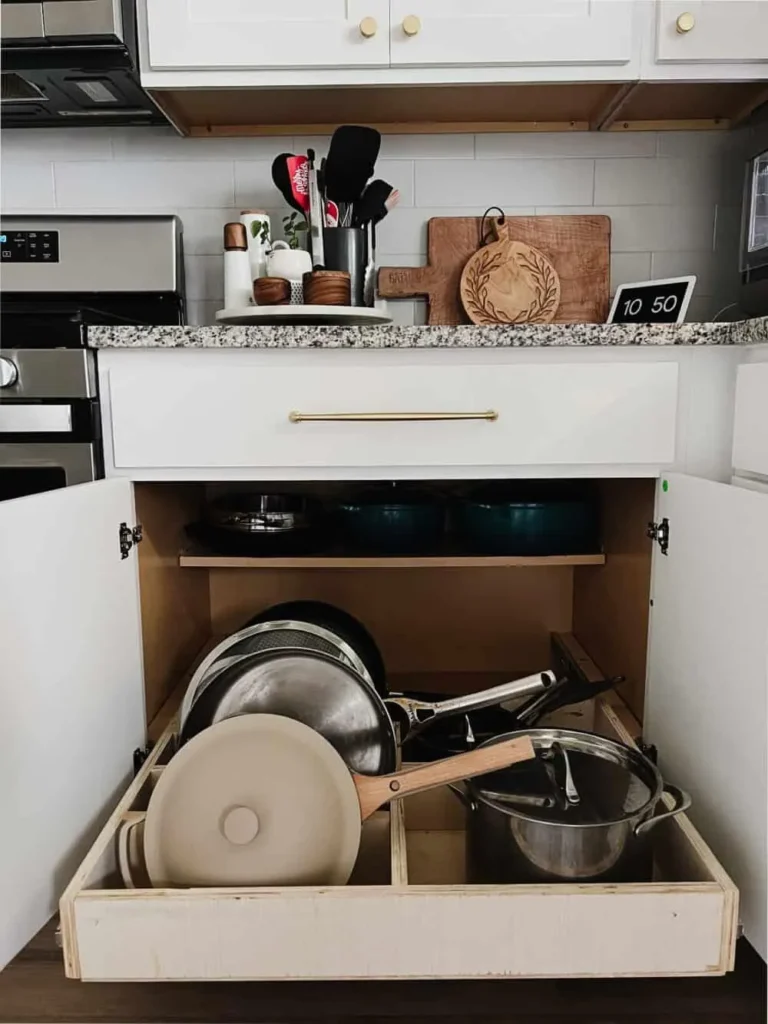
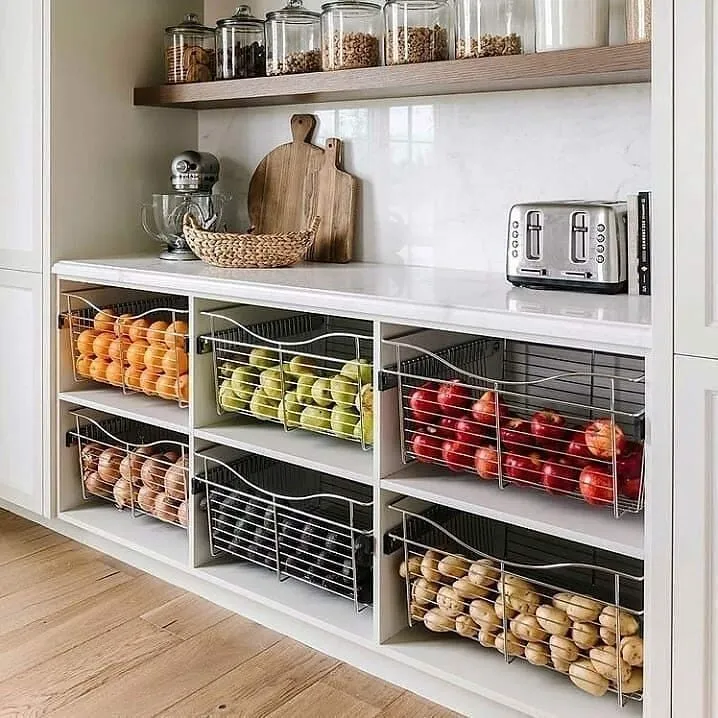
Storage upgrades that punch above their weight
A few inserts can make your kitchen feel custom without a remodel. Ever wondered why some kitchens feel intuitive on day one? It’s these little helpers.
- Pull‑out shelves: bring the back to the front for heavy appliances and cans.
- Divider racks: “file” baking sheets, lids, and boards vertically.
- Lazy susans: perfect for corners, oils, vinegars, and sauces.
- Drawer organizers: custom slots for knives, spatulas, and gadgets.
- Door racks: spices, wraps, and cleaners—turn doors into bonus space.
Triangle vs. zones (you want both)
The triangle cuts steps between the sink, stove, and fridge—great for daily cooking. Zones reflect how modern kitchens actually work—baking, beverages, lunch prep—while respecting traffic flow. Best of both worlds: set the triangle, then carve zones around it, and store by use within each zone.
Keep it organized long‑term
You nailed the setup; now make it stick with quick habits that don’t rely on willpower. IMO, systems fail in maintenance, not in design—so keep it simple.
- FIFO everything edible: label dates, rotate forward, cook oldest first.
- Unload dishes with intent: store plates and glasses right next to the dishwasher.
- Quarterly reset: 30 minutes to purge duplicates, refresh labels, and tune trouble spots.
Quick-reference: what goes where
- By the stove: pots, pans, lids, mitts, oils, salt, pepper, go‑to spices.
- By the prep area: knives, boards, mixing bowls, measures, peelers, frequent dry goods.
- By the sink/dishwasher: plates, bowls, cups, cutlery, towels, soaps, trash/compost.
- Pantry/consumables: dry goods, snacks, cans, with FIFO labels and clear bins.
When to break the rules
Single‑wall kitchens can’t do a perfect triangle—so keep the fridge near prep and the stove within a comfy pivot. If kids snack all day, carve a snack zone away from the cooking lane. If you’re left‑handed or have mobility needs, mirror or lower key zones so the kitchen fits you, not a diagram.
Speed upgrades you’ll feel today
- Put an in‑drawer knife tray in the prep zone so you don’t cross the kitchen with wet hands.
- Store dishes above/beside the dishwasher for a 60‑second unload—it feels like a cheat code.
- Mount a rail with S‑hooks near the stove for ladles, tongs, and mitts; goodbye drawer chaos.
Common mistakes that cause cabinet chaos
- Storing by category instead of use: “all plastics” in one spot far from the sink = extra steps; store by zone of use.
- Ignoring eye‑level: keep daily items between waist and eye height; exile rarely used stuff up high.
- Buying bins before mapping zones: plan first, then buy inserts that solve specific problems.
Mini setups for different cooks
- Stir‑fry fan: wok, high‑heat oil, and spatula by the stove; aromatics/soy/vinegar on a lazy susan; knives and board at prep.
- Sandwich artist: breads and condiments near the fridge, boards and knives in the prep drawer, plates by the dishwasher for quick serve.
- Smoothie starter: blender accessible, cups and scoops above, frozen fruit front of freezer, chia/flax in labeled bins near prep.
A quick word on aesthetics
Aim for calm when doors open: repeat container styles, label clearly, and keep visible zones tidy. You’ll use what you see and stop rebuying what you buried. It’s practical minimalism without the preach—clean lines that earn their keep.
Your next 60 minutes: zero overwhelm
- Step 1: Sketch your triangle and mark your five zones (be honest about habits).
- Step 2: Move the top 20 items you touch daily into prime spots near their zones.
- Step 3: Add two inserts that fix your biggest pain (pull‑out, divider, or lazy susan).
Conclusion
Stop the cabinet shuffle by organizing for the cook you are—not the catalog you browse at midnight. Set your triangle, build your zones, and let your cabinets mirror your real routines so your kitchen feels like a teammate, not a toddler on espresso. Ready to reclaim your counters and your sanity? Start with one zone tonight, label two shelves, and enjoy tomorrow’s easier breakfast 🙂