Here’s how to style a kitchen island christmas centerpiece that actually steals the show: anchor it with a strong base, layer greenery and height, add a focal moment with candles or a mini village, then finish with texture, sparkle, and smart lighting while keeping traffic flow and wipeability in mind.
Focus on balance and practicality—think trays, runners, faux garland, and hurricanes—so the display looks lush but moves easily when the cookie-baking chaos kicks in, because it will.
In This Article
- 1 Why the island matters
- 2 Pick a strong base
- 3 Choose a theme that pops
- 4 Layer lush greenery
- 5 Add height (without blocking faces)
- 6 Pick a focal moment
- 7 Light it like a pro
- 8 Mix textures for richness
- 9 Keep it practical and moveable
- 10 Scale it to your island
- 11 Smart safety and traffic flow
- 12 Five centerpiece formulas that always work
- 13 Quick swap ideas for busy weeks
- 14 Budget-friendly pro tricks
- 15 Trending looks this season
- 16 Mistakes to avoid
- 17 A sample step-by-step build
- 18 Clean-up and after-holiday plan
- 19 Final touch: make it personal
- 20 Conclusion
Why the island matters
A kitchen island sits at the center of holiday life, so a showstopper centerpiece instantly tells guests where the magic happens (and where the snacks are).
When styled right, it delivers big visual impact without blocking traffic or commandeering the prep space for three weeks straight, which matters in real-world kitchens. The trick is choosing pieces that look luxe, clean easily, and shift without a meltdown when the cocktail shaker needs room, IMO.
Pick a strong base

Start with a base that defines the footprint and protects the counter—tray, riser, wooden board, or a wipeable vinyl runner if going big and dramatic.
Vinyl and large trays make heavy pieces feel intentional and help “zone” the display on long islands, which reads finished and keeps crumbs from wandering into the decor village like tiny holiday tumbleweeds. A wood slice tray brings a rustic grounding that warms sleek quartz or marble without visual clutter.
Choose a theme that pops
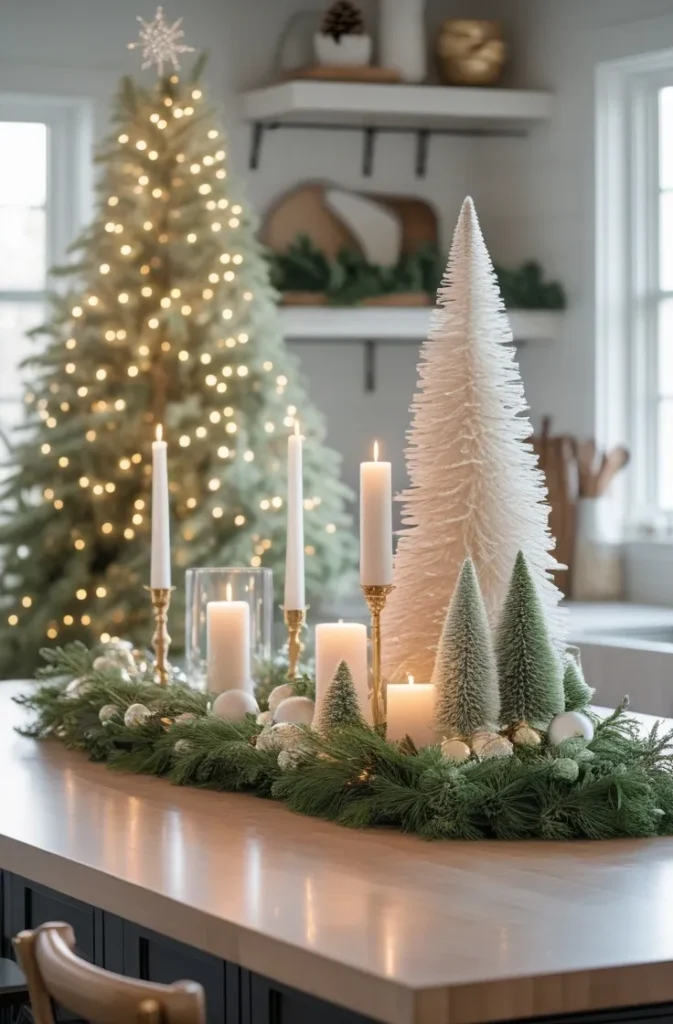
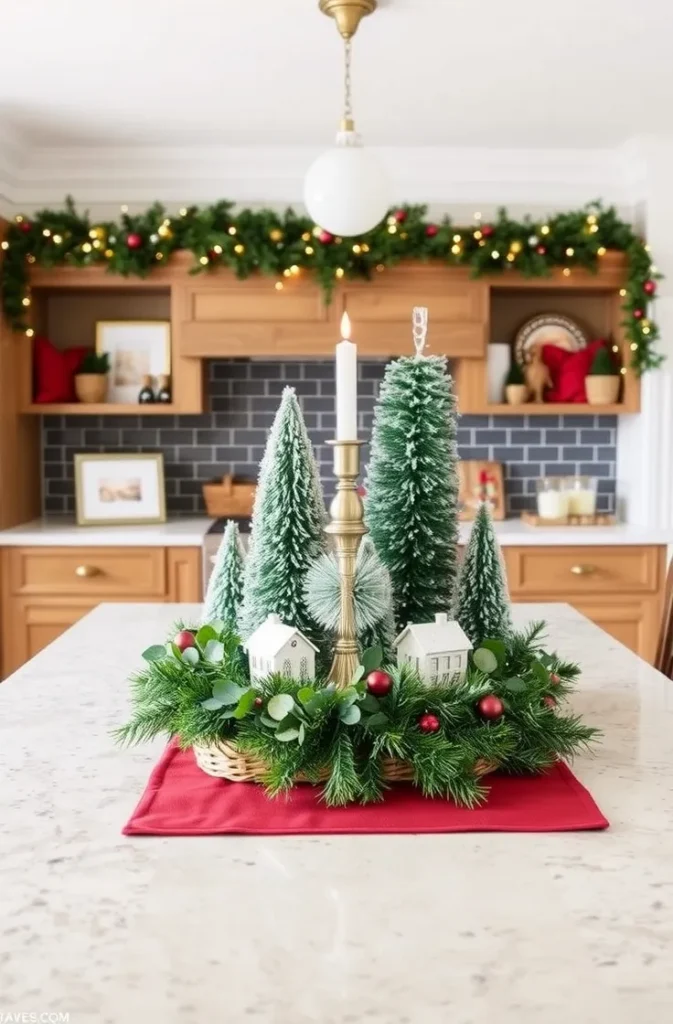
Pick a clear vibe and stick to it: minimalist greenery, Nordic neutrals, glam gold-and-glass, or “enchanted forest” with bottle-brush trees and soft glow.
Themes don’t just look cohesive—they help editing, so the centerpiece feels curated, not like the seasonal aisle tripped on the island and stayed for cocoa. If the kitchen leans modern, dial up glass, metal, and slim silhouettes; if farmhouse, lean on wood, linen, and frosted greens for texture.
Layer lush greenery
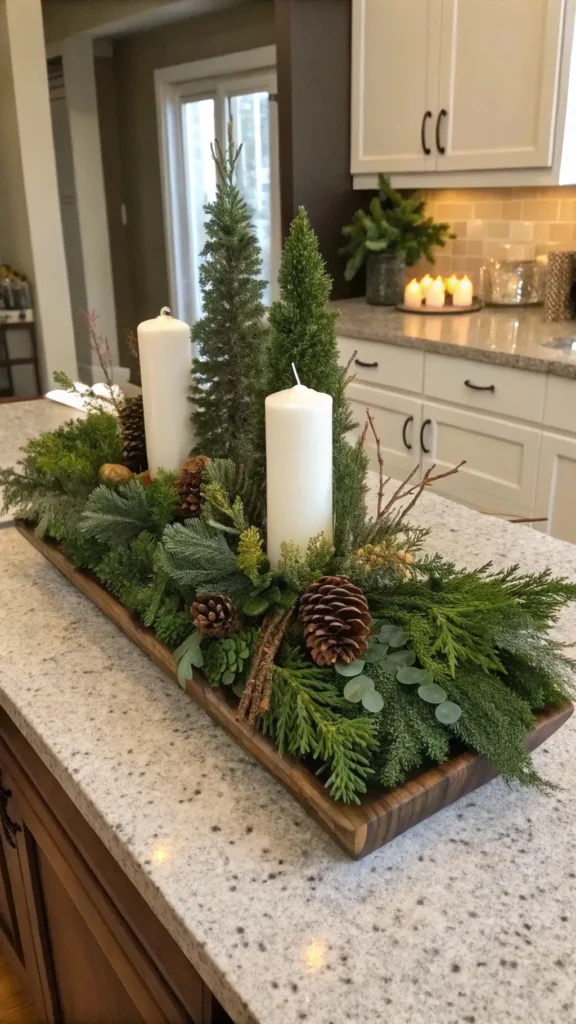
Run faux or fresh garland across the base, then tuck in cedar or pine picks to thicken the line and hide stems for that “designer full” look.
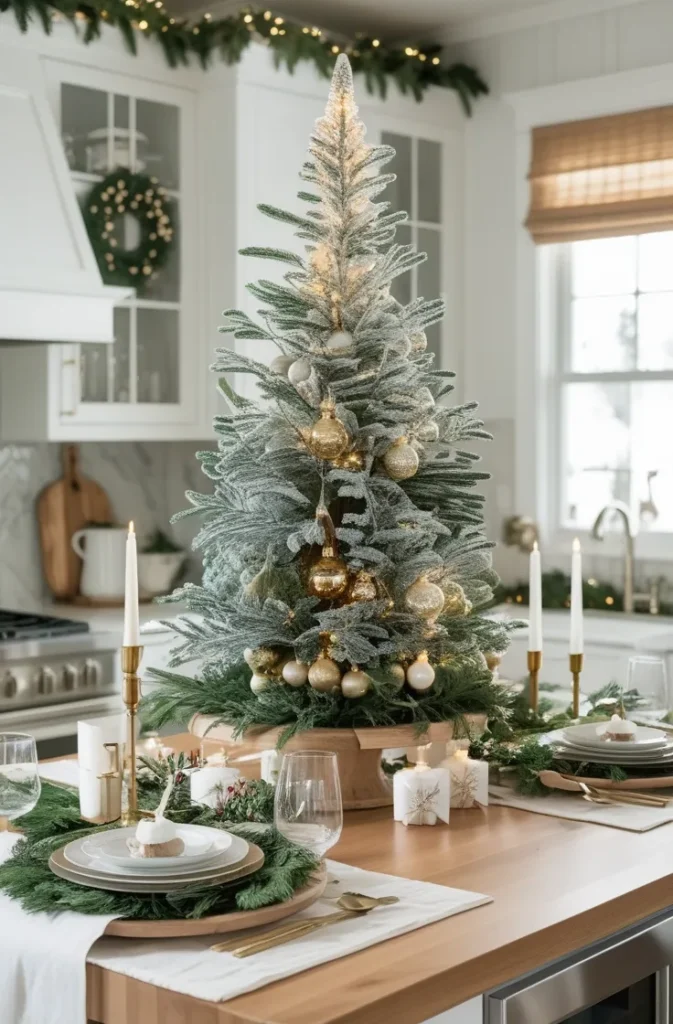
Add small evergreens or mini trees to break up the horizontal line and instantly create a wintry landscape that frames candles or a focal object. If using fresh greens, keep a tray and runner underneath for easy cleanup and to prevent sap drama on stone tops, FYI.
Add height (without blocking faces)
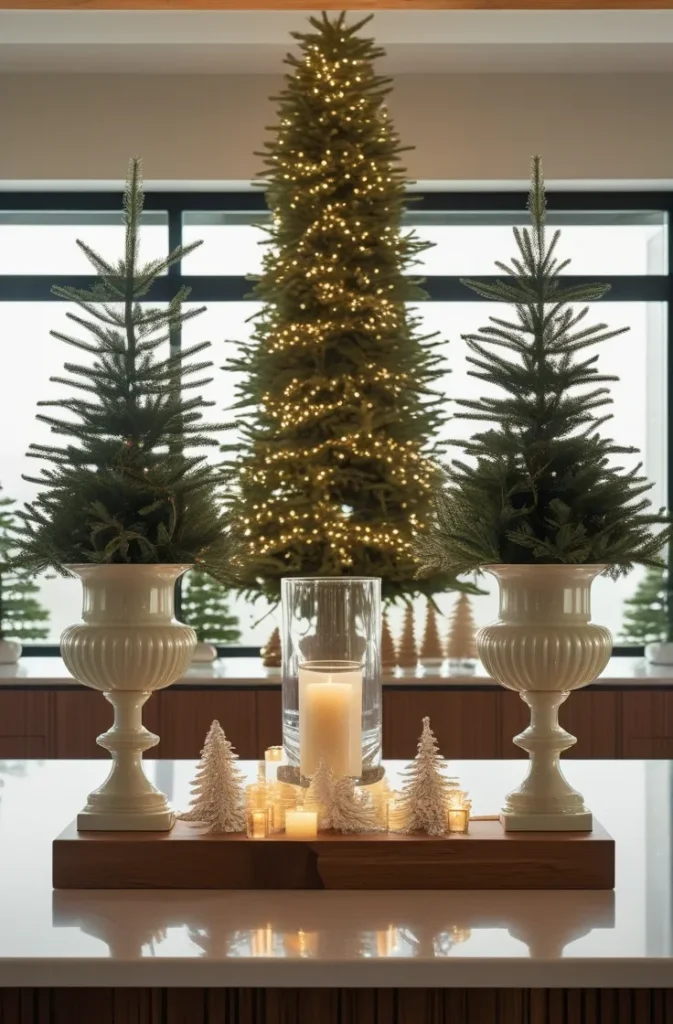

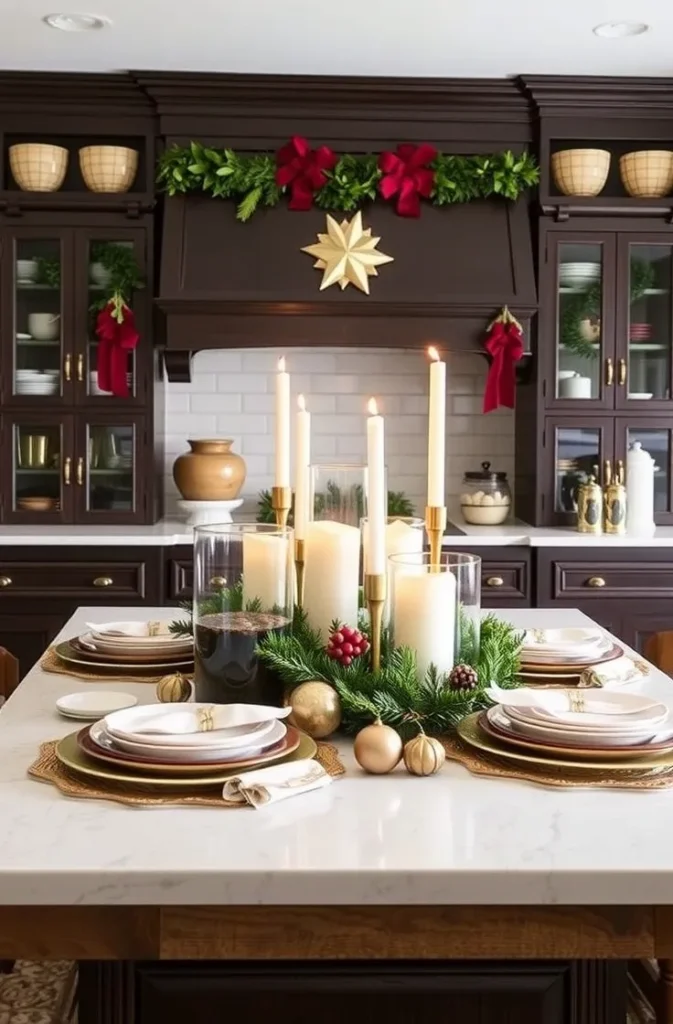
Think in tiers—low greenery, mid-height trees or hurricanes, a single taller anchor—and keep sightlines open so guests don’t talk through a forest of pine.
Two matching hurricanes flanking a center platform look polished and “holiday hotel lobby,” in the best possible way. Vary materials for depth—glass, wood, ceramic—but keep the palette tight so it reads intentional, not random.
Check Next: 12 Stunning Kitchen Table Christmas Decor Ideas That Steal the Party
Pick a focal moment
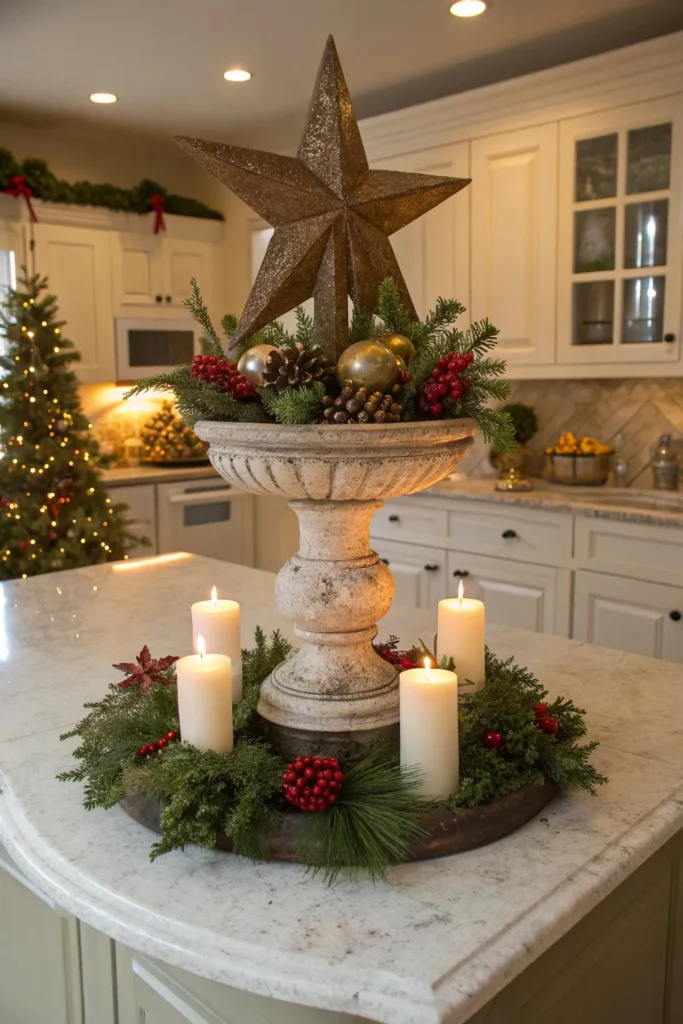
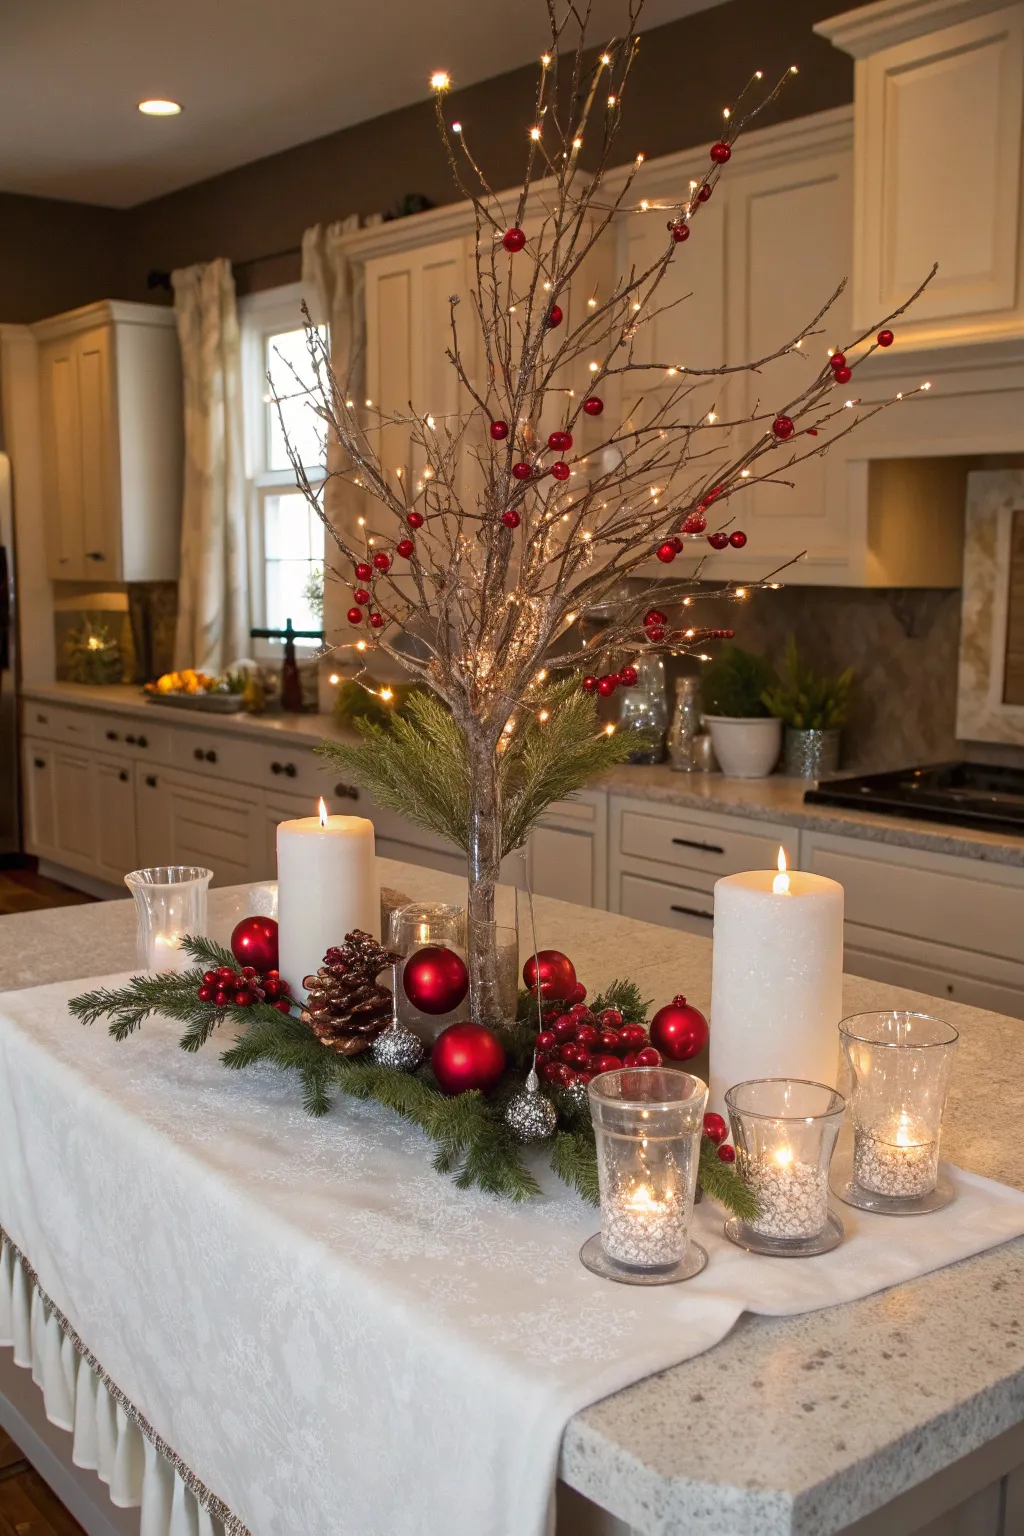
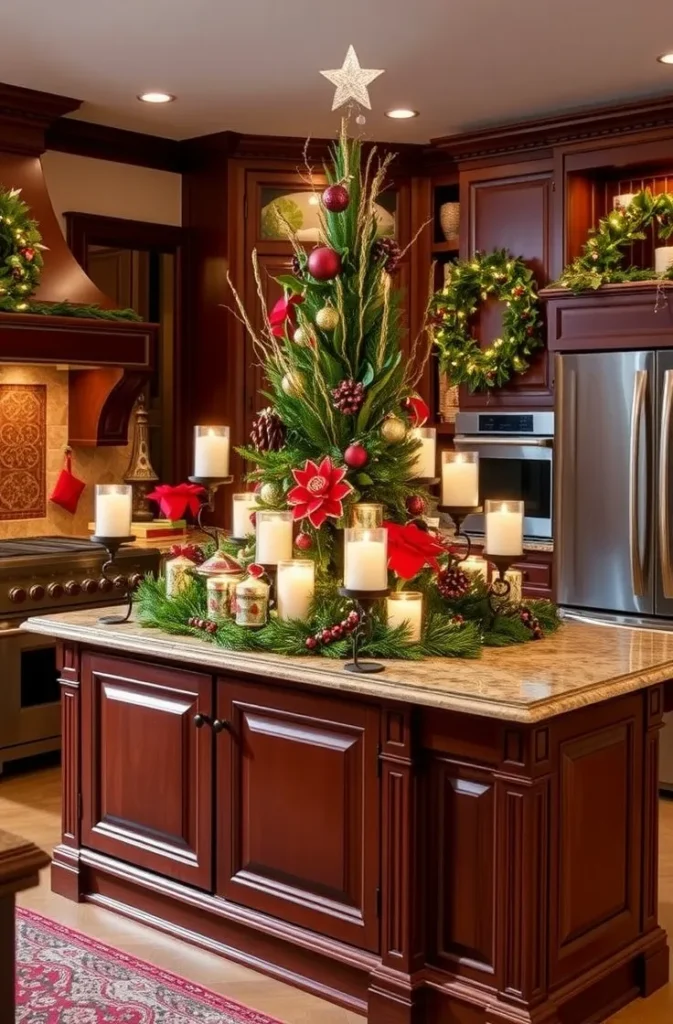
Choose one “steal the show” element: an oversize pedestal with a vignette, a glass cloche with ornaments, or a mini ceramic village sprinkled with faux snow.
A wide center riser creates a stage for those special pieces and makes everything else feel elevated (literally and stylistically). If space allows, flank the focal with symmetrical elements—candles, trees, or lanterns—to amplify the drama without visual chaos.
Light it like a pro
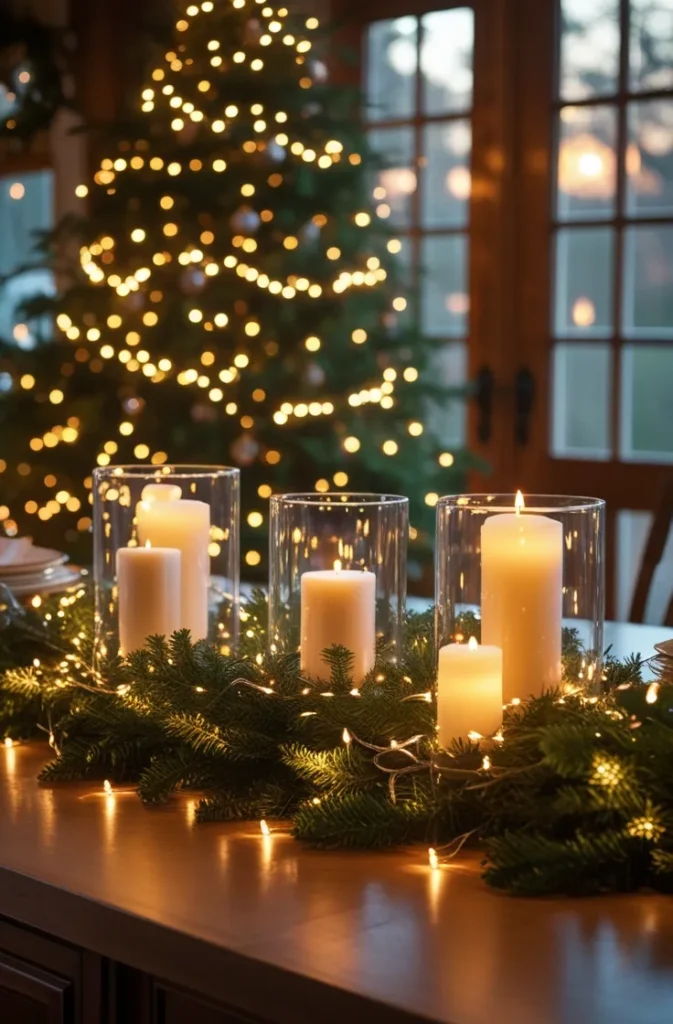
Soft lighting sells the magic: hurricanes with pillar candles, LED tapers, or battery micro-lights woven through garland for glow without cords.
If kids or pets hover nearby, go flameless and tuck fairy lights into greenery for that “twinkle at dusk” vibe that photographs beautifully (and won’t scorch the napkins). Keep light sources at staggered heights to add depth, and repeat warm white for consistency.
Mix textures for richness
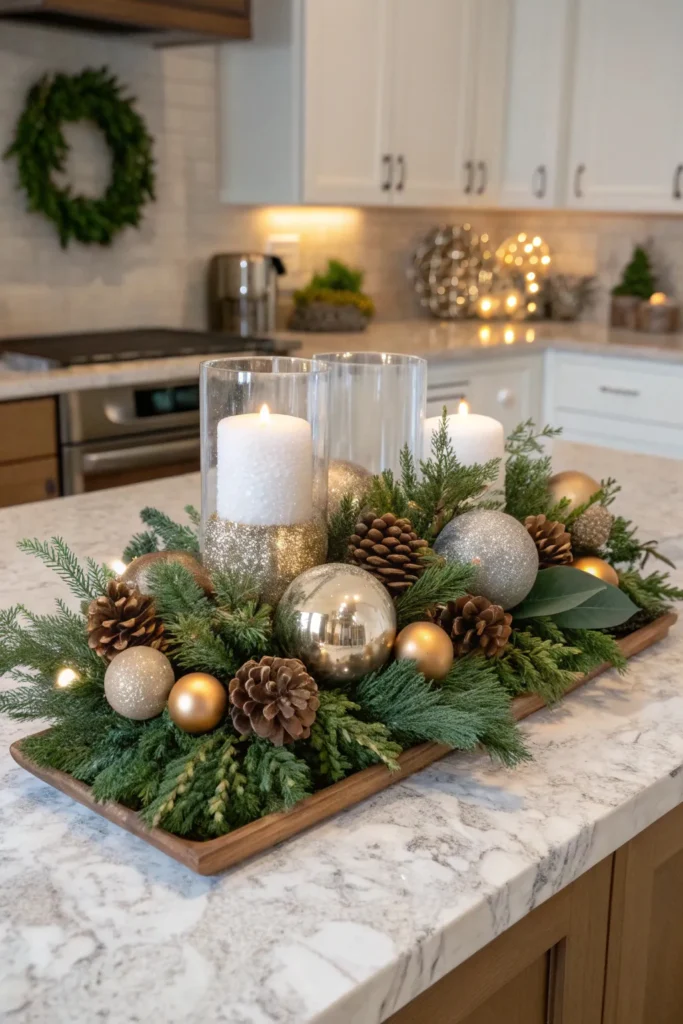
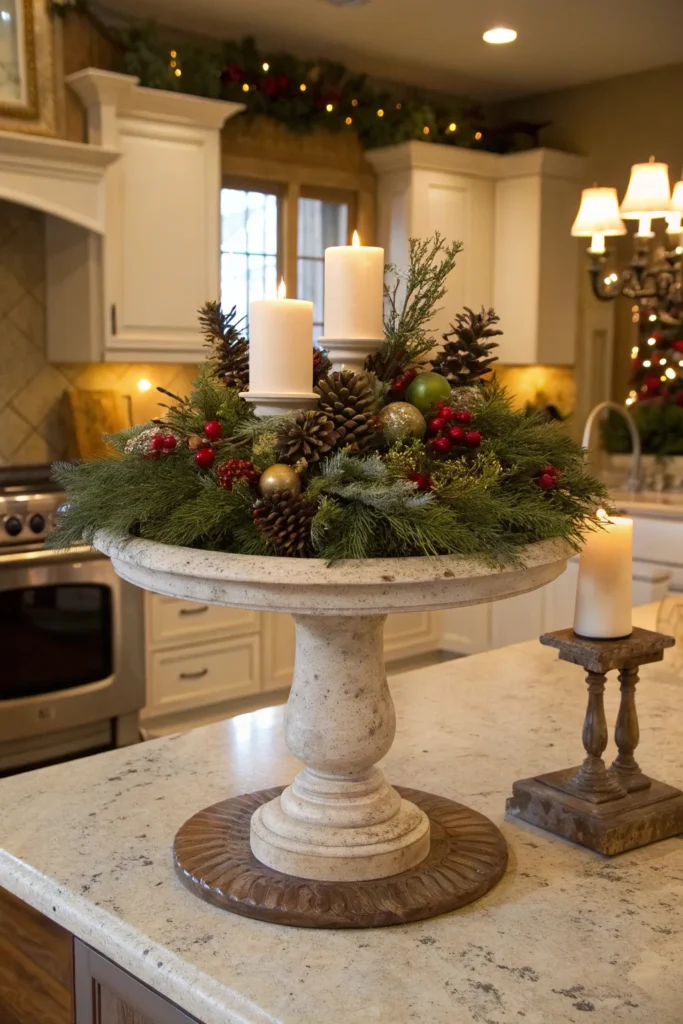
Balance glossy ornaments with matte ceramics, frosted greenery with smooth glass, and add small natural touches like pinecones for contrast.
A simple recipe that never fails: lush garland + two glass hurricanes + a wood element + a metallic accent = instant designer centerpiece. Metallics like brushed brass or champagne gold add holiday glam without veering into tinsel-overload territory.
Keep it practical and moveable
Corral everything on a tray, riser, or runner so the entire scene slides aside in one move when it’s time for cookie sheets and punch bowls.
Choose wipeable pieces and avoid loose faux snow on food-prep zones unless it’s contained inside hurricanes or cloches—clean counters are the real gift of the season. If the island doubles as a buffet, style the centerpiece to one side and leave landing space for platters and drinks.
Scale it to your island
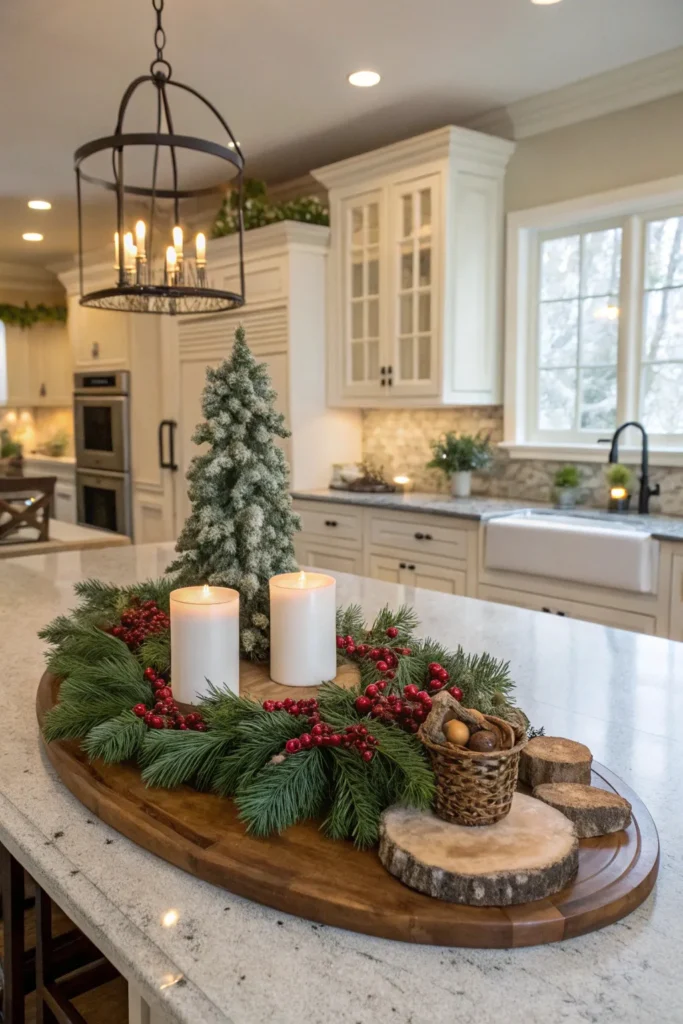
Large island? Go “wow” with a long runner, oversized platform, and flanking hurricanes to maximize the footprint. Compact island? Use a round tray or wood slice with a tight vignette—mini tree, candle, and bead garland—so it looks full but not fussy.
Curved islands? Lean into the arc with a crescent garland and staggered heights that follow the curve for smooth traffic and balanced sightlines.
Smart safety and traffic flow
Leave 36–42 inches of clearance around the island so the display doesn’t bottleneck holiday traffic like a mall parking lot on December 23rd.
Keep flames and tall decor away from stove lines and high-heat zones, and choose LED candles in high-traffic kitchens for peace of mind. Avoid sharp-edged decor at corners where hips and backpacks collide; rounded and recessed pieces save bruises and ornaments.
Five centerpiece formulas that always work
- Nordic Minimal: low cedar garland, three slim LED tapers, two mini ceramic houses, and a matte black tray for contrast.
- Enchanted Forest: bottle-brush trees in mixed heights on a wood slice, with micro-lights and a frosted pine accent pick.
- Glass & Gold: central riser with ornaments under a cloche, flanked by gold hurricanes filled with “snow” and village houses.
- Rustic Cozy: chunky wood board, pillar candle in smoked glass, pinecones, plaid ribbon, and a small flocked tree.
- Candy Cane Bar: long runner, alternating red-and-white ornaments, clear jars of candy canes, and a single evergreen swag.
Quick swap ideas for busy weeks
If the island hosts brunch or cookie parties, design for easy edits—remove the center riser and keep just the garland and candles for instant serving space.
Use nesting components like lidded cloches and jars so fragile pieces stash quickly without a full teardown when guests arrive early (because they always do). Keep a labeled tote nearby for rapid swaps—village out, charcuterie in—so hosting doesn’t nuke the look.
Budget-friendly pro tricks
Use a vinyl runner as a base to protect stone and add color; it wipes clean and lasts for seasons. Bottle-brush trees and mini houses create high-end vibes for less when grouped and repeated—scale and repetition feel designer, not price tag dependent.
Faux garland pays off over time; fluff it, add picks, and thread micro-lights for a luxe finish on a budget :).
Trending looks this season

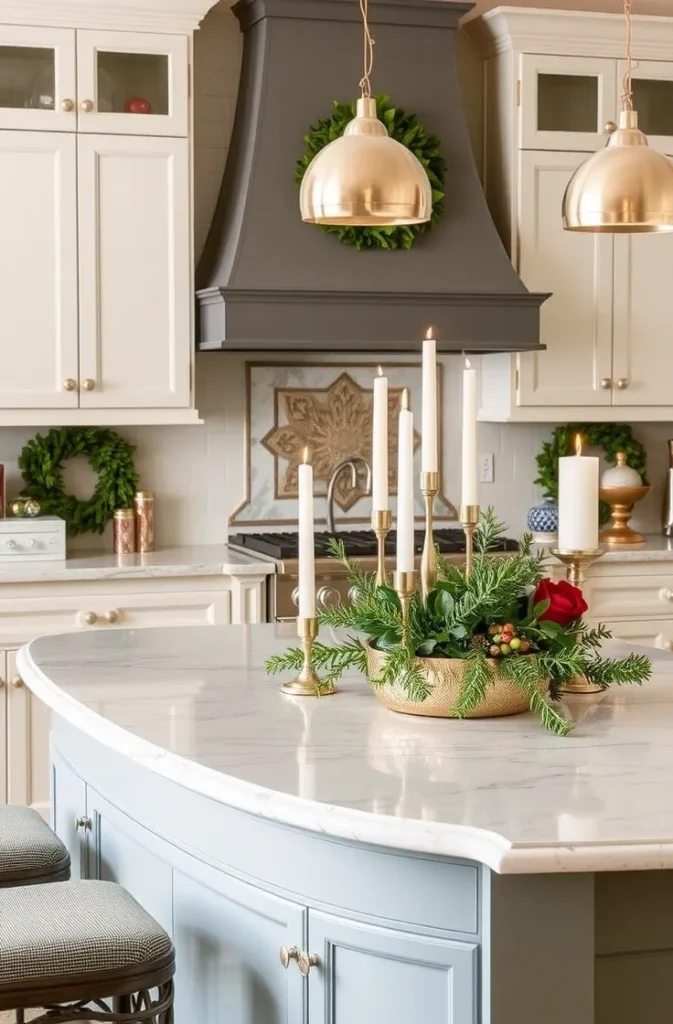
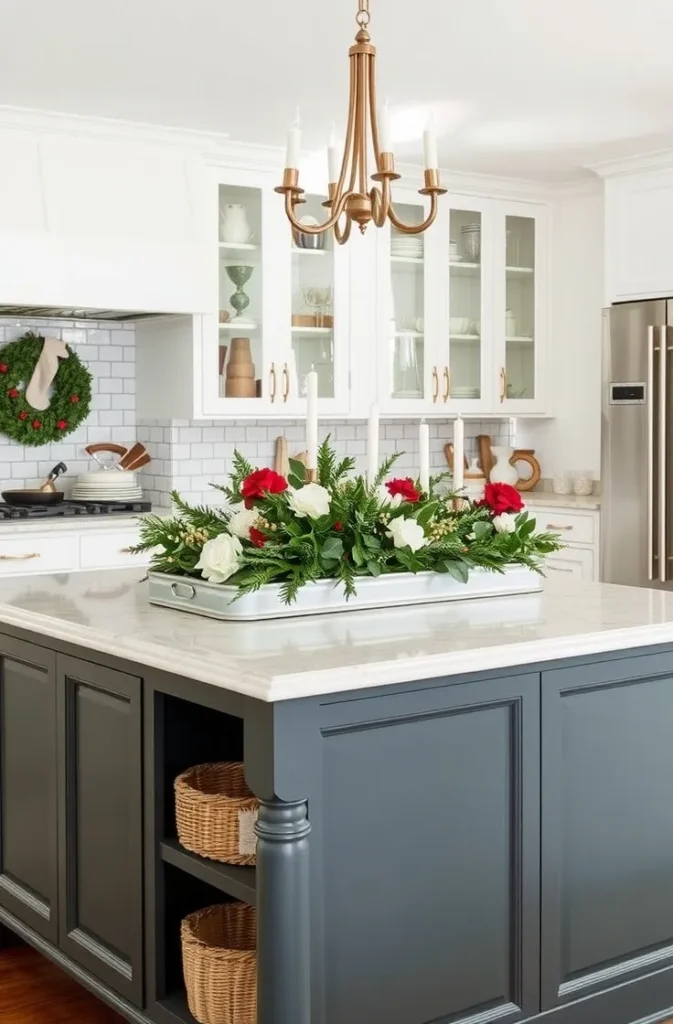
Editors lean into sophisticated kitchen decor: wreaths on cabinetry, warm metals, and styled beverage nooks that echo the island centerpiece for cohesion.
Minimalist centerpieces with natural greenery and tapered candles stay timeless and photograph well for social—hello, holiday pin traffic. Curved islands are having a moment—styling that follows the arc feels elevated and guest-friendly.
Mistakes to avoid
- Overcrowding: if platters can’t land, scale down or corral decor on a tray.
- Wobbly layers: heavy anchors at the bottom, lighter decor up top—no one wants a cloche crash mid-toast.
- Mixed temperatures: stick to warm white or cool white lighting across pieces; clashing light tones look messy.
A sample step-by-step build
- Lay a vinyl runner or oversized wood board to define space and protect counters.
- Place a wide riser or low crate in the center as a stage.
- Drape faux cedar garland and tuck stems to thicken; keep ends neat.
- Add two hurricanes left and right; fill bases with Epsom “snow” or ornaments.
- Build the focal: cloche with ornaments, or a mini village with warm LED tea lights.
- Tuck in mini trees and pinecones to fill gaps; keep height varied.
- Thread micro-lights through greenery; hide battery packs behind the riser.
- Edit: remove one item, then one more—negative space = luxury.
Clean-up and after-holiday plan
Choose pieces that transition into winter by pulling the red: keep greens, glass, and gold, and swap ornaments for citrus or neutral ceramics. Store delicate items inside their own cloches or hurricanes to avoid breakage, then slide the entire tray into a shelf—future self says thanks.
When the tree comes down, refresh the island with white candles, pine, and a bowl of lemons for a bright winter reset, no emotional whiplash required.
Final touch: make it personal
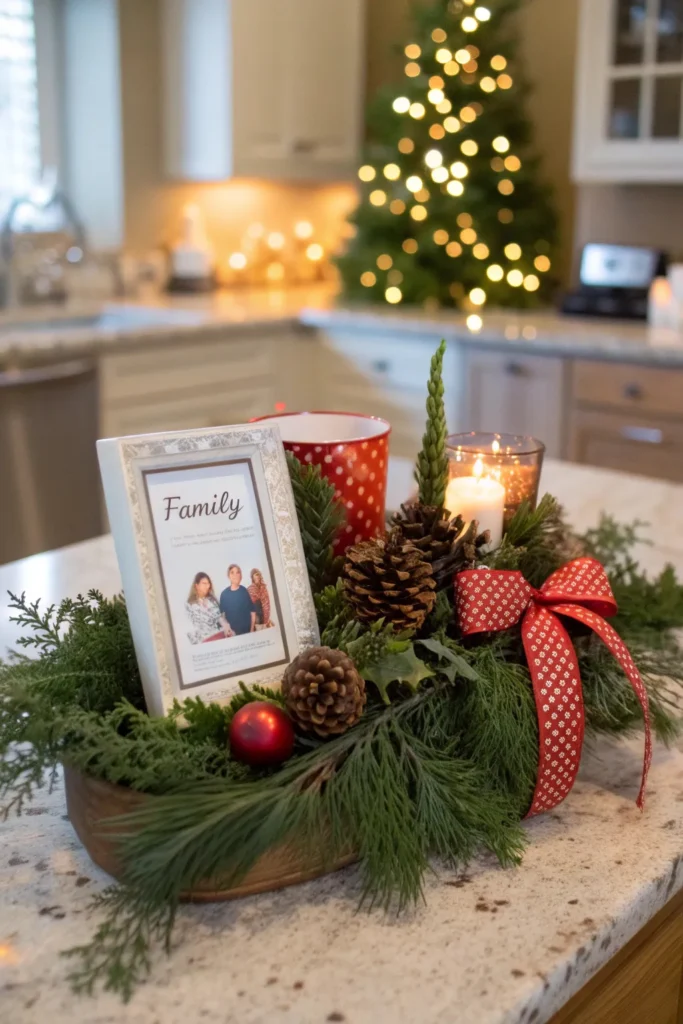
Add a tiny framed recipe card from family, a monogram ribbon, or a favorite ornament tucked into the garland—those details make guests lean in and ask questions. If kids help, assign them the “village architect” role; give them one side to style and set a boundary with a tray so creativity stays adorable, not chaotic :/.
Most importantly, build a centerpiece that can flex for the season’s real rhythm—weeknight cocoa, weekend parties, and the inevitable crumb trail—because the best decor works as hard as the kitchen does.
Conclusion
Build a show-stealing kitchen Christmas island centerpiece by anchoring with a solid base, layering greenery and height, spotlighting a single focal moment, and dialing in warm lighting and texture—then keep it flexible for hosting and clean-up.
Scale it to the island, respect traffic flow, and stick to a tight palette so the scene reads high-end, not high-maintenance—your guests will notice, and the photos will absolutely slay, FYI. Now grab the runner, fluff the garland, and let the island earn its Main Character energy this season.