
Let’s face it: flat, painted drywall behind a stove is about as exciting as watching paint dry. You want texture, you want character, and you probably want it done before the weekend is over.
Whether you’re chasing that gritty industrial loft vibe or a cozy farmhouse aesthetic, a brick backsplash delivers major style points. But should you go authentic or fake it? Let’s figure it out.
Real Brick vs. Faux Brick: Which One is Your Vibe?
Before we start ripping things apart, you need to pick a lane. Are you a purist who needs the cold, hard touch of clay, or a budget-savvy DIYer who just wants the look?
The Real Deal (Thin Brick Veneer):
- The Look: Unbeatable authenticity. It has depth, imperfections, and genuine texture.
- The Cost: Roughly $12–$20 per square foot for materials, not including the sweat equity you’ll invest.
- The Effort: High. You’re dealing with wet saws, mortar, and a lot of mess.
- Best For: Forever homes and people who don’t mind heavy lifting.
The “Fake It” (Faux Panels/Peel-and-Stick):
- The Look: Surprisingly good if you hide the seams well, but can look plastic-y if you buy the cheap stuff.
- The Cost: A fraction of the price—often under $5–$10 per square foot.
- The Effort: Low. You can knock this out in an afternoon with a utility knife and some glue.
- Best For: Renters, tight budgets, or anyone who changes their mind about decor every six months.
IMO, if you plan to sell your house in a few years, go real. Buyers can spot plastic brick from a mile away. But if you just want a quick refresh? Faux is your best friend.
Option 1: Installing Real Thin Brick Veneer
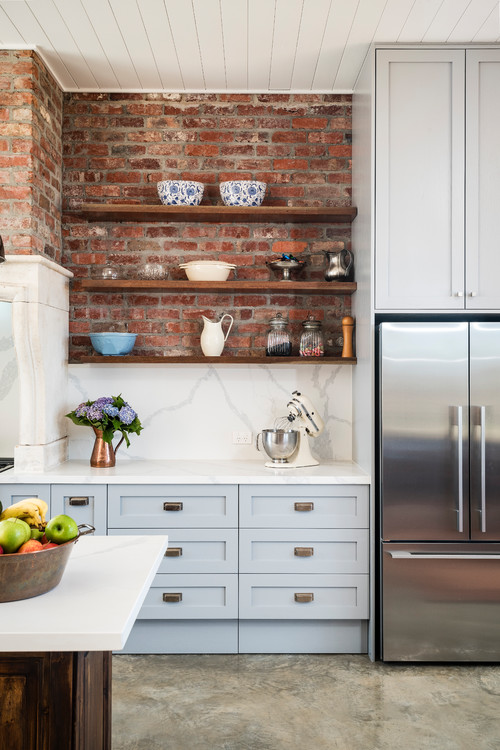
Photo by Smith & Smith Kitchens – Search kitchen pictures
So you chose violence—err, I mean, authenticity. Good for you. Installing real brick veneer is messy, but the payoff is huge. Do not rush this.
Gather Your Arsenal
You can’t do this with just hope and a hammer. You’ll need:
- Thin brick veneers (obviously).
- Thinset mortar or construction adhesive (like Loctite Power Grab for smaller areas).
- Notched trowel and a wet saw (rent one; don’t be a hero trying to use an angle grinder inside).
- Grout bag (looks like a bakery piping bag, but for mud).
- Spacers (3/8 inch is standard).
Step 1: Prep Like You Mean It

Clean your walls thoroughly. Grease is the enemy of adhesion. If your drywall is painted with high-gloss paint, scuff it up with sandpaper so the mortar has something to grab onto. Remove all outlet covers and tape off your countertops unless you want them permanently crusted in mortar.
Step 2: Stick ‘Em Up

You have two choices here: apply mortar to the wall or “butter” the back of each brick. For beginners, back-buttering is cleaner. Apply a dollop of adhesive, press the brick firmly against the wall, and wiggle it slightly to create a vacuum seal. Use spacers to keep your lines straight, or eyeball it if you want that “old world” charm (risky, but I respect it).
Step 3: The Grouting Game

Wait 24 hours for the bricks to set. Now, mix your grout to the consistency of peanut butter. Fill your grout bag and pipe it into the gaps just like you’re icing a very gritty cake. Don’t smear it all over the brick face unless you want a “German smear” look intentionally. Once the grout gets firm (about 20 minutes), use a striking tool or a gloved finger to smooth it out.
Option 2: The “Fake It ‘Til You Make It” (Faux Panels)
Okay, you want the look without the backache. I get it. Faux panels are lightweight and forgiving, but the seams are your nemesis. If you don’t handle the seams right, it looks like a cheap movie set.
Tools for the Trade

Faux brick panels (4×8 sheets or smaller interlocking tiles).
- Construction adhesive (Liquid Nails works wonders).
- Jigsaw or circular saw.
- Paintable caulk (this is your magic wand).
- Level and measuring tape.
Installation Hacks
Start from the most visible corner. Measure twice, cut once—seriously, don’t eyeball it. Apply adhesive to the back of the panel and press it onto the wall. Here is the pro tip: When you butt two panels together, run a bead of caulk along the seam.
Once the panels are up, use your finger to smudge the caulk into the seam, mimicking the texture of mortar. Paint over the seams if necessary. If you skip this, you’ll see a straight line running down your “brick” wall, and it will drive you crazy every time you make coffee.
The Sealing Secret (Don’t Skip This!)
Listen to me closely: Real brick is a sponge. If you splash spaghetti sauce on unsealed brick, that stain is living there forever. You must seal your backsplash immediately after the grout dries.
Use a high-quality penetrating stone sealer. It soaks into the pores without making the brick look shiny or plastic. Brush it on, let it sit for a few minutes, and wipe off the excess.
Do this once a year if you cook a lot of greasy food. Faux brick usually doesn’t need sealing, but check the manufacturer’s instructions—some cheap panels might melt near a gas stove, FYI.
Conclusion
Installing a brick backsplash isn’t rocket science, but it does require some patience and the right playlist.
Whether you go with the timeless durability of real veneer or the quick-fix magic of faux panels, you’re adding serious personality to your kitchen. Just remember: measure your outlets before you glue anything down, and for the love of design, hide those seams!
Now, go make a mess. You’ve got this! 🙂