
Are your countertops looking tired and outdated, but a full renovation isn’t in the budget? Don’t worry! With some creativity and a little elbow grease, you can give your countertops a stunning makeover without spending a fortune.
From painting techniques to peel-and-stick solutions, I’ll guide you through pocket-friendly DIY Kitchen Countertop Makeover ideas that will completely transform your kitchen or bathroom countertops.
In this article, you’ll discover:
- Easy and affordable DIY countertop makeover ideas.
- Tips for achieving professional-looking results on a budget.
By the end, you’ll have all the tools and inspiration you need to refresh your countertops and breathe new life into your space. Let’s get started!
DIY Kitchen Countertop Makeover Ideas
1. Transform with Countertop Paint Kits
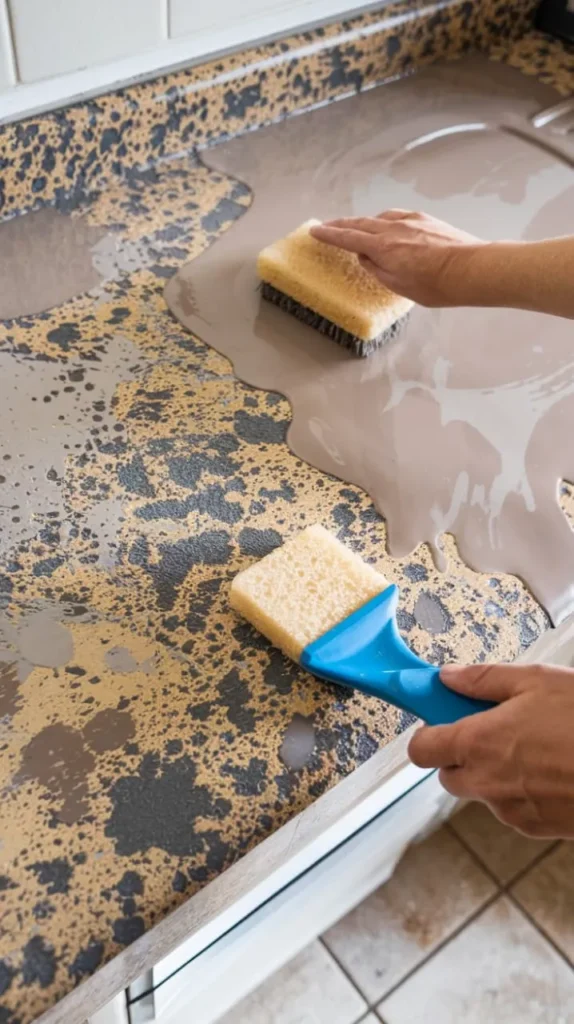
One of the easiest ways to revamp your countertops is by using a countertop paint kit. These kits are designed to mimic expensive materials like Perfect for: The “I want it done yesterday” crowd.
One of the easiest ways to revamp your counters is a paint kit. These bad boys are designed to mimic expensive stuff like granite or marble, but they cost less than a fancy dinner out.
How to Do It:
- Scrub and Sand: Clean that surface like your life depends on it, then sand off the gloss.
- Prime Time: Roll on the primer (it usually comes in the kit).
- Get Artsy: Use the included sponges to dab on layers. This creates that realistic stone look.
- Seal the Deal: Finish with the topcoat to protect against scratches.
Pro Tip: Stick to water-based kits. They smell way less, so you won’t feel dizzy while you work.
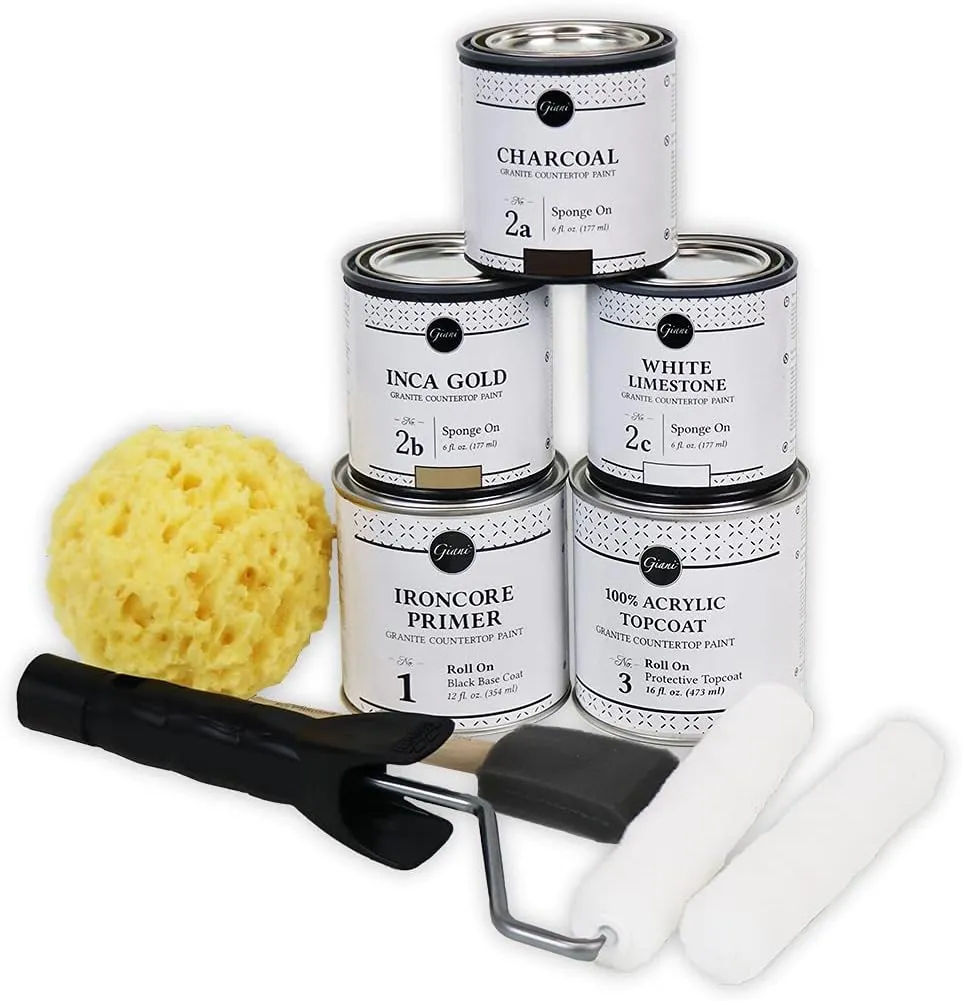
This Granite Countertop Paint Kit Will Do the Job
2. Cover with Peel-and-Stick Contact Paper
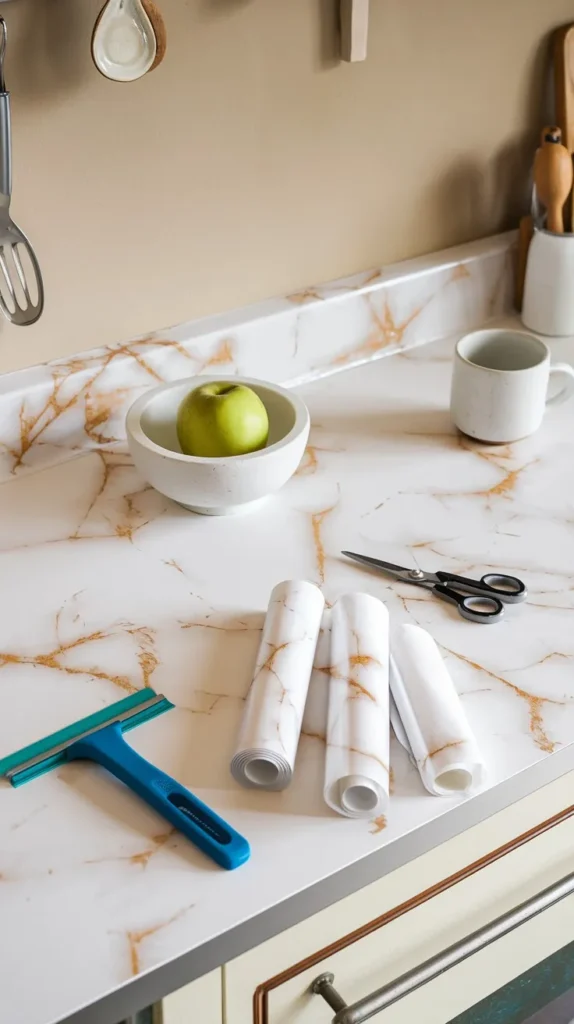
Perfect for: Renters and commitment-phobes.
If you’re renting or just terrified of permanent changes, peel-and-stick contact paper is your new best friend. It’s basically a giant sticker for your counter.
Why I Love It:
- Insane Variety: Marble, wood, concrete—you name it.
- Easy Install: Peel, stick, smooth. Done.
- Zero Risk: Mess it up? Just peel it off and try again.
Pro Tip: Grab a hairdryer! Heating the paper makes it stretchy, so you can wrap it around corners without ugly wrinkles.
Check This Peel-and-Stick Contact Paper
Pro Tip: Use heat (like a hairdryer) to stretch the paper around edges for a seamless look.
3. Faux Concrete Finish with Feather Finish Cement
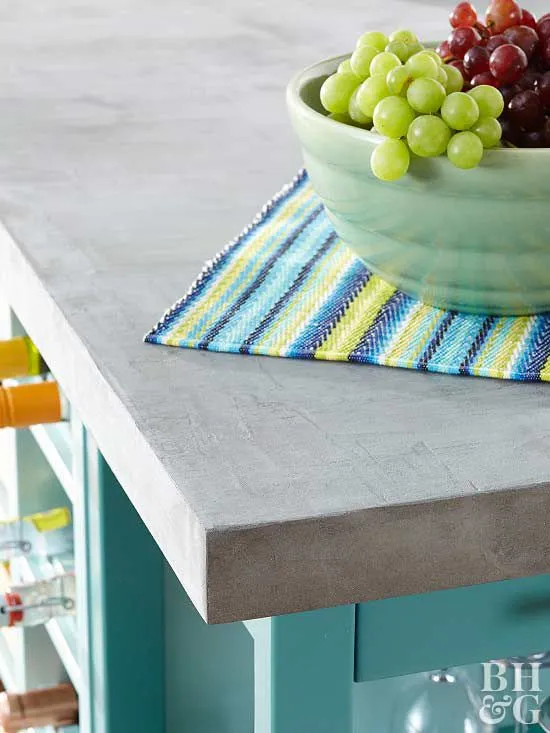
Perfect for: That moody, industrial loft vibe.
Real concrete counters are heavy and expensive. This hack? Not so much. You’re basically frosting your countertop with a thin layer of cement.
How to Do It:
- Mix It Up: Follow the package instructions for the feather finish.
- Spread It: Trowel on thin layers. Don’t stress about perfection—texture looks cool here.
- Sand and Repeat: Sand it smooth between layers until it looks solid.
- Seal It: Crucial Step! Use a food-safe sealer, or your new counter will stain the first time you spill wine.
Pro Tip: Practice your trowel technique on a piece of cardboard first. You’ll thank me later.
4. Tile Over Your Countertops
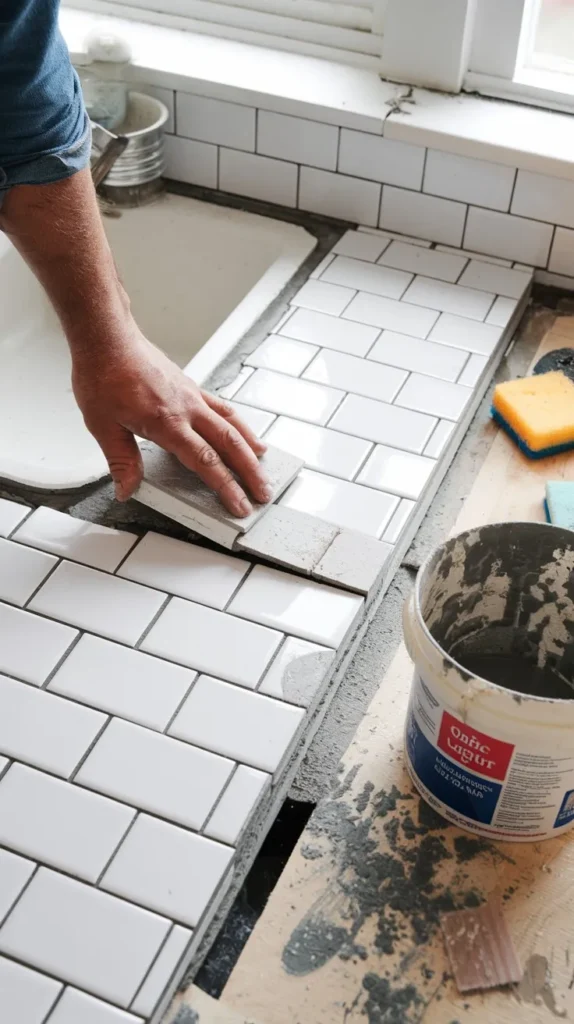
Perfect for: Adding texture and heat resistance.
If you love a retro or Mediterranean look, just tile right over the old stuff. It’s durable and looks intentionally designed.
How to Do It:
- Prep: Use adhesive mats (super easy) or thin-set mortar.
- Stick: Lay down mosaic or subway tiles.
- Grout: Fill the gaps and seal everything.
Pro Tip: Pick heat-resistant tiles if you’re doing this near the stove. You don’t want your hard work cracking under a hot pot.
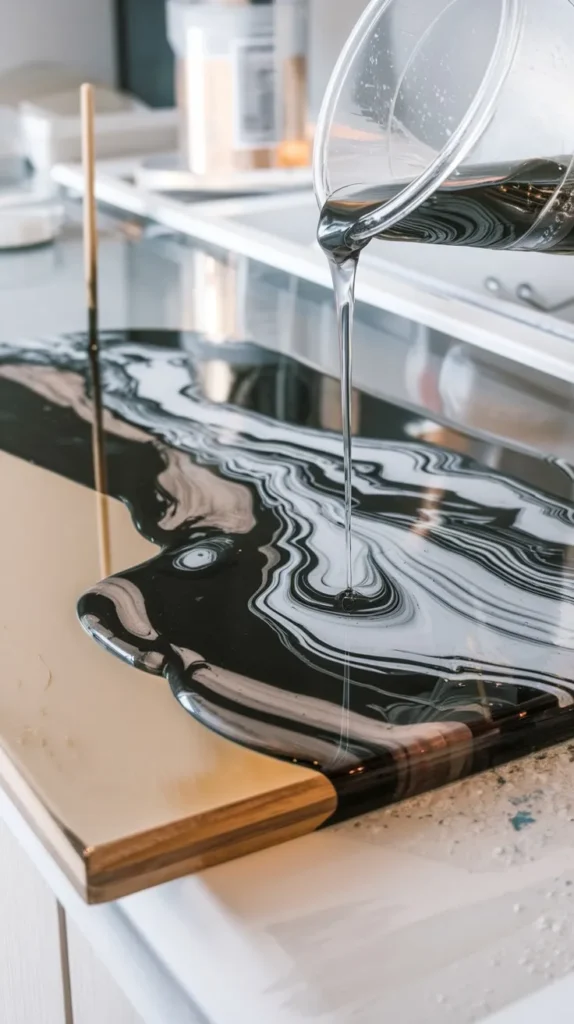
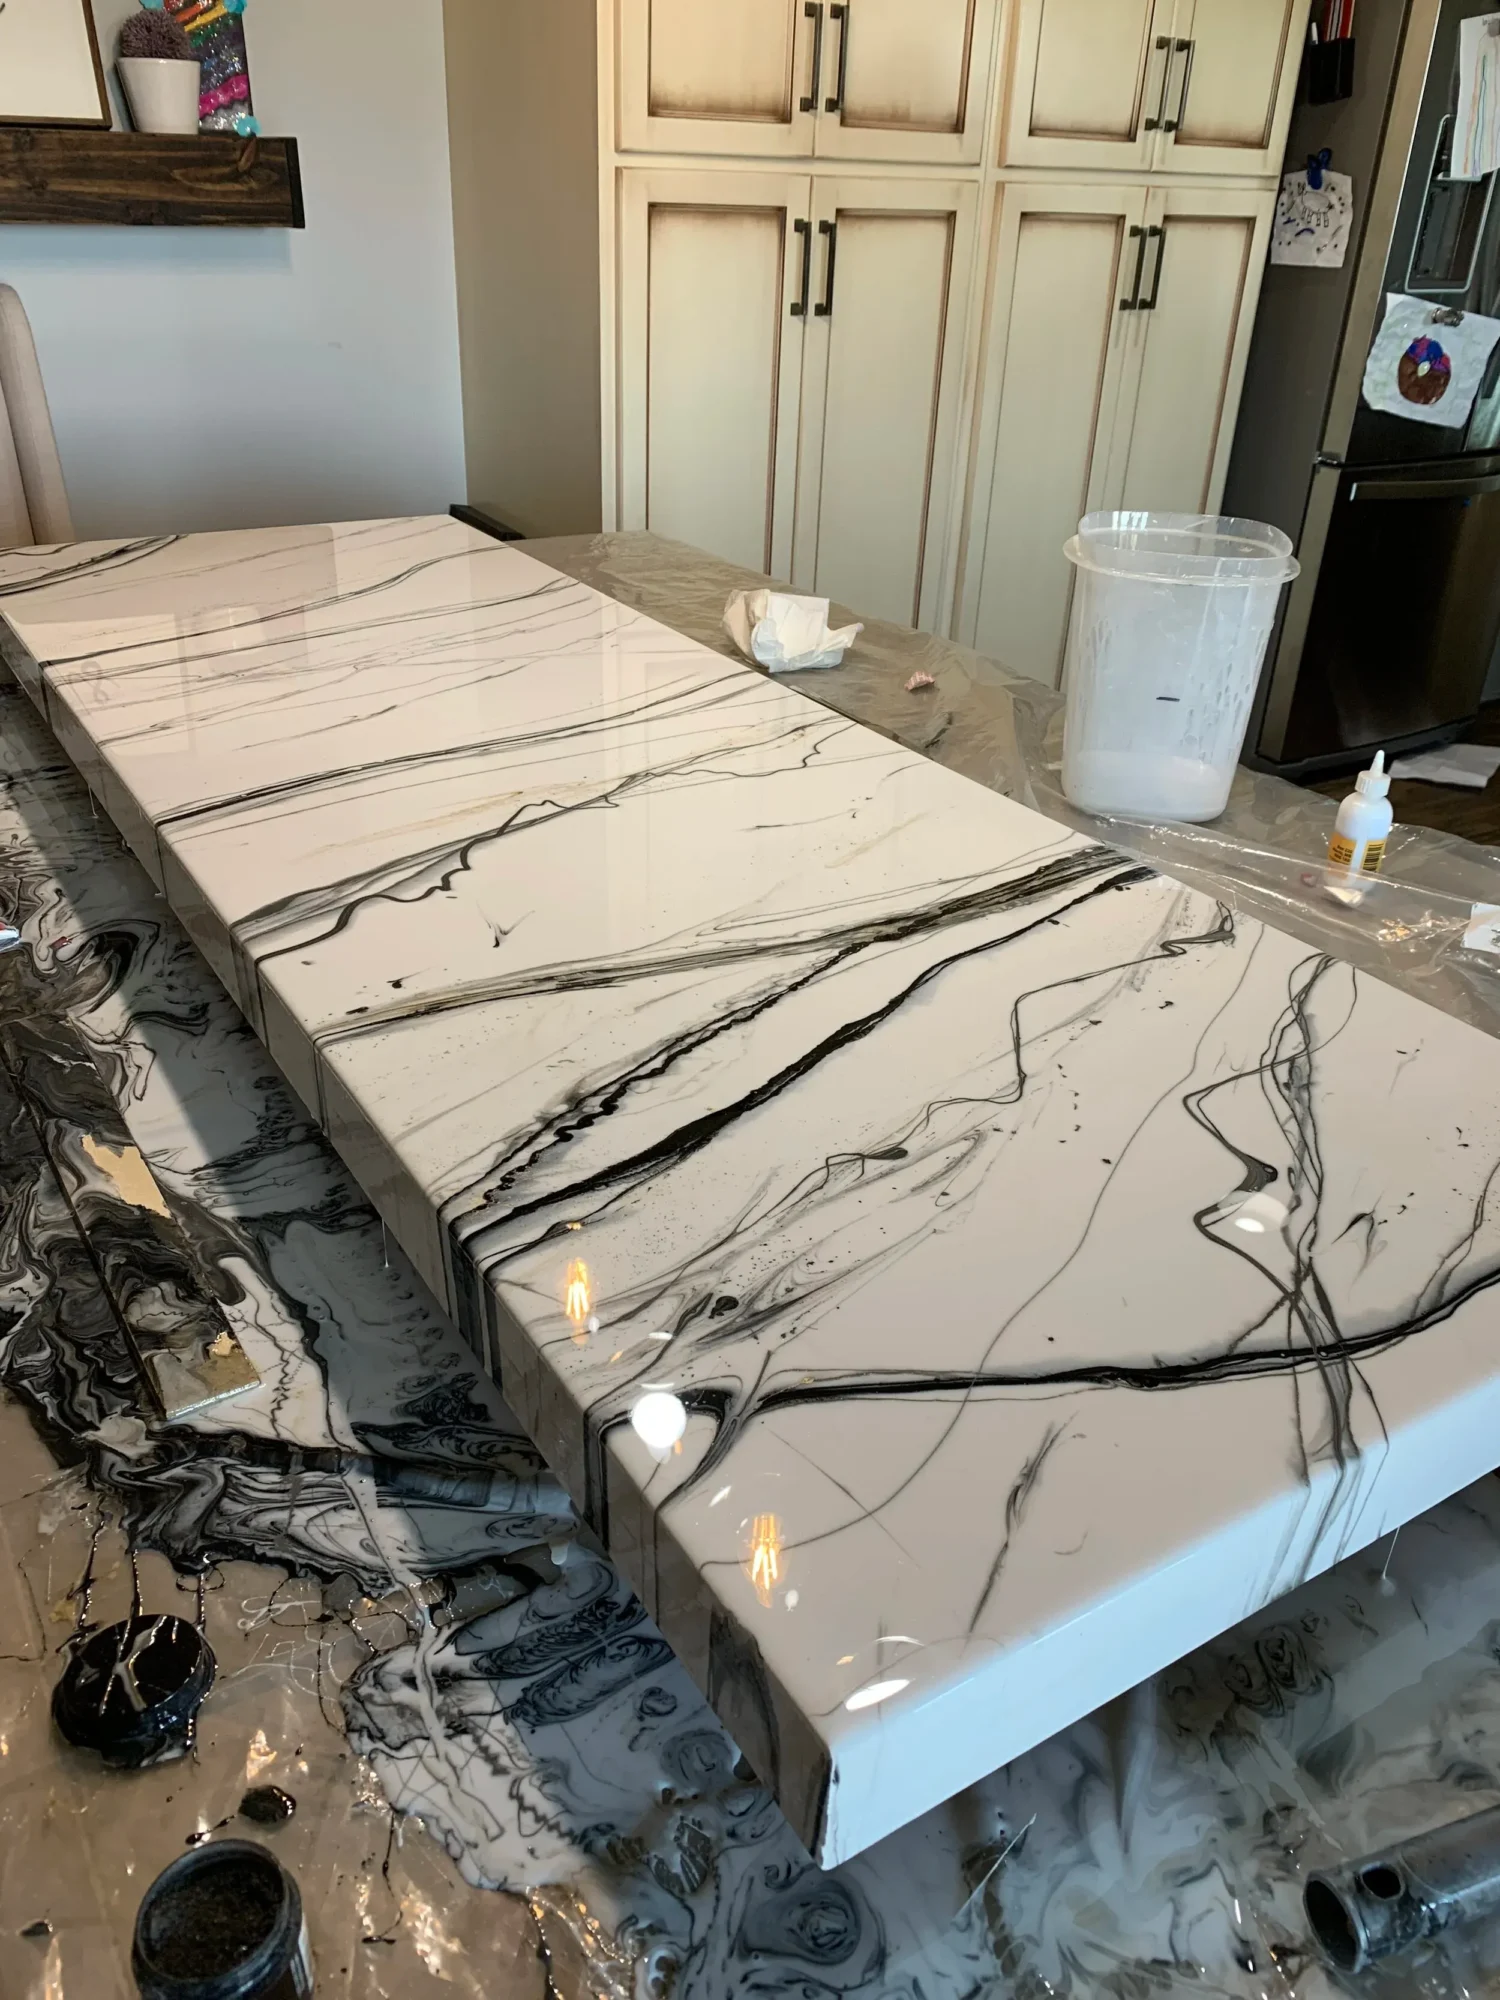
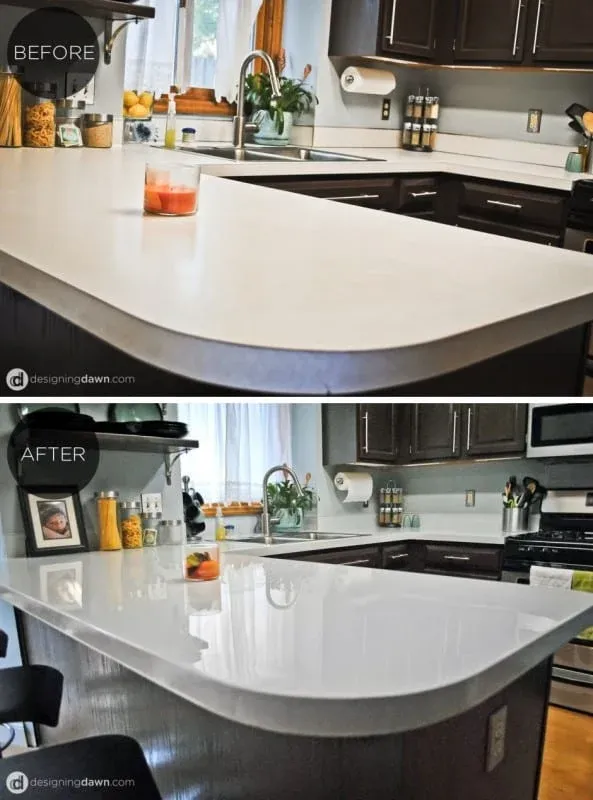
5. Refinish with Epoxy Resin for a High-Gloss Look
Check this paint:

Perfect for: A high-gloss, “glass-like” finish.
Epoxy is messy, but the results are jaw-dropping. It cures into a hard, shiny surface that looks just like expensive quartz or marble.
How to Do It:
- Mix: Combine the resin and hardener (add pigments if you want color).
- Pour: Dump it on the counter and spread it with a trowel.
- Wait: Let it self-level and cure for 24–48 hours.
Pro Tip: Wear a mask and open windows. Epoxy fumes are no joke. Also, keep pets away unless you want permanent paw prints in your kitchen.
Check Next: 10 Easy DIY Kitchen Ideas to Transform Your Space
Pro Tip: Wear gloves and work in a well-ventilated area since epoxy can emit strong fumes during application.
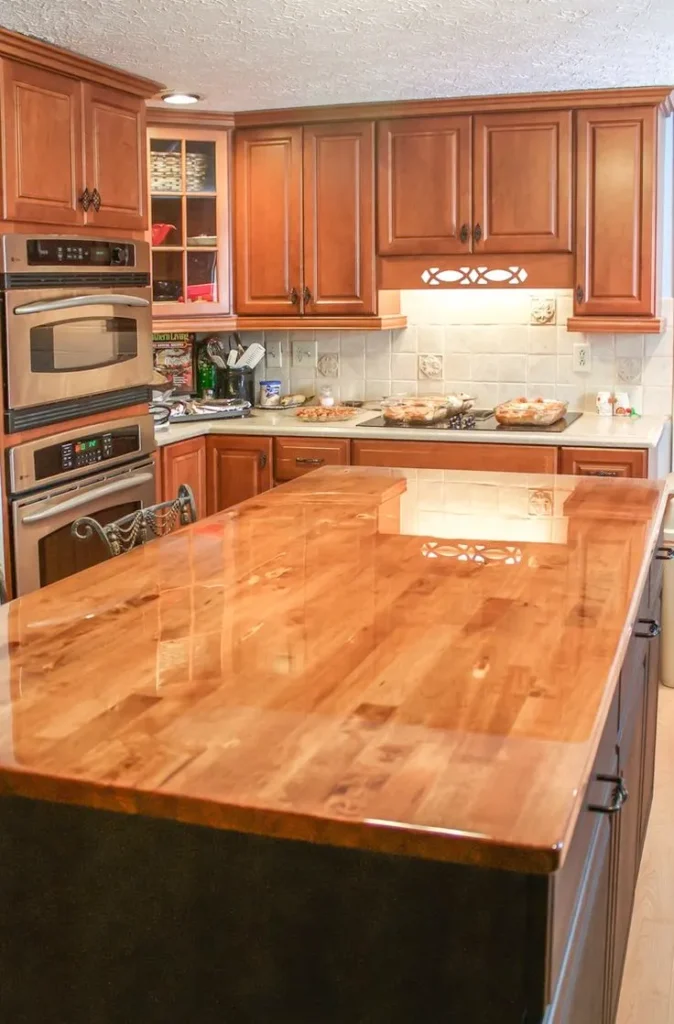
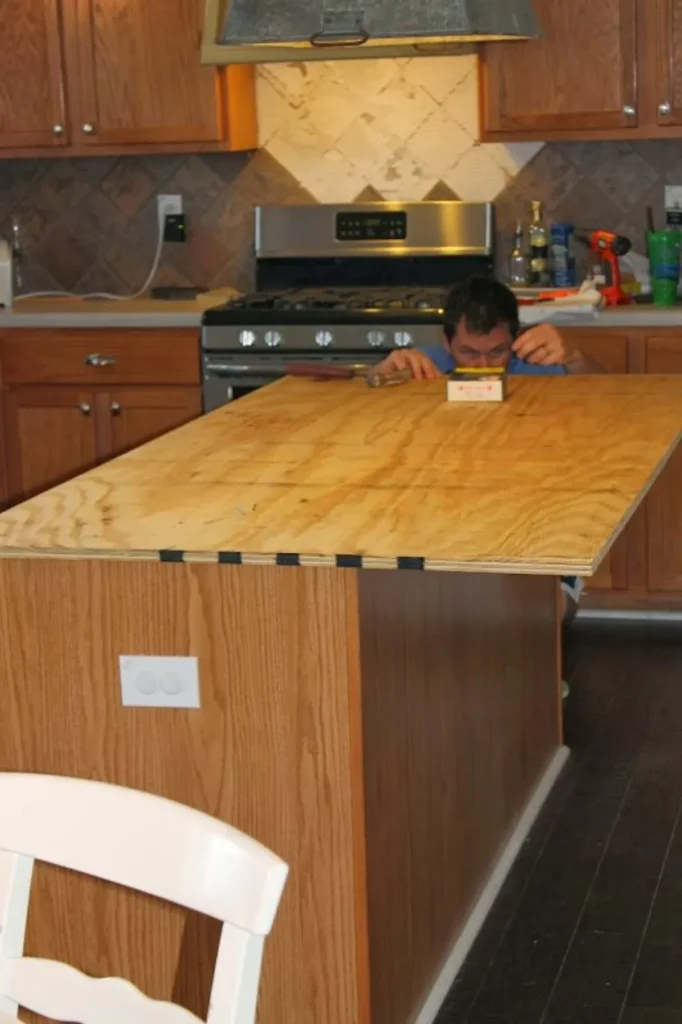
6. Add Wood Veneer or Butcher Block Overlay
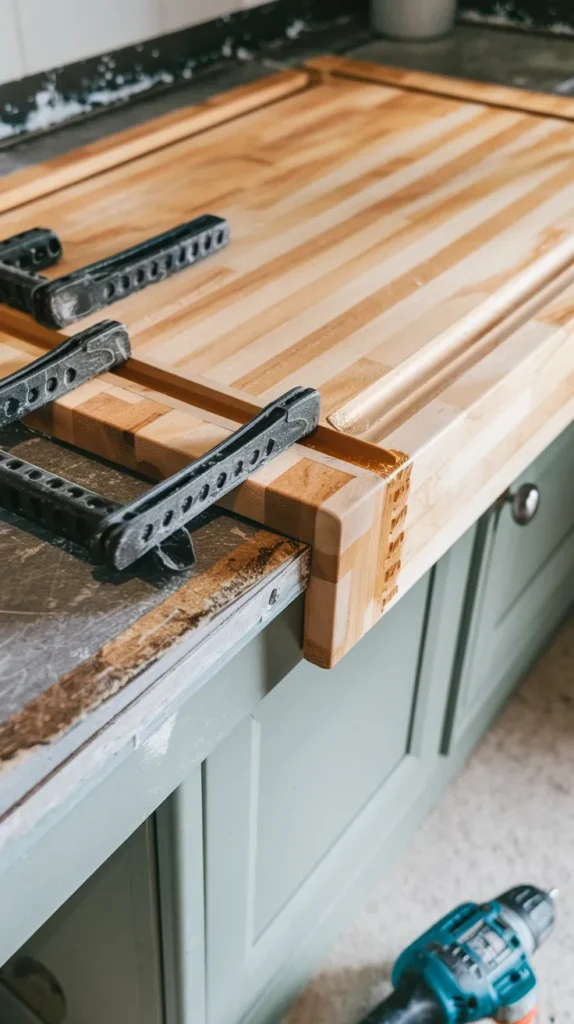
Perfect for: Adding warmth and a farmhouse feel.
You don’t always have to rip out the old counters. Sometimes you can just cover them up with wood for a cozy, rustic look.
How to Do It:
- Measure & Cut: Get your veneer or butcher block to size.
- Glue It Down: Use construction adhesive to stick it right on top of the old counter.
- Treat It: Sand it down and soak it in food-safe oil or polyurethane.
Pro Tip: Buy pre-stained veneer sheets if you want to skip the messy staining step.
Pro Tip: Use pre-stained veneer sheets if you want minimal prep work before installation.
7. The “Brown Paper Bag” Faux Leather Effect

Perfect for: The ultimate budget DIYer with patience.
Okay, hear me out. This sounds weird, but it creates a stunning, textured look that resembles leather or natural stone. It’s practically free if you have paper bags lying around.
How to Do It:
- Tear It Up: Rip brown paper bags into random, jagged shapes. Crumple them up tight, then smooth them back out to get those cool veins.
- Glue It Down: Mix water and glue (usually 50/50), dip the paper, and plaster it onto your counter. Overlap the edges so no original counter shows.
- Seal Like Crazy: Once dry, apply multiple coats of water-based polyurethane (like Minwax Polycrylic). This turns the paper into a hard, durable shell.
Pro Tip: If you mess up a spot later, you can just glue a new piece of paper over it and re-seal. It blends right in.
8. The “Penny” Countertop
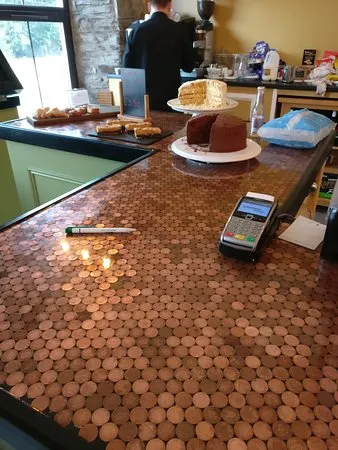
Perfect for: A viral, conversation-starting statement piece.
You’ve probably seen this on social media. It’s tedious, but the copper shine is undeniable. Plus, it literally costs pennies (plus the cost of epoxy).
How to Do It:
- Glue the Cents: Use a strong adhesive to glue thousands of pennies directly to your countertop. You can do rows or a random pattern.
- Seal: Apply a thin seal coat of epoxy first to lock them in place so they don’t float away.
- Flood Coat: Pour a thick “flood coat” of clear epoxy over the top to create a smooth, glass-like surface.
Pro Tip: Make sure your counter is perfectly level before pouring epoxy, or it will all run onto your floor!
9. Re-Laminate (New Sheet Over Old)
Perfect for: A clean, factory-finish look without demolition.
If your underlying counter structure is good but the surface is ugly, just glue a new sheet of laminate right on top. It’s cheaper than buying a whole new countertop.
How to Do It:
- Rough It Up: Sand the old laminate with coarse grit (like 50-grit) to give the glue something to grab.
- Contact Cement: Apply contact cement to both the old counter and the back of the new sheet. Let it dry until tacky.
- The Dowel Trick: Place wooden dowels across the counter. Lay the new sheet on top. The dowels keep the two sticky surfaces apart until you’re ready. Pull dowels out one by one as you press it down.
- Trim: Use a router with a flush-trim bit to cut off the excess edges.
Pro Tip: This bond is instant. Once it touches, it’s stuck. Use the dowels. Trust me.
10. Faux Reclaimed Wood (The “Beat It Up” Method)
Perfect for: Stress relief and anyone on a shoestring budget.
Love the look of #18 but can’t find a 100-year-old barn to raid? No problem. You can take cheap, brand-new lumber from the hardware store and force it to look old. It’s arguably the most fun DIY on this list because you literally get to destroy things.
How to Do It:
- Buy Cheap: Pick up standard construction lumber (like 2×6 or 2×8 pine boards). It’s soft and cheap—perfect for this.
- Get Aggressive: This is the best part. Hit the wood with a hammer, drag a heavy chain across it, or punch holes with a nail set to mimic “wormholes.” The more beat-up, the better.
- The “Magic” Stain: Don’t just use brown stain. Layer a gray stain first (for that weathered look) and then a warm oak or walnut stain on top. Or, use the classic “steel wool dissolved in vinegar” hack to chemically age the wood instantly.
- Seal: Apply a matte polyurethane to lock in the look without making it look like shiny plastic.
Pro Tip: If you use the vinegar/steel wool method, brush the wood with strong black tea first! The tannins in the tea react with the vinegar to turn cheap yellow pine into a gorgeous, deep gray-brown.
11. Hand-Painted Faux Marble (The Artist Route)
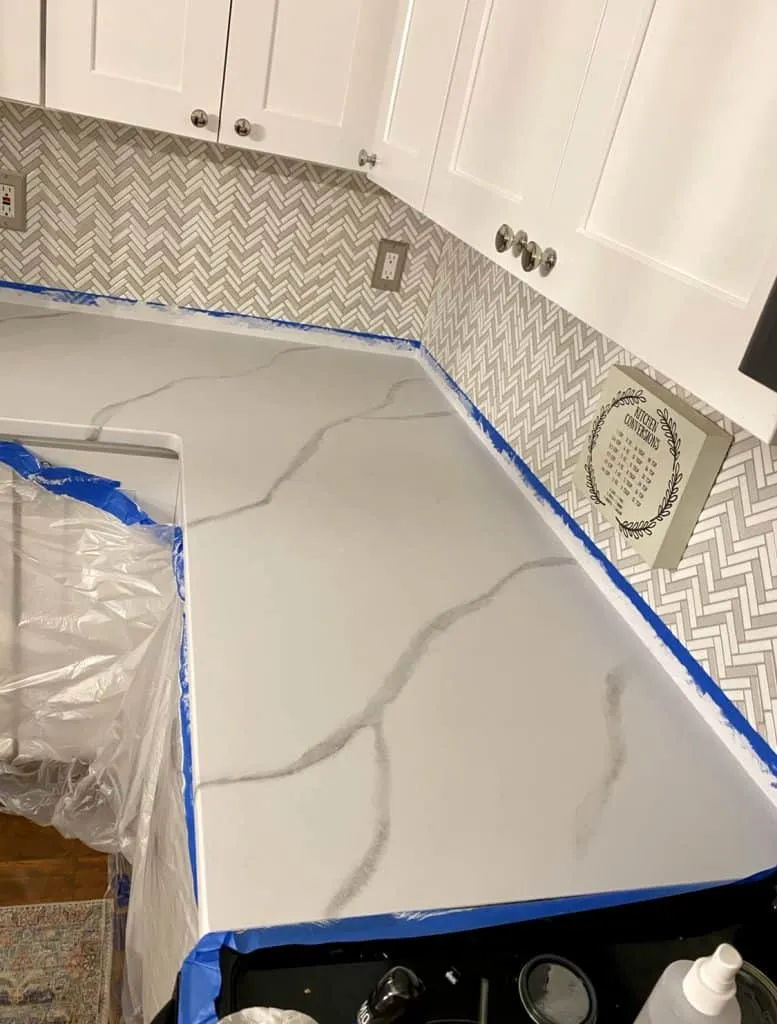
Perfect for: Creative types who want total control.
Kits are great, but if you want specific veining, grab a feather. Yes, a feather. This technique gives you delicate, natural-looking veins that brushes sometimes can’t match.
How to Do It:
- Base Coat: Paint your counter solid white.
- Veining: Dip a feather (or a tiny art brush) into gray paint diluted with water. Drag it across the surface, twisting slightly to create organic veins.
- Soften: Use a damp sponge or dry brush to “blur” the lines so they don’t look like marker drawings.
- Top Coat: Finish with a high-gloss epoxy or polyurethane to make it pop.
Pro Tip: Look at a picture of real marble while you paint. Natural stone is random—don’t make your pattern too perfect!
12. Chalkboard Paint Countertops
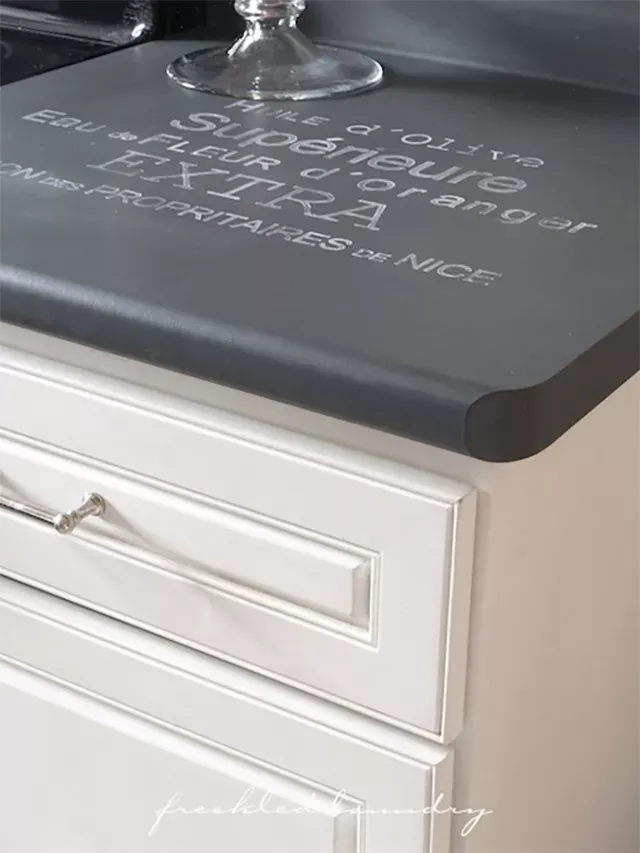
Perfect for: Matte black lovers and list-makers.
Want that soapstone look for $20? Chalkboard paint is surprisingly durable and gives you a trendy matte black finish. Plus, you can write your grocery list right on the counter.
How to Do It:
- Sand & Clean: As always, prep is key.
- Roll It On: Use a foam roller for a smooth finish. Apply 3 coats for durability.
- Season It: Once dry, rub chalk over the whole thing and wipe it off.
Pro Tip: Black counters show crumbs like crazy, so be prepared to wipe them down often. But for the price? It’s unbeatable.
13. Stenciled Ceramic Tile Effect
Perfect for: Adding a vibrant, patterned backsplash-to-counter cohesive look. If plain white or solid colors feel too boring, you can use specialized stencils to mimic expensive hand-painted Moroccan or Spanish tiles right on top of your existing laminate or wood counters.
- How to Do It: Apply a solid base coat of durable porch and floor paint. Once dry, secure your tile stencil with painter’s tape and use a dense foam roller to apply a contrasting color.
- Pro Tip: Use a very dry roller when stenciling. Too much paint on the roller will bleed under the stencil edges and ruin the crisp tile illusion.
14. Zinc Sheet Overlay

Perfect for: Home cooks wanting an antique, European bistro vibe. Zinc is a gorgeous, living metal that develops a unique patina over time. Buying a custom zinc countertop is incredibly pricey, but wrapping your existing countertops with thin zinc flashing sheets is surprisingly affordable.
- How to Do It: Cut the zinc sheet to size using tin snips, wrap it tightly around your existing wood or laminate counter edges, and secure it underneath with construction adhesive and heavy-duty staples.
- Pro Tip: Don’t panic when it scratches or darkens from spills. That natural oxidation is exactly what gives zinc its high-end, historic charm.
15. The Groutless “Penny Tile” Backsplash Extend
Perfect for: Creating a seamless transition from your wall to your counter. Instead of stopping your makeover at the flat surface, you can use flexible, self-adhesive mosaic tiles (like hexagon or penny shapes) to roll down from the wall and curve right over the countertop seam.
- How to Do It: Prep the surface to ensure it is perfectly flat. Stick the mosaic sheets continuously down the wall and onto the counter, then fill with high-durability pre-mixed urethane grout.
- Pro Tip: Use a flexible silicone caulk in the exact color of your grout at the absolute joint where the counter meets the wall to prevent cracking from natural house shifting.
16. Granite Dust “Stone” Spray Paint
Perfect for: The ultimate lazy DIYer who hates using paintbrushes. Faux-stone textured spray paints actually contain tiny flecks of multi-colored material that dry to create the bumpy, organic texture of real granite or composite stone.
- How to Do It: Mask off your entire kitchen with plastic sheeting (overspray gets everywhere!). Spray multiple light coats of the textured paint, let it dry, and then seal it with a thick, glossy clear topcoat to smooth out the texture for food prep.
- Pro Tip: Sand the textured spray paint lightly with fine-grit sandpaper right before applying your topcoat to knock down any sharp peaks.
17. Reclaimed Pallet Wood Herringbone
Check the how to here:
Perfect for: Advanced woodworkers looking for a zero-dollar material cost. If you have access to free shipping pallets, you can break them down, plane them flat, and arrange them in a gorgeous herringbone or chevron pattern over your old counters.
- How to Do It: Deconstruct the pallets, sand the boards smooth, cut them into equal lengths at a 45-degree angle, and glue/nail them down to a plywood sub-countertop. Finish with a heavy pour of clear epoxy to fill all the rustic knots and gaps.
- Pro Tip: Only use pallets stamped with “HT” (Heat Treated). Avoid pallets stamped with “MB” (Methyl Bromide), as they contain harmful chemicals you don’t want near food.
18. Faux Terrazzo Using Paint Flakes

Check this paint kit Epoxy Paint
Perfect for: Retro lovers who want a trendy, mid-century modern speckled look. Terrazzo is making a massive comeback, but real terrazzo involves pouring concrete mixed with marble or glass chips and grinding it down. You can fake this expensive process using decorative color chips meant for garage floors.
- How to Do It: Paint your countertop a solid base color. While the paint is still completely wet, toss handfuls of multi-colored vinyl paint flakes into the air, letting them rain down randomly onto the surface. Once dry, seal under a thick flood coat of epoxy.
- Pro Tip: Vacuum up any loose, unadhered flakes thoroughly before pouring your epoxy, otherwise they will float to the top and create a bumpy surface.
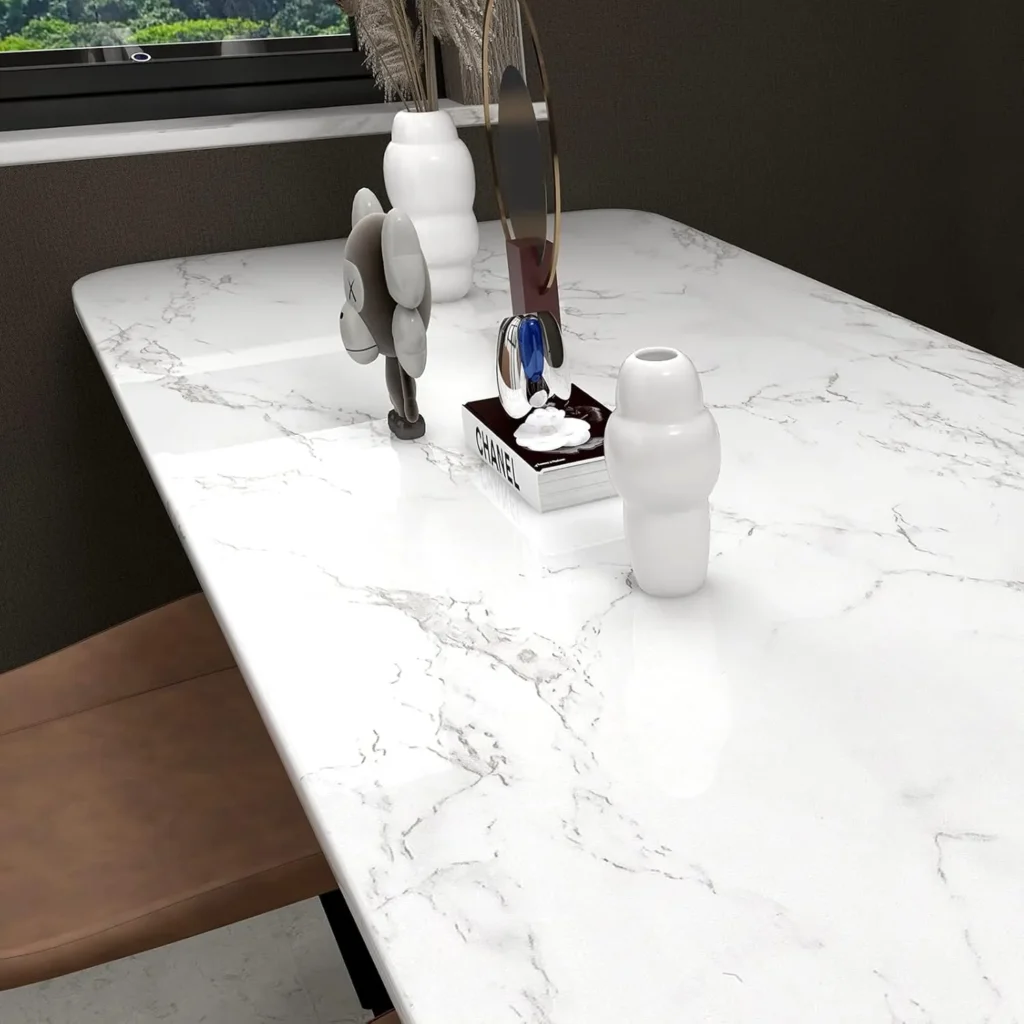
19. Architectural Vinyl Wrap (Automotive Grade)

Check these: Architectural Vinyl Wrap Heat gun
Perfect for: Seamless modern finishes and sleek waterfall edges. While standard contact paper is great, automotive-grade or architectural vinyl wrap (like the kind used to change the color of cars) is thicker, highly scratch-resistant, and can handle much higher temperatures.
- How to Do It: Clean the surface perfectly—every speck of dust will show. Lay the vinyl down and use a felt-edged squeegee to push out air bubbles while working from the center outward.
- Pro Tip: Automotive vinyl is highly heat-activated. Use a heat gun to stretch it seamlessly around difficult molded sinks or curved bullnose counter edges.
20. Skim-Coat Microcement
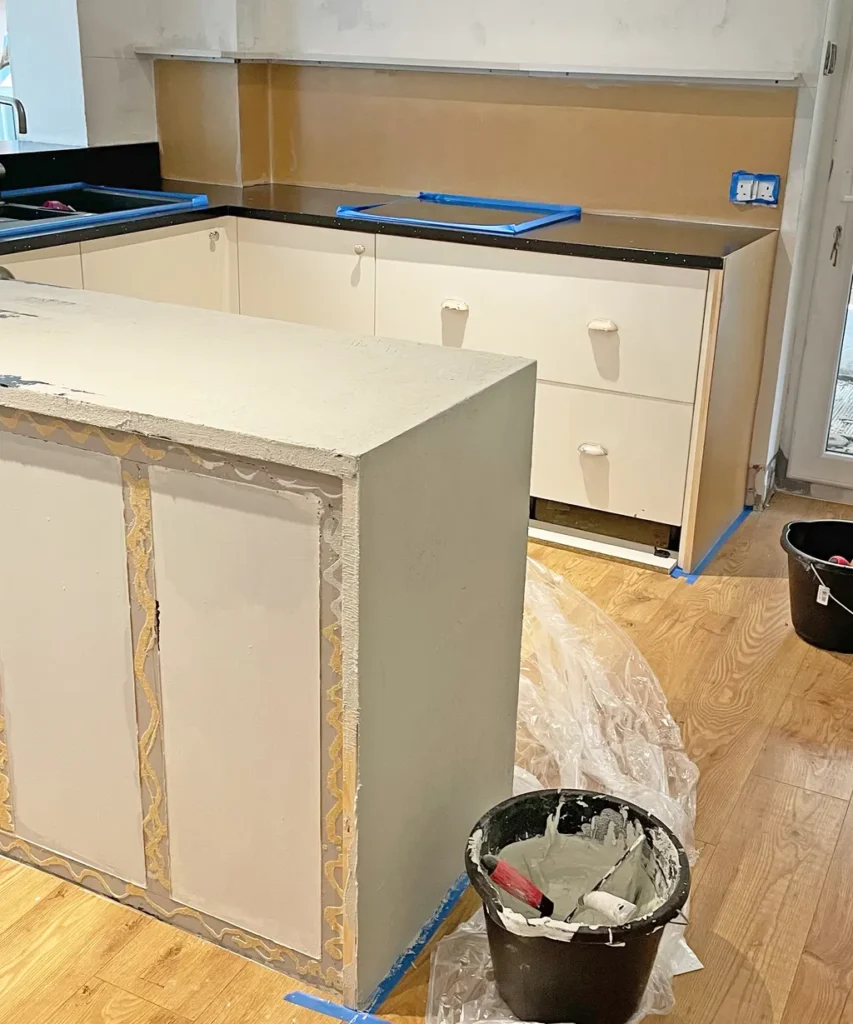
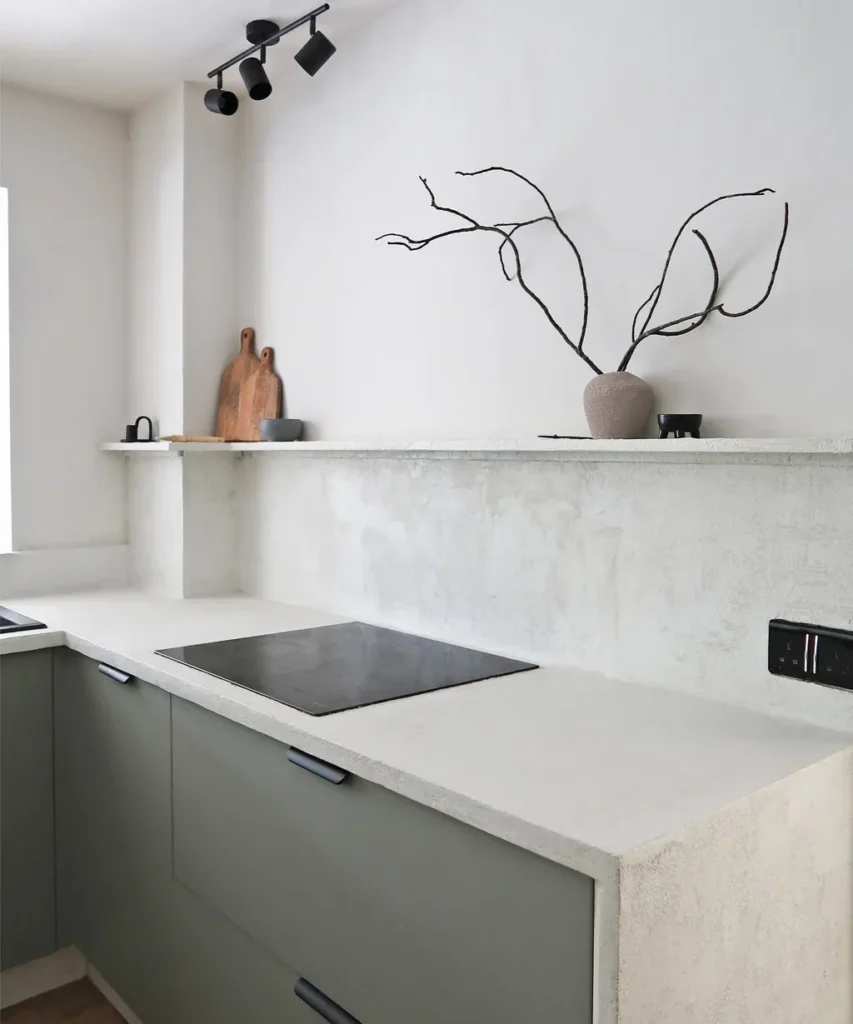
Perfect for: A ultra-smooth, minimalist minimalist aesthetic. Unlike regular concrete or feather finish which can look a bit rustic, microcement is a specialized polymer-modified cement blend that goes on paper-thin but cures to an incredibly strong, smooth, and flexible finish.
- How to Do It: Apply a fiberglass mesh over your old laminate counter to prevent cracking. Trowel on two coats of microcement, sand it down to a buttery-smooth texture, and apply a specialized polyurethane matte sealer.
- Pro Tip: Microcement dries incredibly fast. Work in small 2-foot sections at a time so you can smooth it out before it sets.
21. Stainless Steel Contact Foil
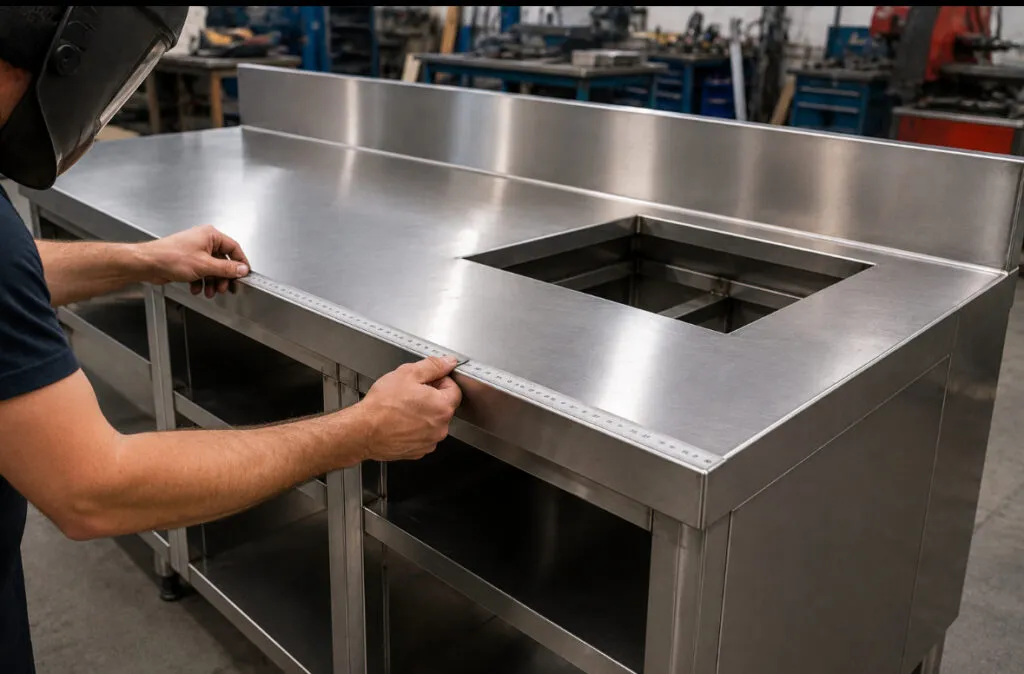

Perfect for: Achieving an industrial, commercial-chef look on a absolute shoestring. If you love the sterile, modern look of industrial stainless steel but don’t want to pay a metal fabricator, heavy-duty stainless steel metallic foil film is an incredible alternative.
- How to Do It: Roll the metallic film across the counter, using a hard plastic card to smooth it out. It features a brushed metallic texture that looks incredibly authentic to real steel sheets.
- Pro Tip: Run a bead of clear silicone caulk around your sink rim after installing the foil to completely prevent water from getting underneath and lifting the edges.
22. Troweled Acrylic Overlay (Faux Granite)

Check This: Acrylic stone paint
Perfect for: Creating a rock-hard stone texture without pouring thick concrete. Acrylic stone overlays are paste-like mixtures made from acrylic resins and real crushed stone particles. You trowel it on like icing, but it cures into a surface that feels identical to real solid-surface counters like Corian.
- How to Do It: Tape off your edges, prime the surface, and use a flat putty knife or trowel to spread the thick acrylic paste evenly over the surface. Once cured, sand it with progressively higher grits of sandpaper until it shines.
- Pro Tip: Wet-sanding (spraying a little water while you sand) prevents the acrylic dust from clouding up your kitchen and creates a much shinier, professional finish.
Countertop Makeover Comparison Table
| Method | Cost Range | Durability | Skill Level | Key Tools Needed |
|---|---|---|---|---|
| Paint Kits | $50–$100 | Moderate | Beginner | Paintbrushes, sponge |
| Contact Paper | $20–$50 | Low (temporary) | Beginner | Scissors, squeegee |
| Faux Concrete Finish | $30–$70 | High | Intermediate | Trowel, sander |
| Tiling | $50–$150 | High | Intermediate | Adhesive mat, grout tools |
| Epoxy Resin | $100–$200 | Very High | Advanced | Resin kit, gloves |
| Wood Veneer/Butcher Block | $100–$300 | High | Intermediate | Saw, clamps |
FAQ Section
1. Can I use these methods on any type of countertop?
Yes, you can.
2. Are these DIY makeovers durable?
Durability depends on the method you choose—epoxy resin and faux concrete finishes are highly durable, while contact paper is better suited for temporary updates.
3. How do I maintain my newly updated countertops?
Clean with mild soap and water; avoid abrasive cleaners that could damage finishes like paint or epoxy resin.
4. Can I remove these makeovers later?
Yes! Peel-and-stick contact paper is easy to remove without damage, while other methods like paint kits may require sanding if you want to revert back.
5. Do I need special tools for these projects?
Most projects require basic tools like sandpaper, brushes, or trowels that are easily available at hardware stores—and many kits include everything you need!
Conclusion
Updating your countertops doesn’t have to cost thousands of dollars! With these budget-friendly DIY ideas—like painting kits, peel-and-stick contact paper, faux concrete finishes, tiling, epoxy resin coatings, or wood overlays—you can achieve stunning results that look professional without breaking the bank.
So roll up your sleeves and get creative! Whether you’re aiming for sleek modern vibes or rustic charm, there’s an option here that will fit your style and budget perfectly. Your dream countertops are just one weekend project away!