My kitchen floor takes a beating every single day. Crumbs, coffee drips, muddy paw prints, you name it. So I stopped guessing and built a routine that works.
Here’s the thing: clean floors don’t come from scrubbing harder. They come from cleaning smarter, on a schedule, with the right tools. Let me walk you through exactly how I do it.
1. Figure Out How Often Your Floor Actually Needs Cleaning

There’s no magic number for how often to mop. A busy family kitchen gets dirty way faster than a one-person place where nobody really cooks.
Four things decide your schedule: household size, how much you cook, foot traffic, and your floor type. Dark tile and glossy finishes show every crumb, so they need attention more often.
If you cook most days and have a small family, this rhythm works well for most kitchens:
- Daily: wipe spills fast, give a quick sweep, hit the high-traffic path by the sink and stove.
- 2-3 times a week: a light mop or wet wipe to catch everyday grime before it builds up.
- Weekly: full sweep, vacuum, and a proper mop and deep clean.
- Monthly or quarterly: scrub the grout, wax if your floor needs it, and get into corners.
Not sure if it’s time? Walk across barefoot. If the floor feels gritty or tacky underfoot, it’s asking for a clean, no matter what day it is.
My honest take? Spills matter more than the calendar. Wipe a sauce splatter the second it lands and you’ll mop a whole lot less.
2. The Floor-Cleaning Tools Worth Keeping On Hand

You don’t need a closet full of gadgets. Whether you have tile, linoleum, hardwood, or laminate, a few solid basics cover almost everything.
Start with a soft-bristle broom and dustpan, plus a vacuum with a hard-floor attachment. Grab a light one that tucks into a closet without a fight.
A microfiber mop is the real workhorse for high-traffic kitchens. It grabs fine dust that a string mop just pushes around. Browse microfiber flat mops here.
Hate hauling buckets? A steam mop cleans and sanitizes with just water, no chemicals. See steam mop options here.
One trick that changed everything for me: the two-bucket system. One bucket holds clean solution, the other holds rinse water, so you never smear dirt back down. Grab a two-bucket set here.
Last, keep a stack of soft microfiber cloths nearby for spot cleaning. They’re perfect for quick wipe-ups between full mops and barely cost a thing.
3. Store-Bought or Homemade: Picking Your Floor Cleaner

Store-bought cleaners are totally fine. But some are so heavily perfumed they can overwhelm a small kitchen, and they add up in cost over time.
Making your own is cheap and low-odor. My go-to is a diluted white vinegar solution, which cuts through stuck-on grime and has natural antimicrobial properties. Stock up on cleaning vinegar here.
One warning: the right vinegar-to-water ratio depends on your floor. Hardwood needs a gentler mix than porcelain or linoleum, so dial it down on wood.
Not a vinegar fan? Dish soap, baking soda, or a different vinegar all work as swaps depending on the mess you’re tackling.
Add a few drops of essential oil to any homemade batch. It’s naturally antibacterial and leaves the whole kitchen smelling fresh. Find cleaning-friendly essential oils here.
4. The Floor-Cleaning Mistakes That Quietly Wreck Your Floors

A few common habits do more harm than good. The biggest one? Reaching for harsh chemicals, especially if kids or pets share your space.
Those fumes are rough to breathe and can actually shorten your floor’s life. Skip abrasive scrubbers too, since they leave fine scratches that trap even more dirt.
Go easy on water. Flood a wood or laminate floor and the moisture seeps into seams, warping boards and lifting edges over time.
Steam mops aren’t for every floor. Keep them off unsealed hardwood, laminate, and vinyl plank. The hot steam can warp the material or loosen the adhesive underneath.
Basically, gentler usually wins. When in doubt, less water and milder cleaner will protect your floor far longer than brute force. 🙂
5. My Step-by-Step Deep Clean, Start to Finish
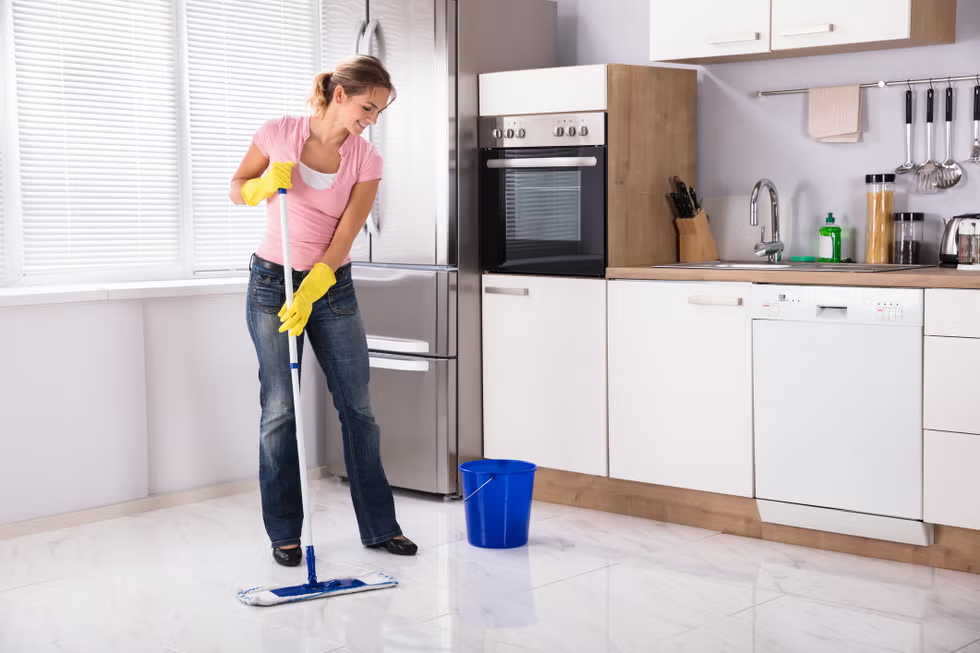
When it’s time for a real deep clean, order matters. Follow these steps and you’ll never mop dirt back into a corner you already did.
Step one: clear the floor. Pick up trash, pet toys, stray utensils, and rugs. Move chairs and anything covering the floor. This takes just a few minutes.
Step two: sweep or vacuum. Pull up all the loose crumbs and dirt. Get along the edges, under cabinets, and the spots you usually forget.
Step three: hit the stubborn spots. Now go after dried spills and old pet prints while the floor is dry. They lift easier before water spreads them.
Step four: mop with hot water and two buckets. Start in the back corner and mop backward toward the door, so you walk out on a clean, finished floor.
One in-progress tip: dump and refill your mop water the moment it turns grey. Mopping with dirty water just spreads a thin film of grime around.
That’s it. Step back and admire your handiwork, because a freshly mopped kitchen is a genuinely satisfying sight. 😉
6. How to Beat Grease, Gum, and Scuff Marks

Every kitchen throws a few weird messes at you. Here are the fixes I reach for most, matched to the exact problem.
Grease: warm water, a squirt of dish soap, and a clean cloth cut right through it. Dish soap is built to break down fat, so let it do the work.
Sticky gum or residue: set an ice cube on top until it hardens, then gently scrape it off with an old credit card or a plastic ice scraper.
Scuff marks: mix a little baking soda and water into a paste, let it sit a few minutes, then buff it away with a soft cloth. Grab a big bag of baking soda here.
Speed helps most with grease. Blot a fresh splatter with a paper towel right away, before it cools and bonds to the floor, and the cleanup gets far easier.
The common thread? Match the method to the mess. Heat softens gum, soap dissolves grease, and a mild abrasive lifts scuffs without scratching.
7. How to Keep Your Kitchen Floor Clean for Longer

You just put in the work, so let’s make it last. A little prevention means way less scrubbing down the road.
Start at the door. Place doormats at every entryway to catch dirt before it ever reaches the kitchen, and keep those mats clean too.
Drop washable rugs in the splash zones by the sink and stove. When a spill hits, blot it and toss the rug in the wash. Check out washable kitchen rugs here.
Stick felt furniture pads under chairs, stools, and anything you slide around. They stop scuffs and scratches before they start. Grab furniture pads here.
These three habits take minutes to set up and save you hours. Honestly, they’re the closest thing to a cheat code for clean floors.
Wrapping It Up
So that’s my whole kitchen floor cleaning playbook: know your schedule, grab a few good tools, clean gentle, tackle stains the smart way, and protect your work.
It really doesn’t have to feel like a chore. Break it into small steps and you’ll have floors you’re actually proud to show off.
Which tip are you trying first? Pick one, give it a shot this week, and your future self will thank you. 🙂
